Installing Linux GPIB Drivers for the Agilent 82357B
- Introduction
- Other Installation Instructions
- Agilent 82357B Initialization Process
- Installing the Agilent 82357B GPIB Driver on an Ubuntu Linux Distribution
- References
Introduction
I’ve started to grow a collection of older test equipment from the eighties, the nineties, and the early 2000s: TDS 420A oscilloscope, HP 3478A multimeter, Racal-Dana 1992 universal counter, Agilent E3631A power supply…
The one common feature is that they all have a GPIB interface for remote control. Multiple instruments can be wired together with impossibly clunky GPIB cables, with one shared USB to GPIB dongle responsible for the link to the PC.
Here’s what’s currently on my desk: a setup with power supply, DAC, frequency counter, and multimeter to control and measure the characteristcs of a oven controlled crystal oscillator:
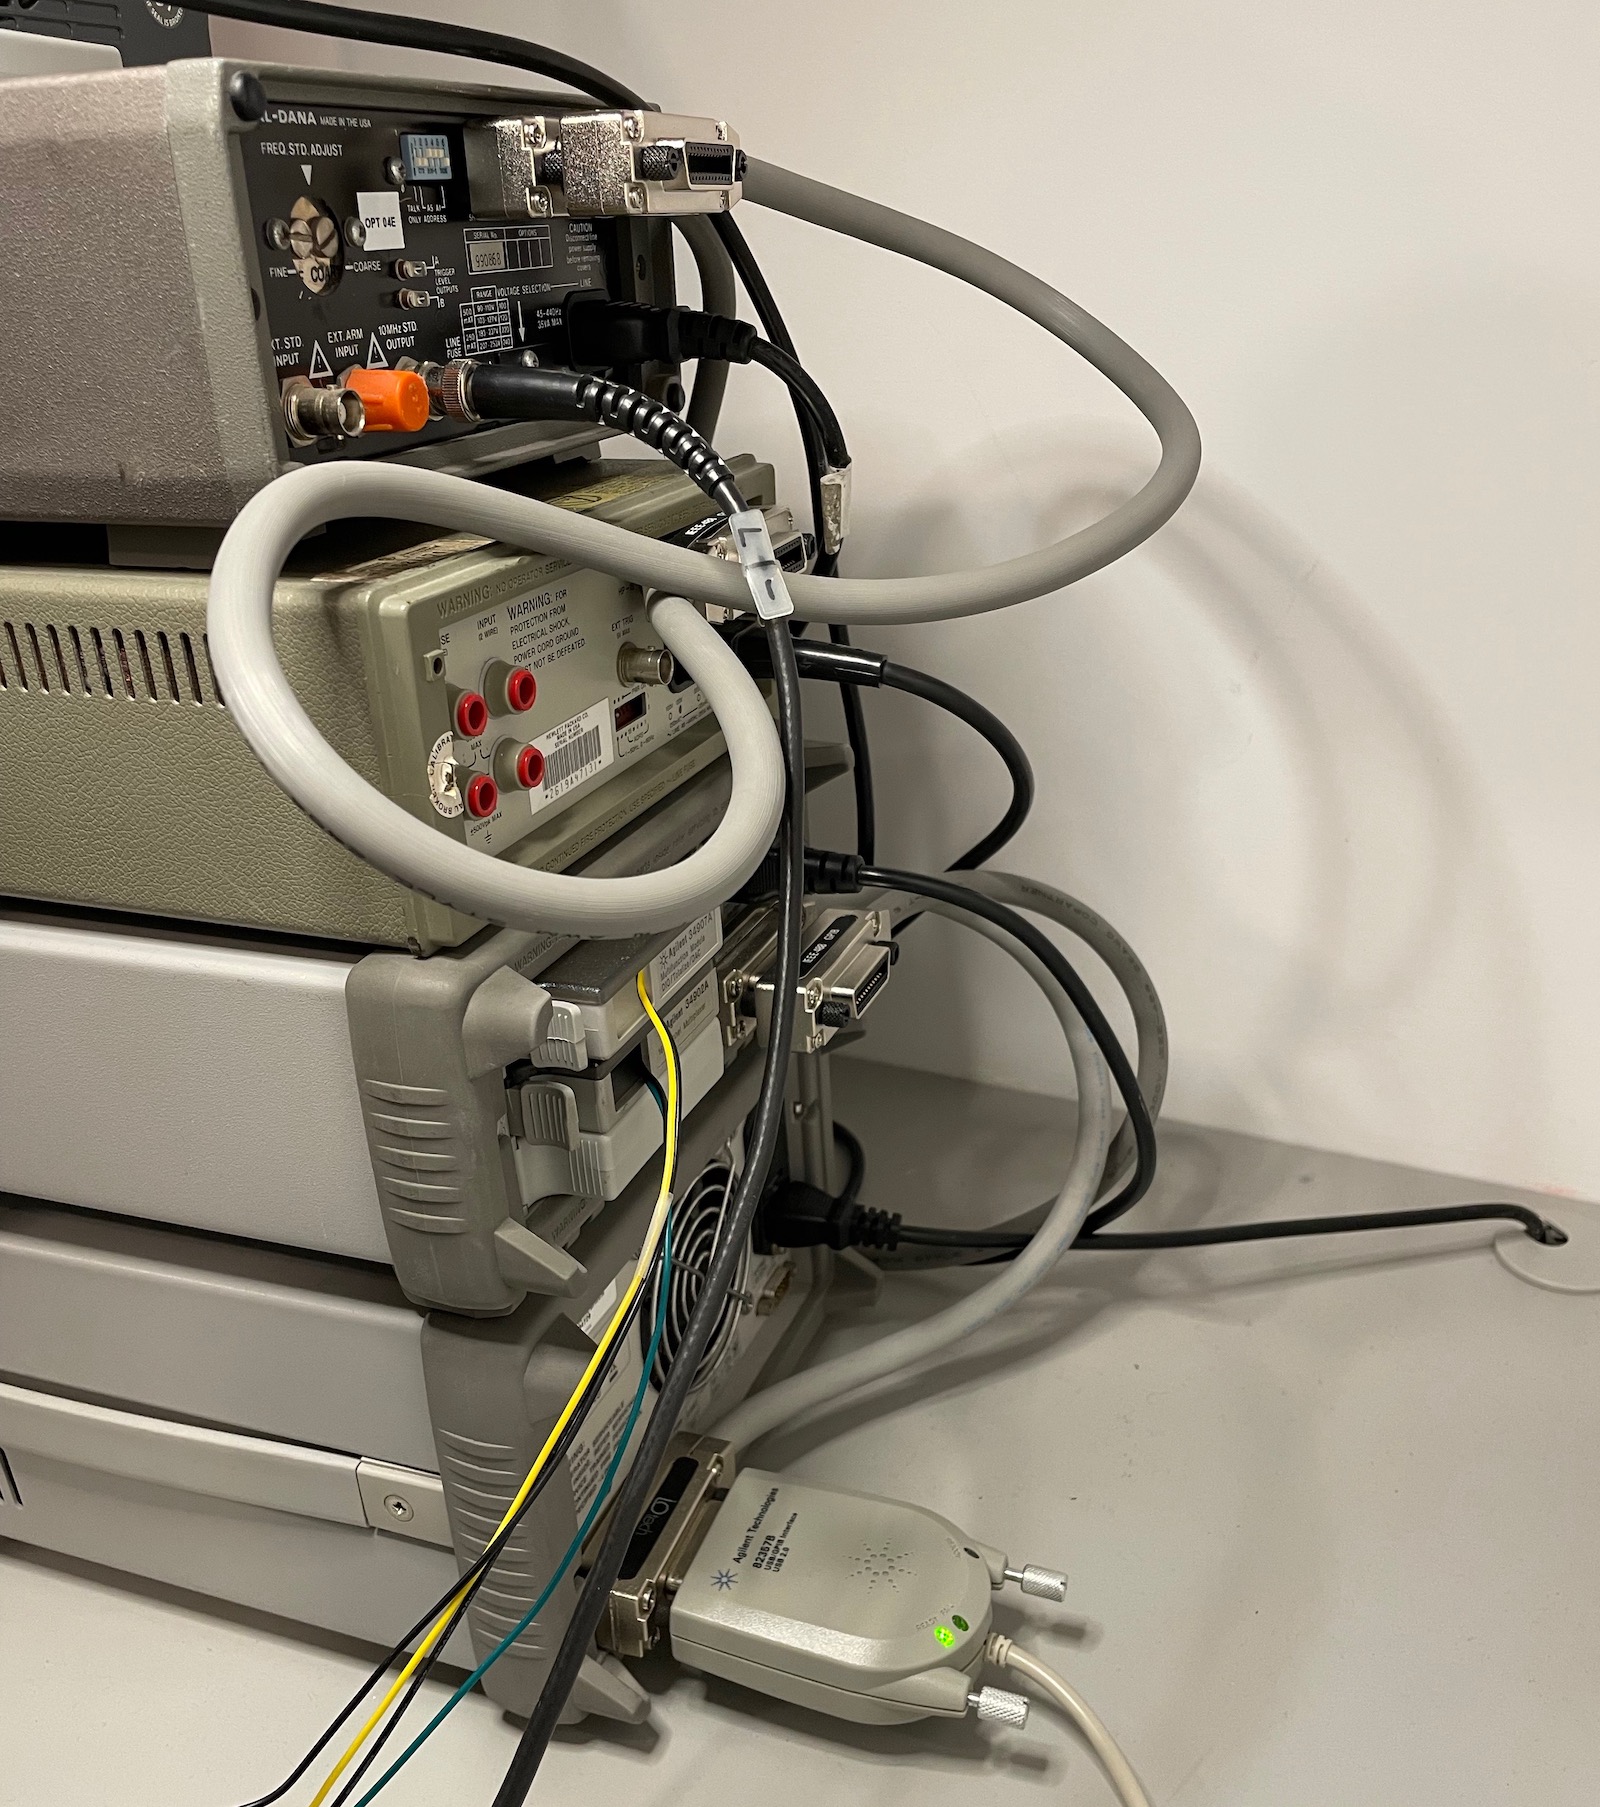
You can see the 4 instruments, the GPIB cables, and at the bottom the USB dongle. A Python script uses the PyVISA library to send commands to the individual instruments.
Let’s talk about these dongles. Due to circumstances, I have two of them: a National Instruments GPIB-USB-HS and an Agilent 82357B. Both are ridiculously expensive when you buy them from National Instruments or Keysight, but I paid less than $100 for each of them. Both are almost certainly clones, but who cares, they work.

I use Linux almost exclusively for all my hobby electronics projects but GPIB drivers
can’t be part of the standard Linux kernel because the
linux-gpib project is GPL3 licensed. Making the Linux GPIB
drivers work is a pain in the neck. A major part of my earlier blog post
‘controlling a TDS 420A oscilloscope over GPIB’
is devoted to making the GPIB-USB-HS work.
The Agilent 82357B makes it just a little bit harder. Instead of keeping my installation notes stashed away somewhere on my PC (with a high chance on not being able to find it back), I figured I’d just dump it in another blog post…
Other Installation Instructions
You can find other installation instructions all over the web. Like these:
- Agilent 82357B GPIB interface programming on Ubuntu Linux
- Setting up and using Agilent 82357B GPIB USB pod in RPi Linux
- How to enable Agilent 82357A USB GPIB dongle and remain sane
All of these work in getting the dongle going, but they require manual interaction as soon as you reboot the PC. I had to do some specific extra steps on my Ubuntu 20.04 system to make it work even after a reboot.
You’ll still have to do something whenever you do an Ubuntu Linux kernel update (which happen often!), but it’s still a big step forward.
Agilent 82357B Initialization Process
Before getting to the actual installation instructions, let’s quickly go over the process why which an Agilent 82357B must be initialized.
-
Initial plug-in
When you plug in the USB device, the dongle will first announce itself as follows:
[ 4774.179320] usb 1-7.1: New USB device found, idVendor=0957, idProduct=0518, bcdDevice= 0.00
[ 4774.179325] usb 1-7.1: New USB device strings: Mfr=0, Product=0, SerialNumber=0
Take note of the USB product ID: it’s 0x0518 now, but it won’t stay that way!
When initially plugged in, the USB device doesn’t have the firmware that make it a GPIB device. The only action that can happen with a USB device with this product ID is to upload firmware.
That’s because the dongle is using one of the popular Cypress EZ-USB controllers: all of these use a two-stage USB boot process.
-
Uploading the firmware
A special tool, fxload, is used to upload EZ-USB firmware that transforms the device from a generic into a custom USB device.
-
Device with firmware
After uploading the firmware, the USB device automatically disconnects from the USB bus and reconnects, but this time with the following signature:
[ 5313.849157] usb 1-7.1: New USB device found, idVendor=0957, idProduct=0718, bcdDevice= 0.00
[ 5313.849162] usb 1-7.1: New USB device strings: Mfr=1, Product=2, SerialNumber=5
[ 5313.849164] usb 1-7.1: Product: 82357B ()
[ 5313.849166] usb 1-7.1: Manufacturer: Agilent Technologies, Inc.
[ 5313.849167] usb 1-7.1: SerialNumber: MY49451115
Notice how the product ID is now 0x0718 instead of 0x0518.
The USB device is now ready to be used by the Linux GPIB user-mode utilities.
-
Linux device creation
The Linux GPIB user mode package contains a tool called
gpib_configthat will create a/dev/gpib0device which provides a generic interface for all other user tools to use.
Installing the Agilent 82357B GPIB Driver on an Ubuntu Linux Distribution
(The initial steps are shamelessly self-plagiarized from my earlier blog post.)
Linux Kernel Headers
This section is the only part you will need to redo over and over again, whenever you (or the automated updating system of your distribution!) upgrades your kernel to a later version. It’s really annoying…
-
Install Linux Kernel Headers
sudo apt-get install linux-headers-$(uname -r)uname -rreturns the directory name for the Linux kernel that you’re running. In my case, it’s5.3.0-53-generic. -
Download the latest version of the Linux-GPIB package
cd ~/tools
svn checkout svn://svn.code.sf.net/p/linux-gpib/code/trunk linux-gpib-code
cd linux-gpib-code/linux-gpib-kernel
Yes:
svn. Some projects still use it. I had to runsudo apt install subversionto install Subversion on my machine just for this. -
Compile and install
make clean
make
sudo make install
This will install the gpib drivers in
/lib/modules/<kernel version>/gpib. Themake cleanis important. Even a minor kernel update may otherwise result in the following error:gpib_common: disagrees about version of symbol module_layout.Depending on your Linux installation, you might also run into the this issue:
warning: the compiler differs from the one used to build the kernel
The kernel was built by: x86_64-linux-gnu-gcc-12 (Ubuntu 12.3.0-1ubuntu1~22.04) 12.3.0
You are using:
CC [M]  /home/tom/tools/linux-gpib-code/linux-gpib-kernel/drivers/gpib/agilent_82350b/agilent_82350b_init.o
/bin/sh: 1: gcc-12: not found
My solution for Ubuntu 22.04 was to simply install gcc-12:
sudo apt install gcc-12After this, the
makecommand worked fine.
Linux User Drivers
-
Install the
fxloadprogramsudo apt install fxloadThis is a generic tool for devices of the Cypress EZ-USB devices to load new firmware into the device.
-
Compile and install the Linux user drivers
cd linux-gpib-code/linux-user
./bootstrap
./configure --sysconfdir=/etc
make
sudo make install
When you’re running an Ubuntu system, it’s really important to specify the
--sysconfdir=/etccommand line option. The default is/usr/local/etc.Running
sudo make installwill still put a bunch of files all over/usr/local, but, most important, it will also put a bunch of files in/etc/udev/rules.d:ls -a /etc/udev/rules.d ... -rw-r--r-- 1 root root 1095 Dec 14 14:01 98-gpib-generic.rules -rw-r--r-- 1 root root 1414 Dec 14 13:58 99-agilent_82357a.rules -rw-r--r-- 1 root root 829 Dec 14 13:58 99-lpvo_usb_gpib.rules -rw-r--r-- 1 root root 1745 Dec 14 13:58 99-ni_usb_gpib.rules ...The
98-gpib-generic.rulesfile contains generic instructions about how to set permissions of the/dev/gpib[0-9]device ports.The
99-agilent_82357a.rulesfile contains the instructions on how to upload the firmware and how to rungpib_config. These rules also apply to the 82357b version. -
Change user access permissions to
/dev/gpib[0-9]The
/etc/udev/rules.d/98-gpib-generic.rulesfile sets the desired access permissions to the/dev/gpib[0-9].There are many things you can do here. I simply give all accounts that are in my group permission to access these ports. The only uncommented line on my system contains this:
KERNEL=="gpib[0-9]*", MODE="0660", GROUP="tom" -
Install the Agilent 82357B firmware in the right location
The
/etc/udev/rules.d/99-agilent_82357a.rulesfile calls/usr/local/lib/udev/gpib_udev_fxloaderto load the firmware. It does this by matching USB devices that have 0518 as product ID. (See earlier!) This, in turn, expects the firmware to be located in/usr/local/share/usb.gpib_udev_fxloadershould already have been placed where it needs to be, as part of the earlierlinux-usersudo make installaction.But you need to make sure the firmware is in place:
cd ~/tools/linux-gpib-code wget --content-disposition --no-check-certificate http://linux-gpib.sourceforge.net/firmware/gpib_firmware-2008-08-10.tar.gz tar xvfz gpib_firmware-2008-08-10.tar.gz cd gpib_firmware-2008-08-10 sudo cp -r * /usr/local/share/usb -
Modify
/etc/gpib.configto support the Agilent dongle:You only need to change the line with
board_type:... interface { minor = 0 /* board index, minor = 0 uses /dev/gpib0, minor = 1 uses /dev/gpib1, etc. */ board_type = "agilent_82357a" /* type of interface board being used */ ... - Reboot PC
-
Plug in USB dongle. If you run
dmesg -win a terminal, you should see the following:First connection of the 0518 device... [353045.216377] usb 1-7.1: new high-speed USB device number 67 using xhci_hcd [353045.334550] usb 1-7.1: New USB device found, idVendor=0957, idProduct=0518, bcdDevice= 0.00 [353045.334555] usb 1-7.1: New USB device strings: Mfr=0, Product=0, SerialNumber=0 [353045.809548] usb 1-7.1: USB disconnect, device number 67 Second connection of the 0518 device... [353047.512385] usb 1-7.1: new high-speed USB device number 68 using xhci_hcd [353047.638538] usb 1-7.1: New USB device found, idVendor=0957, idProduct=0518, bcdDevice= 0.00 [353047.638542] usb 1-7.1: New USB device strings: Mfr=0, Product=0, SerialNumber=0 [353048.113533] usb 1-7.1: USB disconnect, device number 68 Connection of the 0718 device [353049.820395] usb 1-7.1: new high-speed USB device number 69 using xhci_hcd [353049.956523] usb 1-7.1: New USB device found, idVendor=0957, idProduct=0718, bcdDevice= 0.00 [353049.956528] usb 1-7.1: New USB device strings: Mfr=1, Product=2, SerialNumber=5 [353049.956530] usb 1-7.1: Product: 82357B () [353049.956531] usb 1-7.1: Manufacturer: Agilent Technologies, Inc. [353049.956533] usb 1-7.1: SerialNumber: MY49451115 [353049.982561] probe succeeded for path: usb-0000:01:00.0-7.1 Linking the USB device to /dev/gpib0 [353050.002858] gpib0: exiting autospoll thread [353050.002871] agilent_82357a_detach: detached [353050.002899] usb 1-7.1: bus 1 dev num 69 attached to gpib minor 0, agilent usb interface 0 [353050.336808] agilent_82357a_attach: attachedI don’t know why the 0518 device always gets connected twice…
- Connect the GPIB dongle to an instrument for which you know the GPIB address
- Use
ibtestto verify that you can successfully talk to that instrument
That’s it!