Tektronix TDS 420A Remote Control over GPIB
- Introduction
- Acquiring a USB to GPIB Dongle
- Installing the GPIB-USB-HS Linux Kernel Driver
- Installing the GPIB User Mode Library and Utilities
- Set the GPIB Device Address on the TDS 420A
- First Contact!
- Setting Up UDEV rules
- Fetching a Waveform - The Bare Minimum
- Fetching and Plotting a Waveform
- The GPL3 License of the Linux-GPIB Package
- References
Introduction
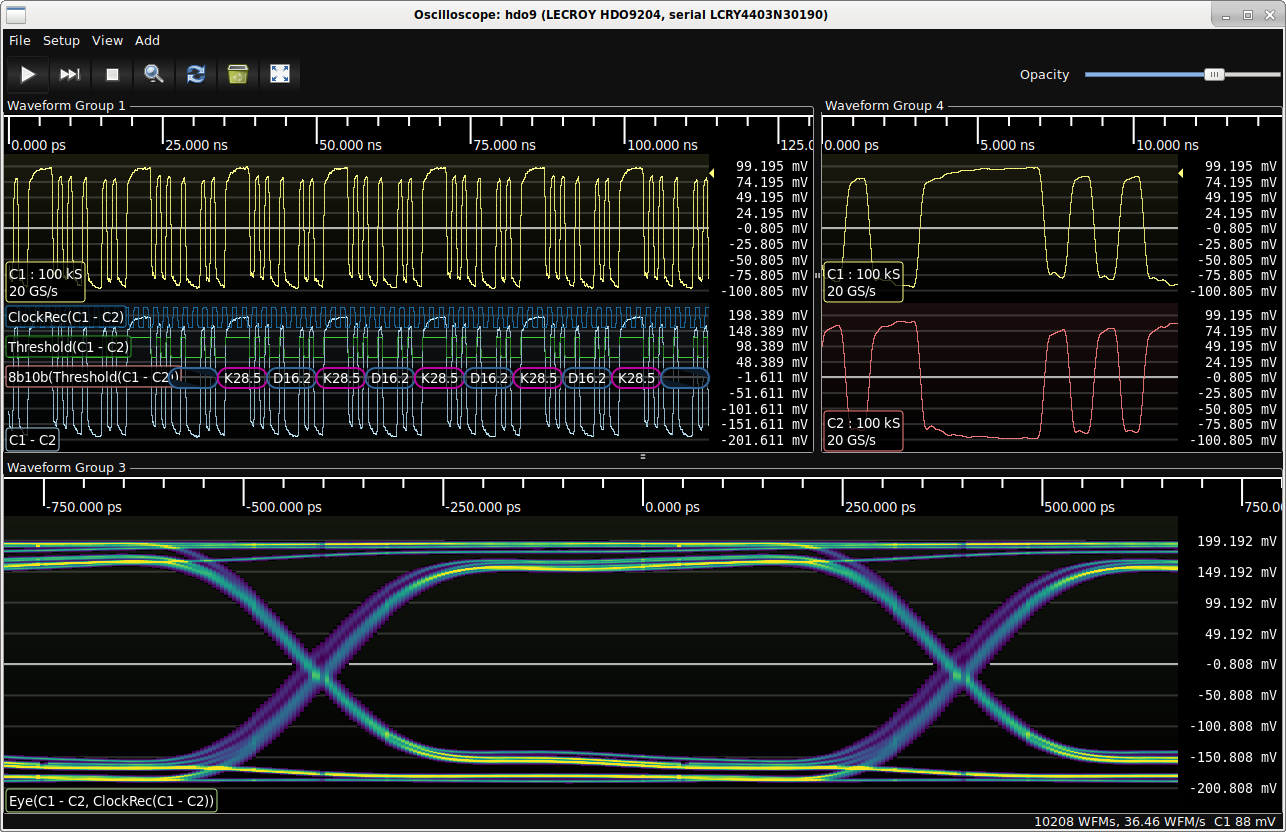
In my earlier post, I introduced my ‘new’ Tektronix TDS 420A oscilloscope, which I bought to add Tektronix support to glscopeclient.
The first step in that process is to get my PC to talk to the scope through the GPIB interface.
It’s not a complicated process, and there’s quite a bit of information online that describes how to do this, but in this post I go through the gory details how to get from nothing to fetching recorded waveforms from the scope onto your PC.
From unpacking the scope, it only took about 30 minutes and 95% of that time was obviously spent getting Linux drivers right.
Acquiring a USB to GPIB Dongle
GPIB is an obsolete interface standard. Modern test and measurement equipment comes with an Ethernet and/or a USB port. But not too long ago, virtually all equipment had GPIB support, and thus most of the older equipment you’ll buy second hand on eBay will come with one too.
The sturdy, specialized GPIB connector itself was already quite expensive back in the day, so a full GPIB interface card or dongle was never cheap.
You can find UGPlus USB to GPIB controllers for around $40 on Amazon, but they aren’t supported on Linux.
The cheapest Linux supported option that I could find was an Agilent/Keysight 82357B. They’re listed for $624 on the Keysight website, but you should be able to find one for ~$70 on eBay or AliExpress.
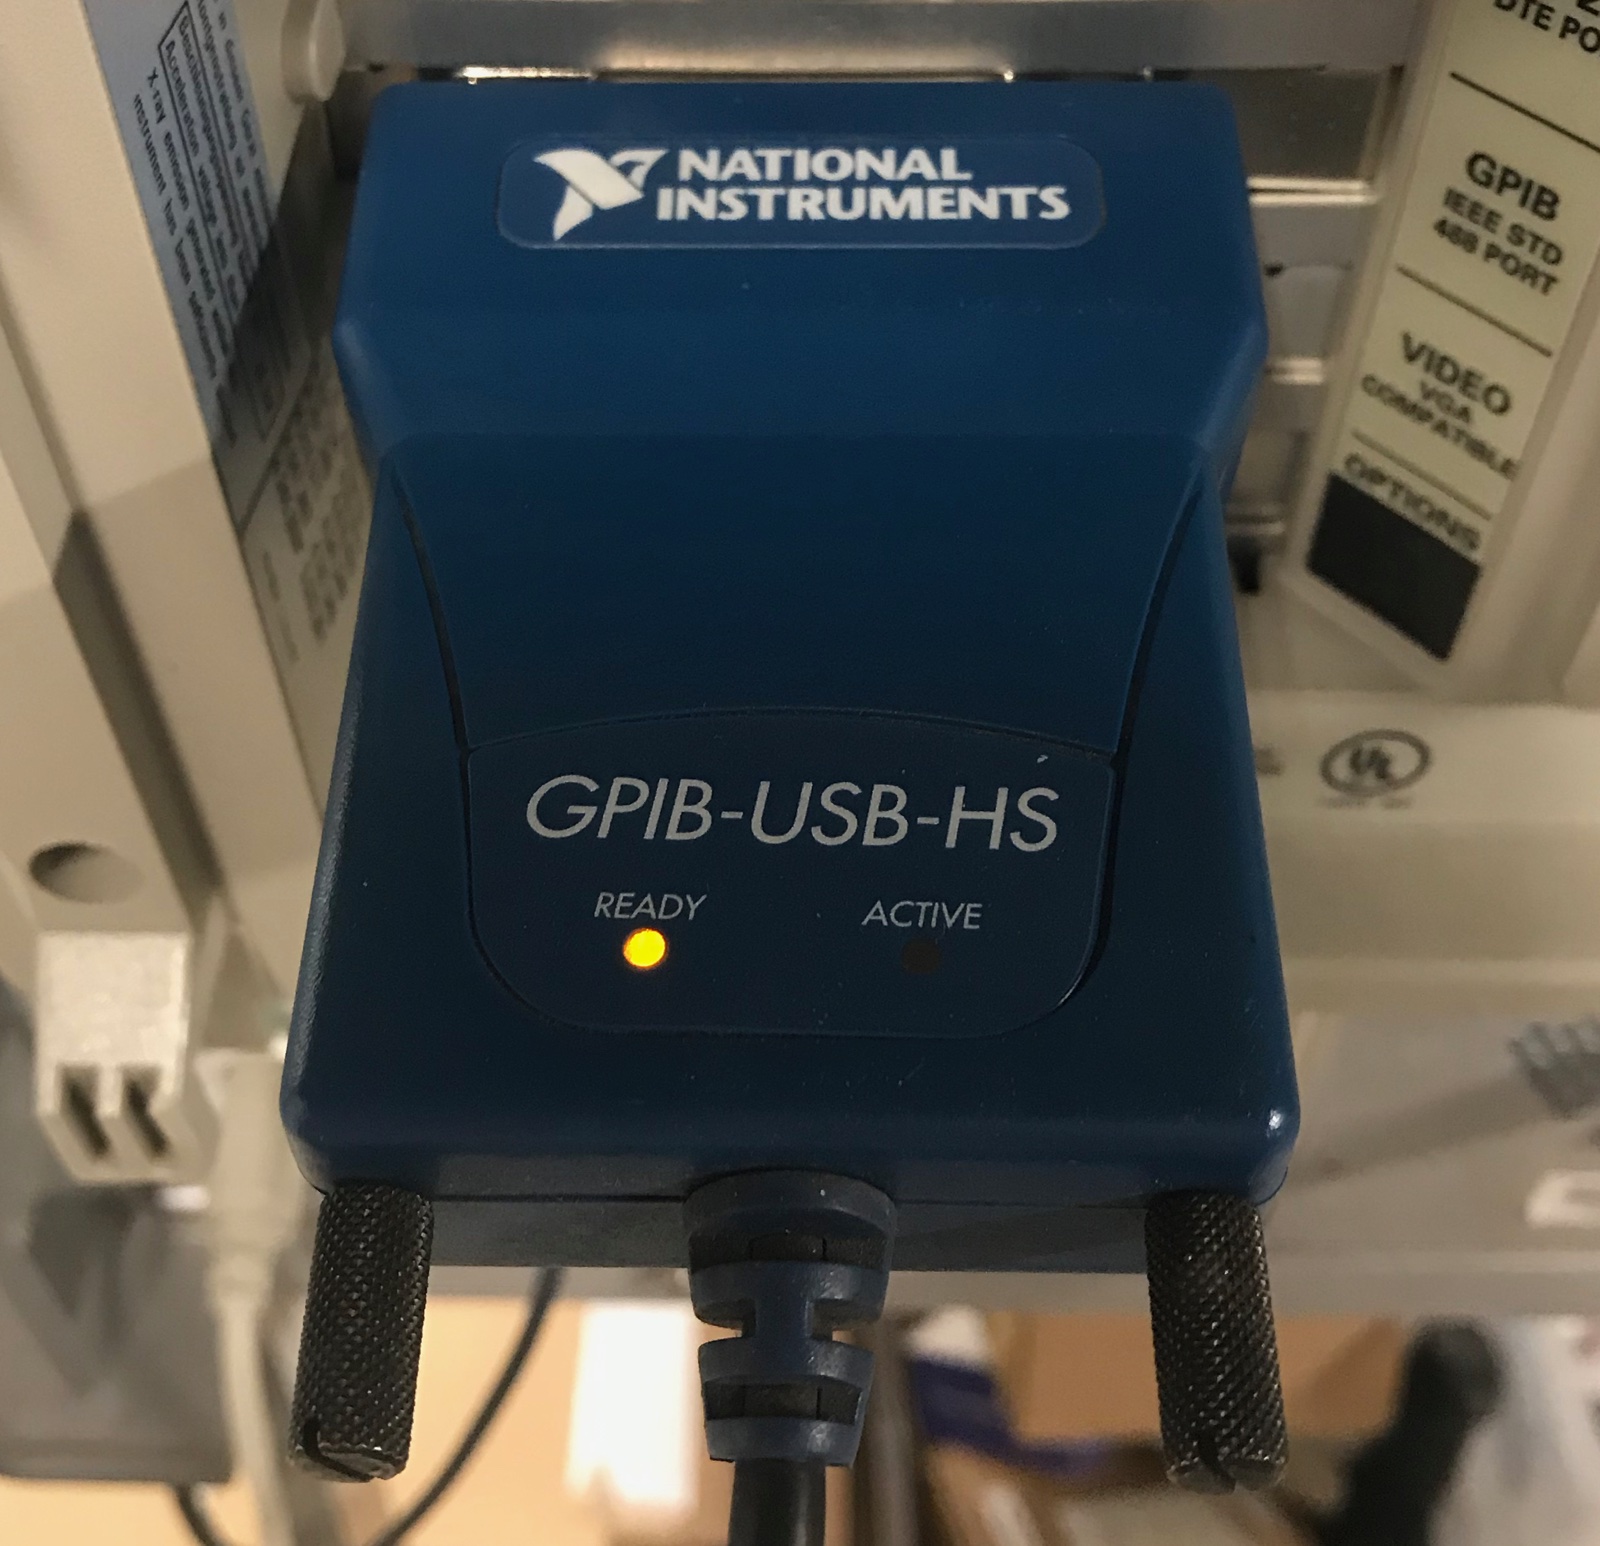
Not wanting to wait for weeks for a shipment from China, I bought a National Instruments GPIB-USB-HS instead. Instead of the $1059 list price, I got mine for $100 on eBay.
Installing the GPIB-USB-HS Linux Kernel Driver
It’s hard to believe, but despite supporting pretty much any kind of device imaginable, the main line Linux kernel doesn’t have any support for GPIB interfaces.
Luckily, there is the Linux GPIB Package which contains driver modules for a variety of such interfaces, as well as whole bunch of user mode libraries and test programs.
One major downside of the method described below is that you need to recompile and reinstall the driver whenever there’s even a minor update of the Linux kernel. It’s not a lot of work, just a very annoying distraction.
Here’s the recipe that worked for my Ubuntu 18.04 distribution:
-
Install Linux Kernel Headers
sudo apt-get install linux-headers-$(uname -r)uname -rreturns the directory name for the Linux kernel that you’re running. In my case, it’s5.3.0-53-generic.You will need to redo this step whenever you (or the automated updating system of your distribution!) upgrade your kernel to a later version. It’s really annoying…
-
Download the latest version of the Linux-GPIB package
cd ~/projects
svn checkout svn://svn.code.sf.net/p/linux-gpib/code/trunk linux-gpib-code
cd linux-gpib-code/linux-gpib-kernel
Yes:
svn. Some projects still use it. I had to install Subversion on my machine just for this. -
Compile and install
make
sudo make install
This will install the gpib drivers in
/lib/module/<kernel version>/gpib:cd /lib/modules/$(uname -r)/gpib find .. ./cec ./cec/cec_gpib.ko ./agilent_82357a ./agilent_82357a/agilent_82357a.ko ./ni_usb ./ni_usb/ni_usb_gpib.ko ./hp_82341 ./hp_82341/hp_82341.ko ./lpvo_usb_gpib ./lpvo_usb_gpib/lpvo_usb_gpib.ko ./ines ./ines/ines_gpib.ko ./sys ./sys/gpib_common.ko ./tnt4882 ./tnt4882/tnt4882.ko ./nec7210 ./nec7210/nec7210.ko ./agilent_82350b ./agilent_82350b/agilent_82350b.ko ./cb7210 ./cb7210/cb7210.ko ./tms9914 ./tms9914/tms9914.ko ./hp_82335 ./hp_82335/hp82335.ko -
Install the appropriate GPIB driver into the kernel
For the GPIB-USB-HS, that’s the
ni_usb_gpibdriver:sudo modprobe ni_usb_gpib -
Check that the driver gets loaded
Plug in your GPIB USB dongle, and check what happens with
dmesg:dmesg -w [63517.842042] usb 1-11.4: new high-speed USB device number 17 using xhci_hcd [63517.957147] usb 1-11.4: New USB device found, idVendor=3923, idProduct=709b [63517.957151] usb 1-11.4: New USB device strings: Mfr=1, Product=2, SerialNumber=3 [63517.957154] usb 1-11.4: Product: GPIB-USB-HS [63517.957156] usb 1-11.4: Manufacturer: National Instruments [63517.957158] usb 1-11.4: SerialNumber: 0120F5DE [63517.975852] gpib_common: loading out-of-tree module taints kernel. [63517.975897] gpib_common: module verification failed: signature and/or required key missing - tainting kernel [63517.976571] Linux-GPIB 4.3.3 Driver [63517.977564] ni_usb_gpib driver loading [63517.977585] ni_usb_gpib: probe succeeded for path: usb-0000:00:14.0-11.4 [63517.977620] usbcore: registered new interface driver ni_usb_gpib [63517.977621] gpib: registered ni_usb_b interfaceSuccess!
But wait, there’s more! We still need to install GPIB user mode libraries and utilities.
Installing the GPIB User Mode Library and Utilities
The National Instrument GPIB USB dongles have small microcontroller on them that needs its own firmware. This firmware must be loaded into the dongle before the dongle is able to behave as a GPIB interface. The firmware, and the utility to load it into the dongle, is part of the same Linux GPIB package that also contained the kernel above.
I used the following recipe:
-
Compile and install the whole thing:
  cd linux-gpib-user
  ./bootstrap/
  ./configure
  make
  sudo make install
  sudo ldconfig
This will install an important configuration file in
/usr/local/etc/gpib.conf.(If you want the location of this file to be under
/etcinstead, you can do so with by using./configure --sysconfdir=/etcinstead of just./configure.) -
Update the
/usr/local/etc/gpib.confconfiguration fileIn my case, all I had to do was change
board_type = "ni_pci"toboard_type = "ni_usb_b". -
Load firmware into the dongle
sudo gpib_configWhen you run
dmesgnow, there will be some warnings unexpected data in some buffer, but that didn’t seem to have any adverse impact on the functionality:[236430.065817] ni_usb_gpib: attach [236430.065830] usb 1-1.2: bus 1 dev num 7 attached to gpib minor 0, NI usb interface 0 [236430.075276] product id=0x709b [236430.075697] ni_usb_hs_wait_for_ready: board serial number is 0x120f5de [236430.075948] /home/tom/projects/linux-gpib-code/linux-gpib-kernel/drivers/gpib/ni_usb/ni_usb_gpib.c: ni_usb_hs_wait_for_ready: unexpected data: buffer[7]=0x4, expected 0x3 or 0x5 or 0x6 [236430.075949] /home/tom/projects/linux-gpib-code/linux-gpib-kernel/drivers/gpib/ni_usb/ni_usb_gpib.c: ni_usb_hs_wait_for_ready: unexpected data: buffer[10]=0x3, expected 0x96 or 0x07 [236430.075950] ni_usb_dump_raw_block: [236430.075951] 40 [236430.075951] 1 [236430.075951] 0 [236430.075951] 1 [236430.075952] 30 [236430.075952] 1 [236430.075952] 2 [236430.075953] 4 [236430.075953] 0 [236430.075953] 0 [236430.075954] 3
Set the GPIB Device Address on the TDS 420A
The GPIB protocol supports up to 31 devices on a single daisy chained cable. But there’s no plug and play here, the address of each device needs to be assigned manually.
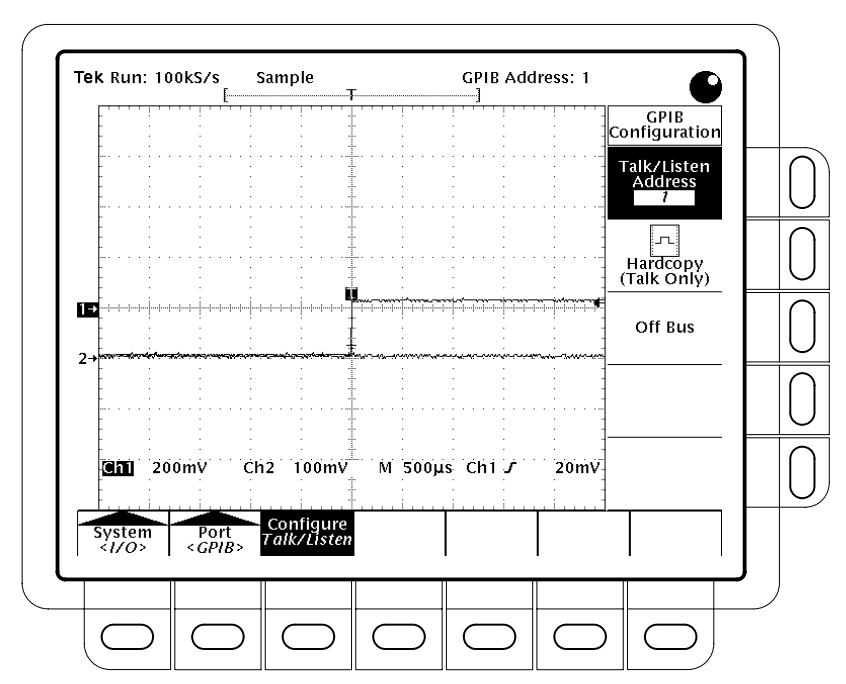
On the TDS 420A, you do this as follows. (See also the user manual on page 3-91.)
- Press SHIFT UTILITY -> System (main) -> I/O (pop-up) -> Port (main) -> GPIB (pop-up) -> Configure (main) -> Talk/Listen Address
I selected address 1.
First Contact!
We can now finally test the whole connection.
The Linux GPIB package comes with a number of utilities, one of which is ibtest. Let’s give it a try:
-
sudo ibtestudevpermission haven’t been set yet, so, for now, let’s run it as root. -
d(for ‘device)ibtestcan be used to talk to a GPIB connected device (like our scope) or to the GPIB interface dongle itself. -
1for GPIB addressThis is obviously the address that was assigned earlier into the scope.
-
w: write string to scope -
*IDN?This is the standard SCPI command that returns an identification string.
r: read the reply from the scope1024-
Result:
: r
enter maximum number of bytes to read [1024]: 1024
trying to read 1024 bytes from device...
received string: 'TEKTRONIX,TDS 420A,0,CF:91.1CT FV:v1.0.2e
'
Number of bytes read: 42
gpib status is:
ibsta = 0x2100  < END CMPL >
iberr= 0
We have successfully received the identification info from the scope: manufacturer, product name, revision number and firmware version.
Setting Up UDEV rules
udev rule set user permissions and can do all kinds of funky stuff behind the scenes.
It took me ages to get things working, and reloading the rules with sudo udevadm control --reload was not
sufficient: a reboot was necessary!
Create a file called /etc/udev/rules.d/72-linux_gpib_ni_usb.rules:
SUBSYSTEMS=="usb", ACTION=="add", ATTRS{idVendor}=="3923", ATTRS{idProduct}=="709b", MODE="666", GROUP="tom", SYMLINK+="usb_gpib"
SUBSYSTEMS=="usb", ACTION=="add", ATTRS{idVendor}=="3923", ATTRS{idProduct}=="709b", RUN+="/usr/local/sbin/gpib_config"
KERNEL=="gpib[0-9]*", MODE="666", GROUP="tom"
You will need to change GROUP="tom" to something else.
Earlier, we called sudo gpib_config to load the GPIB-USB-HS firmware into the device. The second in the udev
parameters above now does that automatically as soon as you plug in the GPIB dongle in the USB port.
Reboot your machine, unplug the USB cable of the dongle and plug it back in, and try out ibtest, but this
time without prefixing it with sudo.
Does it work? Congratulations! You’re ready to start fetching waveforms from the scope!
Fetching a Waveform - The Bare Minimum
We’ll be using pyvisa, the Pyton API for instrumentation that I introduced in
a previous blog post.
Fetch waveforms is just a matter of sending the right command query to the scope. Check out of TDS Family Programmers Manual for a comprehensive list of all the commands and how to use them.
It can be as simple as this:
#! /usr/bin/env python3
import pyvisa

# Open a link to device 1 of the GPIB bus
rm = pyvisa.ResourceManager()
g = rm.open_resource('GPIB0::1::INSTR')

# Get the sample points
wf = g.query("CURV?")
print(wf)
The output of this program could be something like this:
:CURV 78,79,78,77,79,79,79,79,78,83,79,81,78,78,79,77,81,77,78,80,78,79,
78,77,-46,-49,-46,-45,-46,-45,-44,-45,-47,-46,-47,-45,-44,-45,-44,-44,-44,
-44,-47,-44,-45,-46,-45,-44,-41,81,80,80,80,80,81,81,80,80,79,79,79,77,
80,79,78,76,77,79,79,80,79,80,79,78,-48,-44,-45,-48,-50,-47,-56,-46,-45,
-46,-46,-45,-44,-45,-44,-46,-43,-46,-46,-44,-45,-44,-45,-47,-47,81,80,79,
80,79,79,80,81,78,78,77,79,80,84,77,78,77,77,79,79,80,77,78,79,79,-46,-49,
...
A discerning reader will see a square wave in the data above!
Fetching and Plotting a Waveform
The problem with the example above is that a Tektronix scope has many different settings that will influence how the data is returned.
For example, the returned waveform data starts with :CURV,
a redundant repeat of the query command. The waveform values are returned in
ASCII text format, as a command separate list etc. Your scope might
have been configured to return waveform data as signed 8-bit integers, or
maybe even signed 16-bit numbers.
Your code will be very brittle if you rely on these kinds of settings, so it’s better to tell the scope exactly how you want the data to be returned.
Let’s look at an extended example. (Complete source code here.)
The start is the same:
#! /usr/bin/env python3
import pyvisa

import matplotlib as mpl
import matplotlib.pyplot as plt

rm = pyvisa.ResourceManager()
g = rm.open_resource('GPIB0::1::INSTR')
Specify the way the data will be returned:
# Don't repeat the command in the reply. This is easier to parse the result.
g.write("HEAD OFF")

# Encode the waveform as a comma-separated list
g.write("DATA:ENC ASCI")
Let the scope record the data:
# Record 500 waveform samples
g.write("HOR:RECORDL 500");

# Setup a single sequence acquisition
g.write("ACQ:STOPA SEQ")

# Don't do repetitive acquisition (~equivalent-time operation)
g.write("ACQ:REPE OFF")

# Start acquiring data
g.write("ACQ:STATE RUN")
Fetch the waveform parameters and the waveform data from the scope:
# Request data from channel 1 only
g.write("DATA:SOURCE CH1")

# Get all waveform acquisition settings needed decode the sample point
# values: vdiv, number of sample points etc.
wf_params = g.query("WFMPRE?")
print(wf_params)

# Get the sample points
wf = g.query("CURV?")
print(wf)
Plot the waveform on the screen:
# Convert comma separate string of signed integer values to list of integers
values = list(map(int, wf.split(",")))

# Plot
x = range(0, len(values))
plt.plot(x, values)
plt.show()
If everything went well, something like this should appear on your screen:
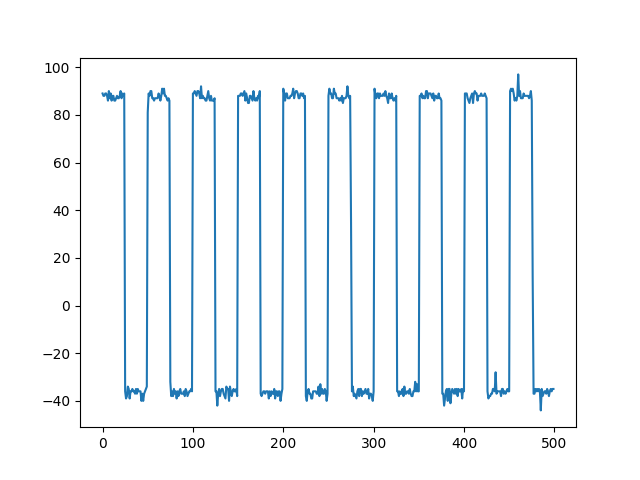
This example still leaves a lot to be desired: it simply graphs integer numbers instead of converting sample values to voltages, the X-axis unit is sample number instead of time.
The WFMPRE? command gives you all the information to do this right, but that’s
left as an exercise for the reader.
The main goal has been achieved: we can fetch data from the scope to the PC and do something useful with it!
The GPL3 License of the Linux-GPIB Package
It’s important to point out that the user mode libraries the Linux GPIB driver are licensed under the GPL 3.0. The consequence is that projects with a less restrictive open source license can’t just be built with the Linux GPIB library without applying the GPL 3.0 license to the whole project.
There is a good discussion about this here on Stackoverflow.
For my purposes, this isn’t a huge deal: instead of writing a C++ GPIB backend for
scopehal/glscopeclient, I will write a TCP/IP to GPIB server instead. glscopeclient already
has a TCP/IP socket based transport driver, so by using such a server, no additional transport driver
would need to be written.