Option Hacking the Tektronix TDS 420A
Previous installments in this series: In the Lab - Tektronix TDS 420A Oscilloscope, Tektronix TDS 420A Remote Control over GPIB, Extracting the Tektronix TDS 420A Firmware, A Tektronix TDS 420A, a Serial Debug Console, a Symbol Table, and Ghidra
- Introduction
- How a TDS400 Oscilloscope Manages Hardware Features
- The Key to Enabling Option 05 - Video Triggering
- The Key to Enabling Option 2F - Advanced DSP Math
- Options 05 and 2F Enabled!
- Option 1M - 120K Sample Points - A Different Story
- In Search of the Missing Memory
- Success at Last!
- Conclusion
- References
Introduction
I wrote earlier about the optional features of TDS 400 series of oscilloscopes:
- Option 05: Video Trigger
- Option 13: RS-232/Centronics Hardcopy Interface
- Option 1F: File System/Floppy
- Option 2F: Advanced DSP Math
- Option 1M: 120k waveform sample points
Most scopes, including mine, come with options 13 and 1F, but the remaining ones are less common.
The video triggering and advanced DSP math options are pure firmware functions, but even the 120k sample points option seemed like something that could be enabled with a software hack, since the signal acquisition board has the 512KB of RAM available to store the data.
Here, I’ll describe how the TDS 400 series manages option enablement, and how you can hack the scope into getting them to work.
How a TDS400 Oscilloscope Manages Hardware Features
Using Ghidra and the debug console, I figured out how the scope manages hardware
features: it has a function called hwAccountantQuery that has a single
parameter which I’ll call the ‘feature ID’.
hwAccountantQuery will return an integer value for that feature ID. These values
can be boolean in nature (“Is a certain feature present or not”) or can be the
amount of DSP memory etc.
Here’s a very non-exhaustive list of codes that I’ve been able to identify:
0x20d: number of scope channels
0x20f: size of acquisition RAM
0x216: ProbeD2MemSize
0x248: CPU clock period
0x255: InstrumentNameStringPtr
0x271: hwProbeSpecialDiagModeActive
0x2a0: hwProbeSpecialDiagLoopCount
0x2a1: hwProbeSpecialDaigSeqId
0x2b8: 30000 points -> value when 1M option is not possible
0x2bf: TDS420A
0x2d2: RS232 Debug uart present
0x317: MathPak      -> this is the advanced DSP math function
0x461: Floppy drive present
0x537: flashRomDateStringPtr
0x54c: TDS410A
0x560: TDS430A
0x700: hwProbeTvTrigPresent
hwAccountantQuery calls hwAccountantGetValue. The first part of that function looks liks this:
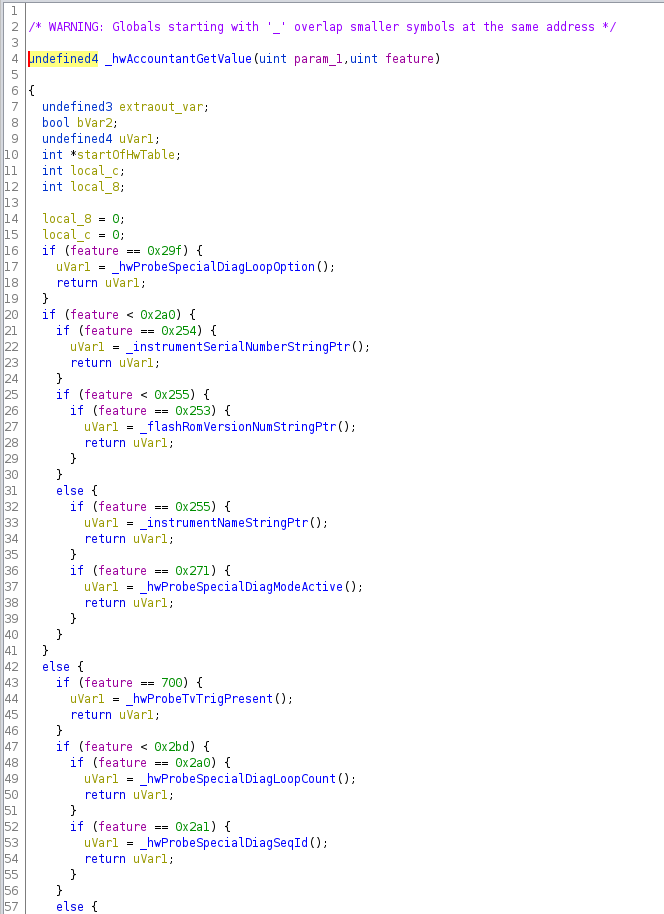
It’s a large if-then-else or case statement that calls a dedicated function for a particular
feature ID.
The Key to Enabling Option 05 - Video Triggering
Did you see _hwProbeTvTrigPresent()? That’s the function that checks
if the video triggering feature should be enabled:
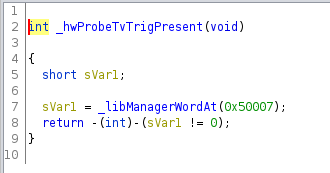
And there we have it! To enable “Option 05 - Video Triggering”, all you need to do is store a non-zero value in non-volatile RAM location 7!
This is not a shocking new discovery: plenty of online sources already mentioned this, but it’s great to confirm it from first principles, by going to the source.
The Key to Enabling Option 2F - Advanced DSP Math
Internally, the Advanced Math DSP is called “MathPak”. Just like for video triggering,
the hwAccountGetValue function issues a call to hwProbeMathPakPresent():
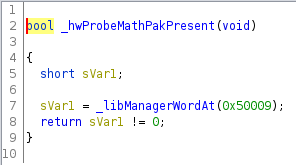
Option 2F simply relies on a non-zero value in NVRAM location 9!
Options 05 and 2F Enabled!
It’s now just a matter of issuing the following 2 commands on the debug console:
libManagerWordAtPut 0x50007, 1
libManagerWordAtPut 0x50009, 1
My scope booted up with this image:
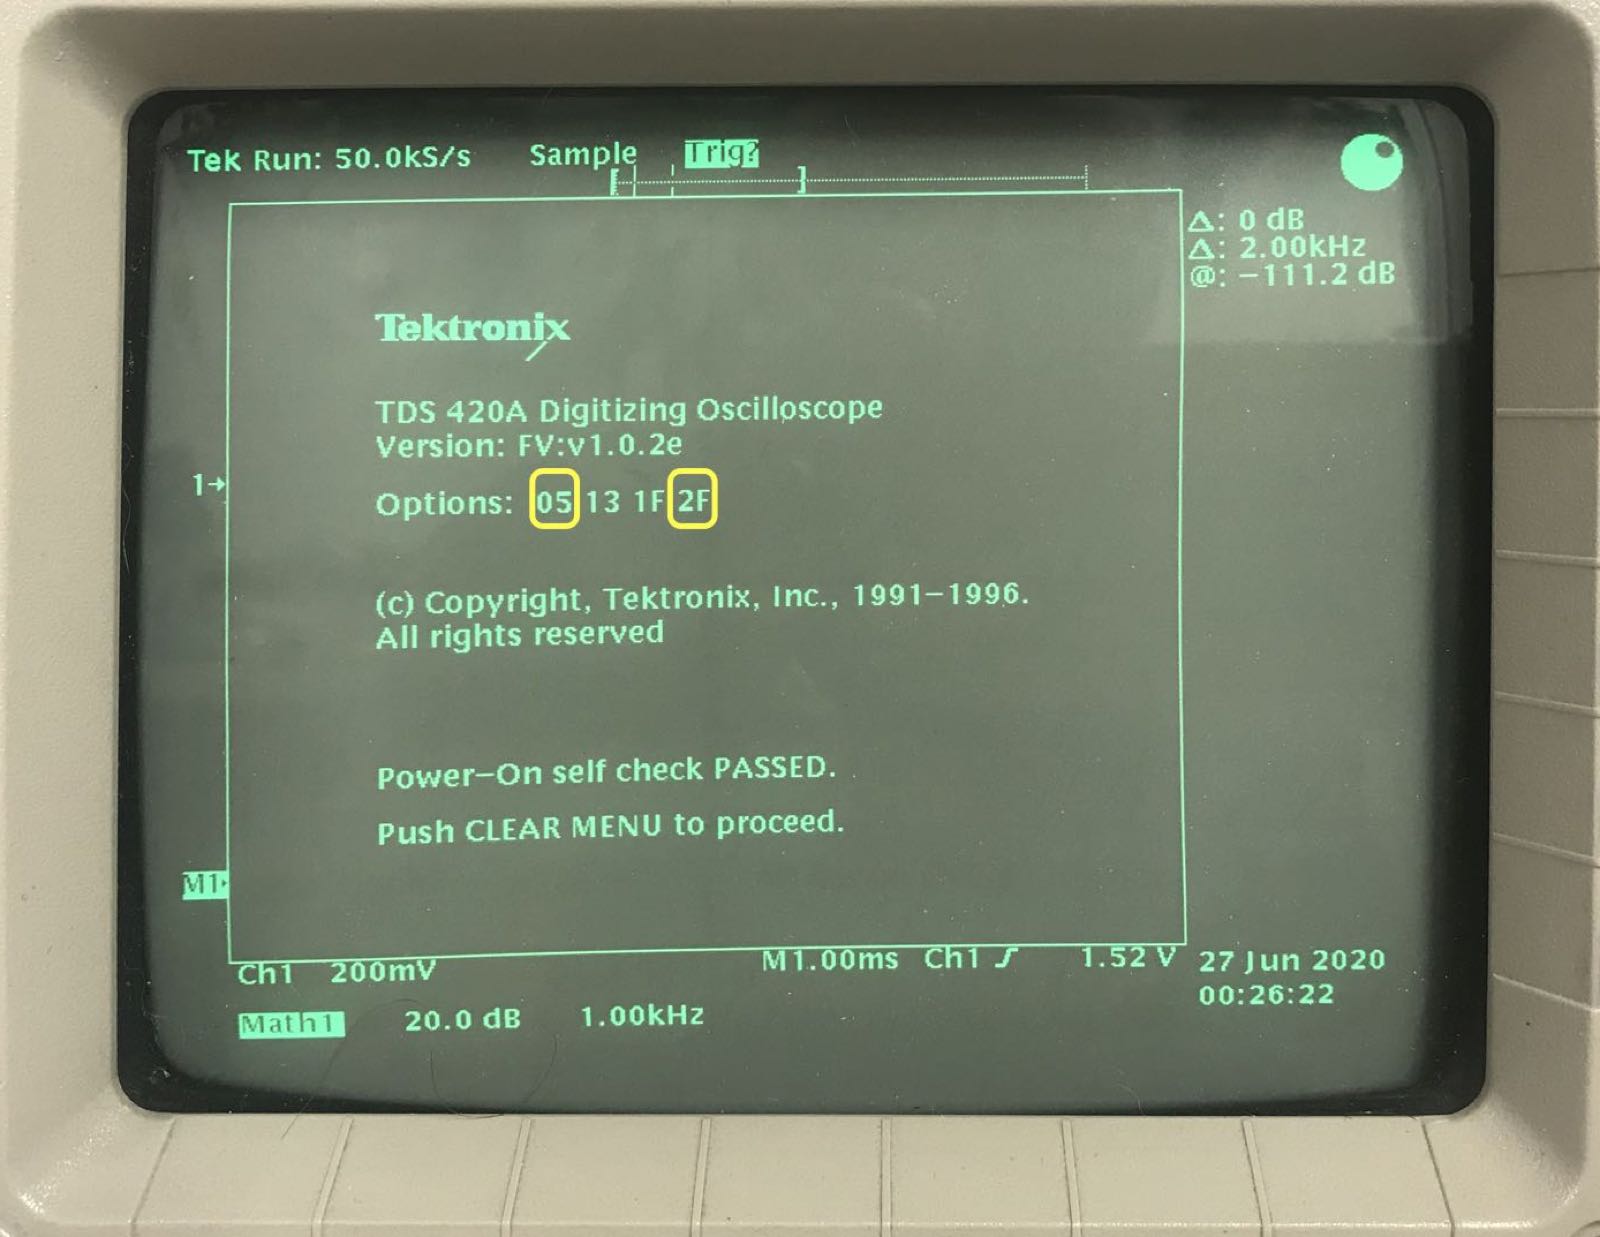
Success! I’m now the proud owner of a scope that supports an entirely obsolete video triggering mode, and a FFT math option!
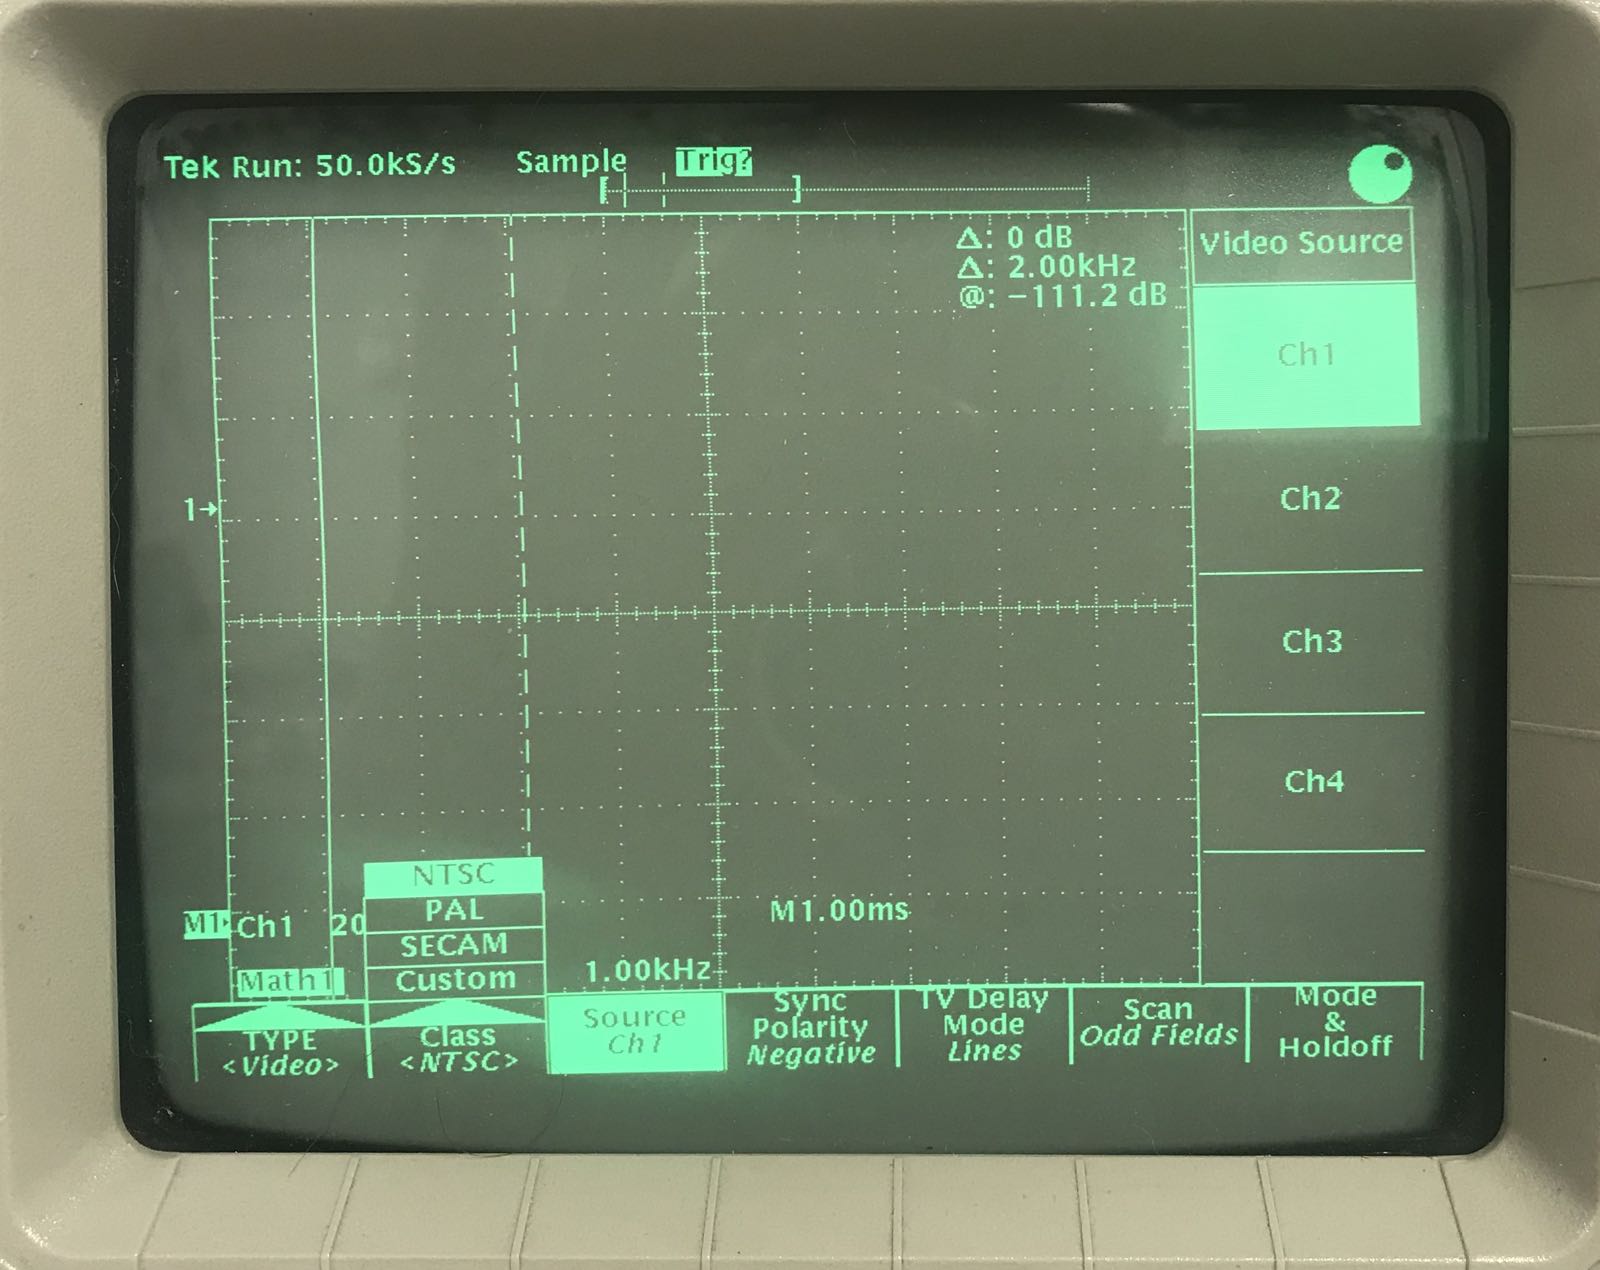
Video Triggering Menu:
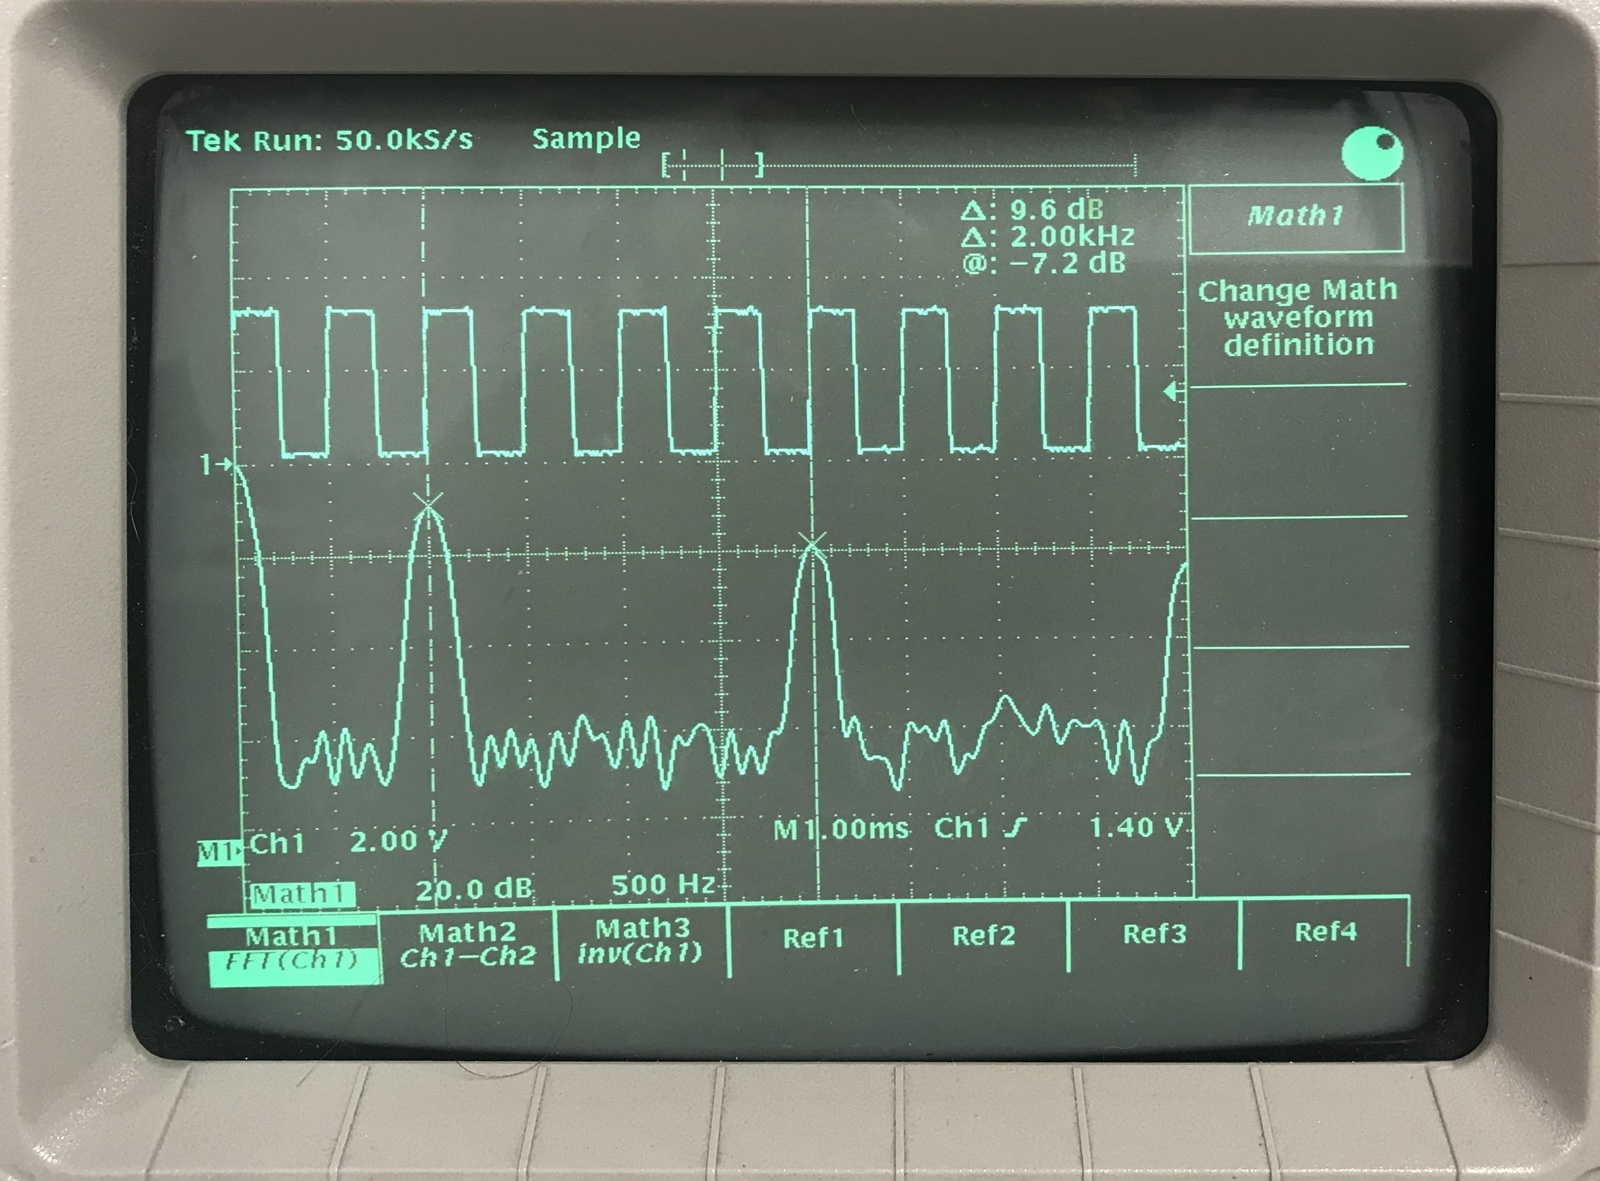
Live FFT of a 1kHz square wave:
Option 1M - 120K Sample Points - A Different Story
Unfortunately, the case statement is only a small part of the hwAccountGetValue function: most
feature checking functions are performed by looping through an array of structs that
have the feature ID and a function pointer to the checking function. It’s a bit harder to figure
out in Ghidra, but we already know that the function names to enable options start with hwProbe.
With Ghidra, we can filter on this, and that gives the hwProbe1MOption and the
hwProbe1MPresent functions.
hwProbe1MPresent looks very familiar:
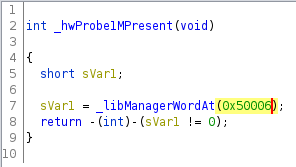
Just like for the 05 and 2F options, we need to set a specific byte in the NVRAM:
libManagerWordAtPut 0x50006, 1
hwProbe1MOption is a different story:
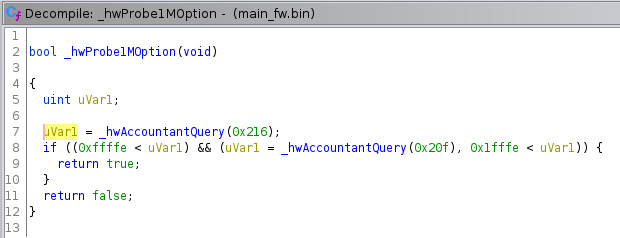
When you run hwProbe1MOption on the command line, the function returns a 0.
Feature IDs 0x216 and 0x20f are also part of the array of structs. They call the functions
hwProbeD2MemSize and hwProbeAcqMemSize respectively.
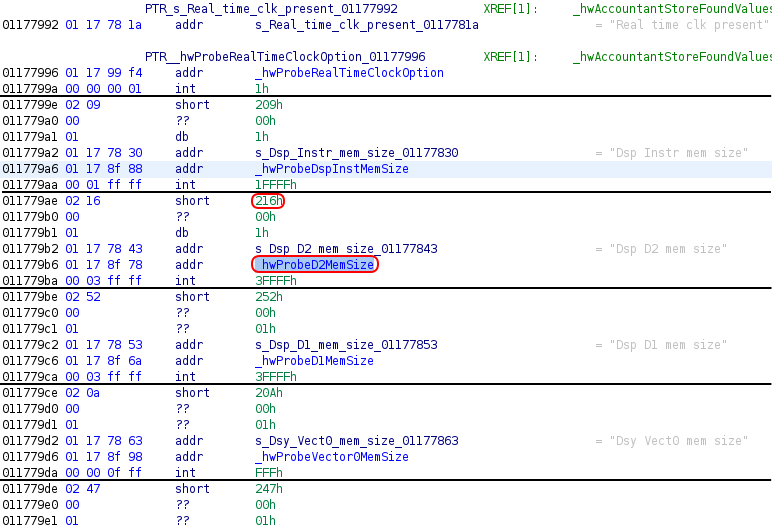
hwProbeD2MemSize and hwProbeAcqMemSize both run a test to check the amount of RAM that
is populated on the board.
When you run these query commands on the debug console, you get:
hwAccountantQuery(0x216)
262143
hwAccountantQuery(0x20f)
131071
It’s now clear why option 1M doesn’t get enabled after changing the NVRAM value: feature ID 0x20f is fine (131071/0x1ffff is larger than 0x1fffe), but feature ID 0x216 is not (262143/0x3ffff is smaller than 0xffffe).
Whatever it is used for, the amount of “D2” memory in the scope is too small.
In Search of the Missing Memory
This finally gave me the crucial hint to start looking at other PCBs inside the scope and try to find if there’s a place with empty footprints for RAM chips.
I call this the DSP PCB. Luckily, it’s a board that’s easy to remove from the chassis, without fragile flex cables or connectors.
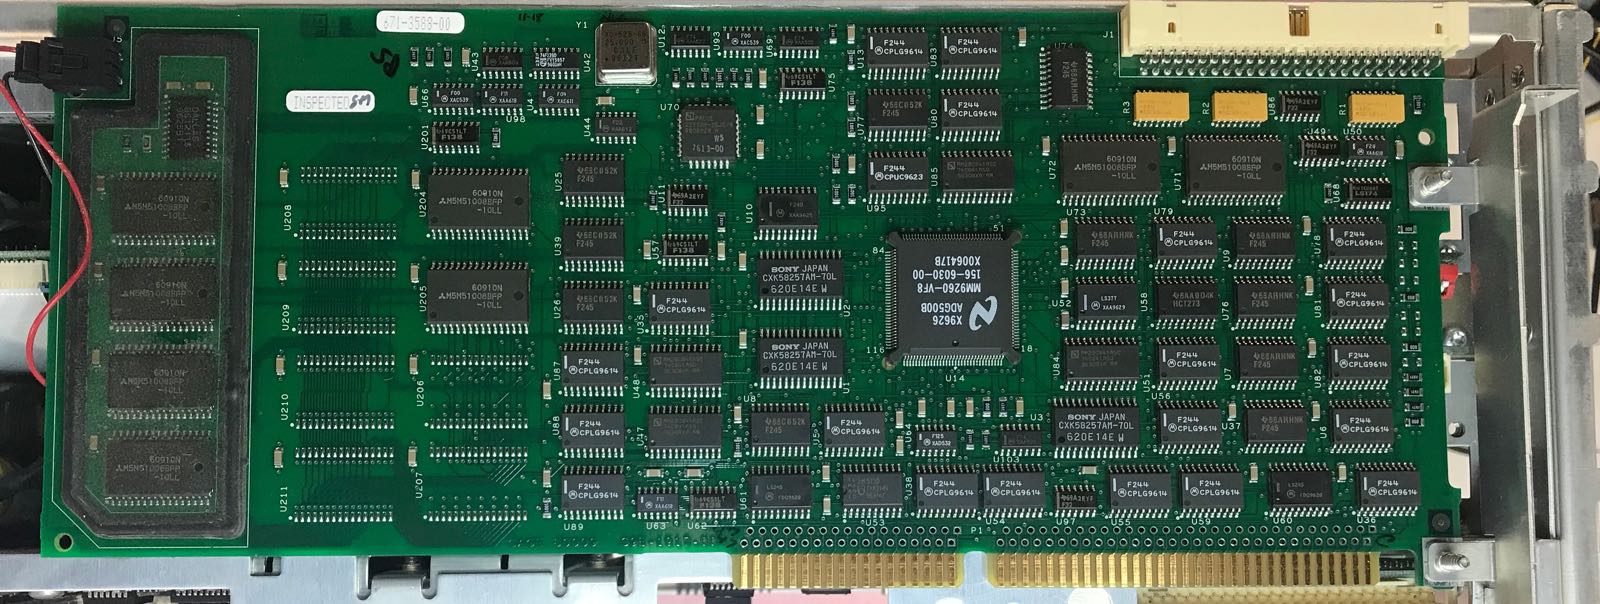
Look at those 6 beautiful, unused footprints!
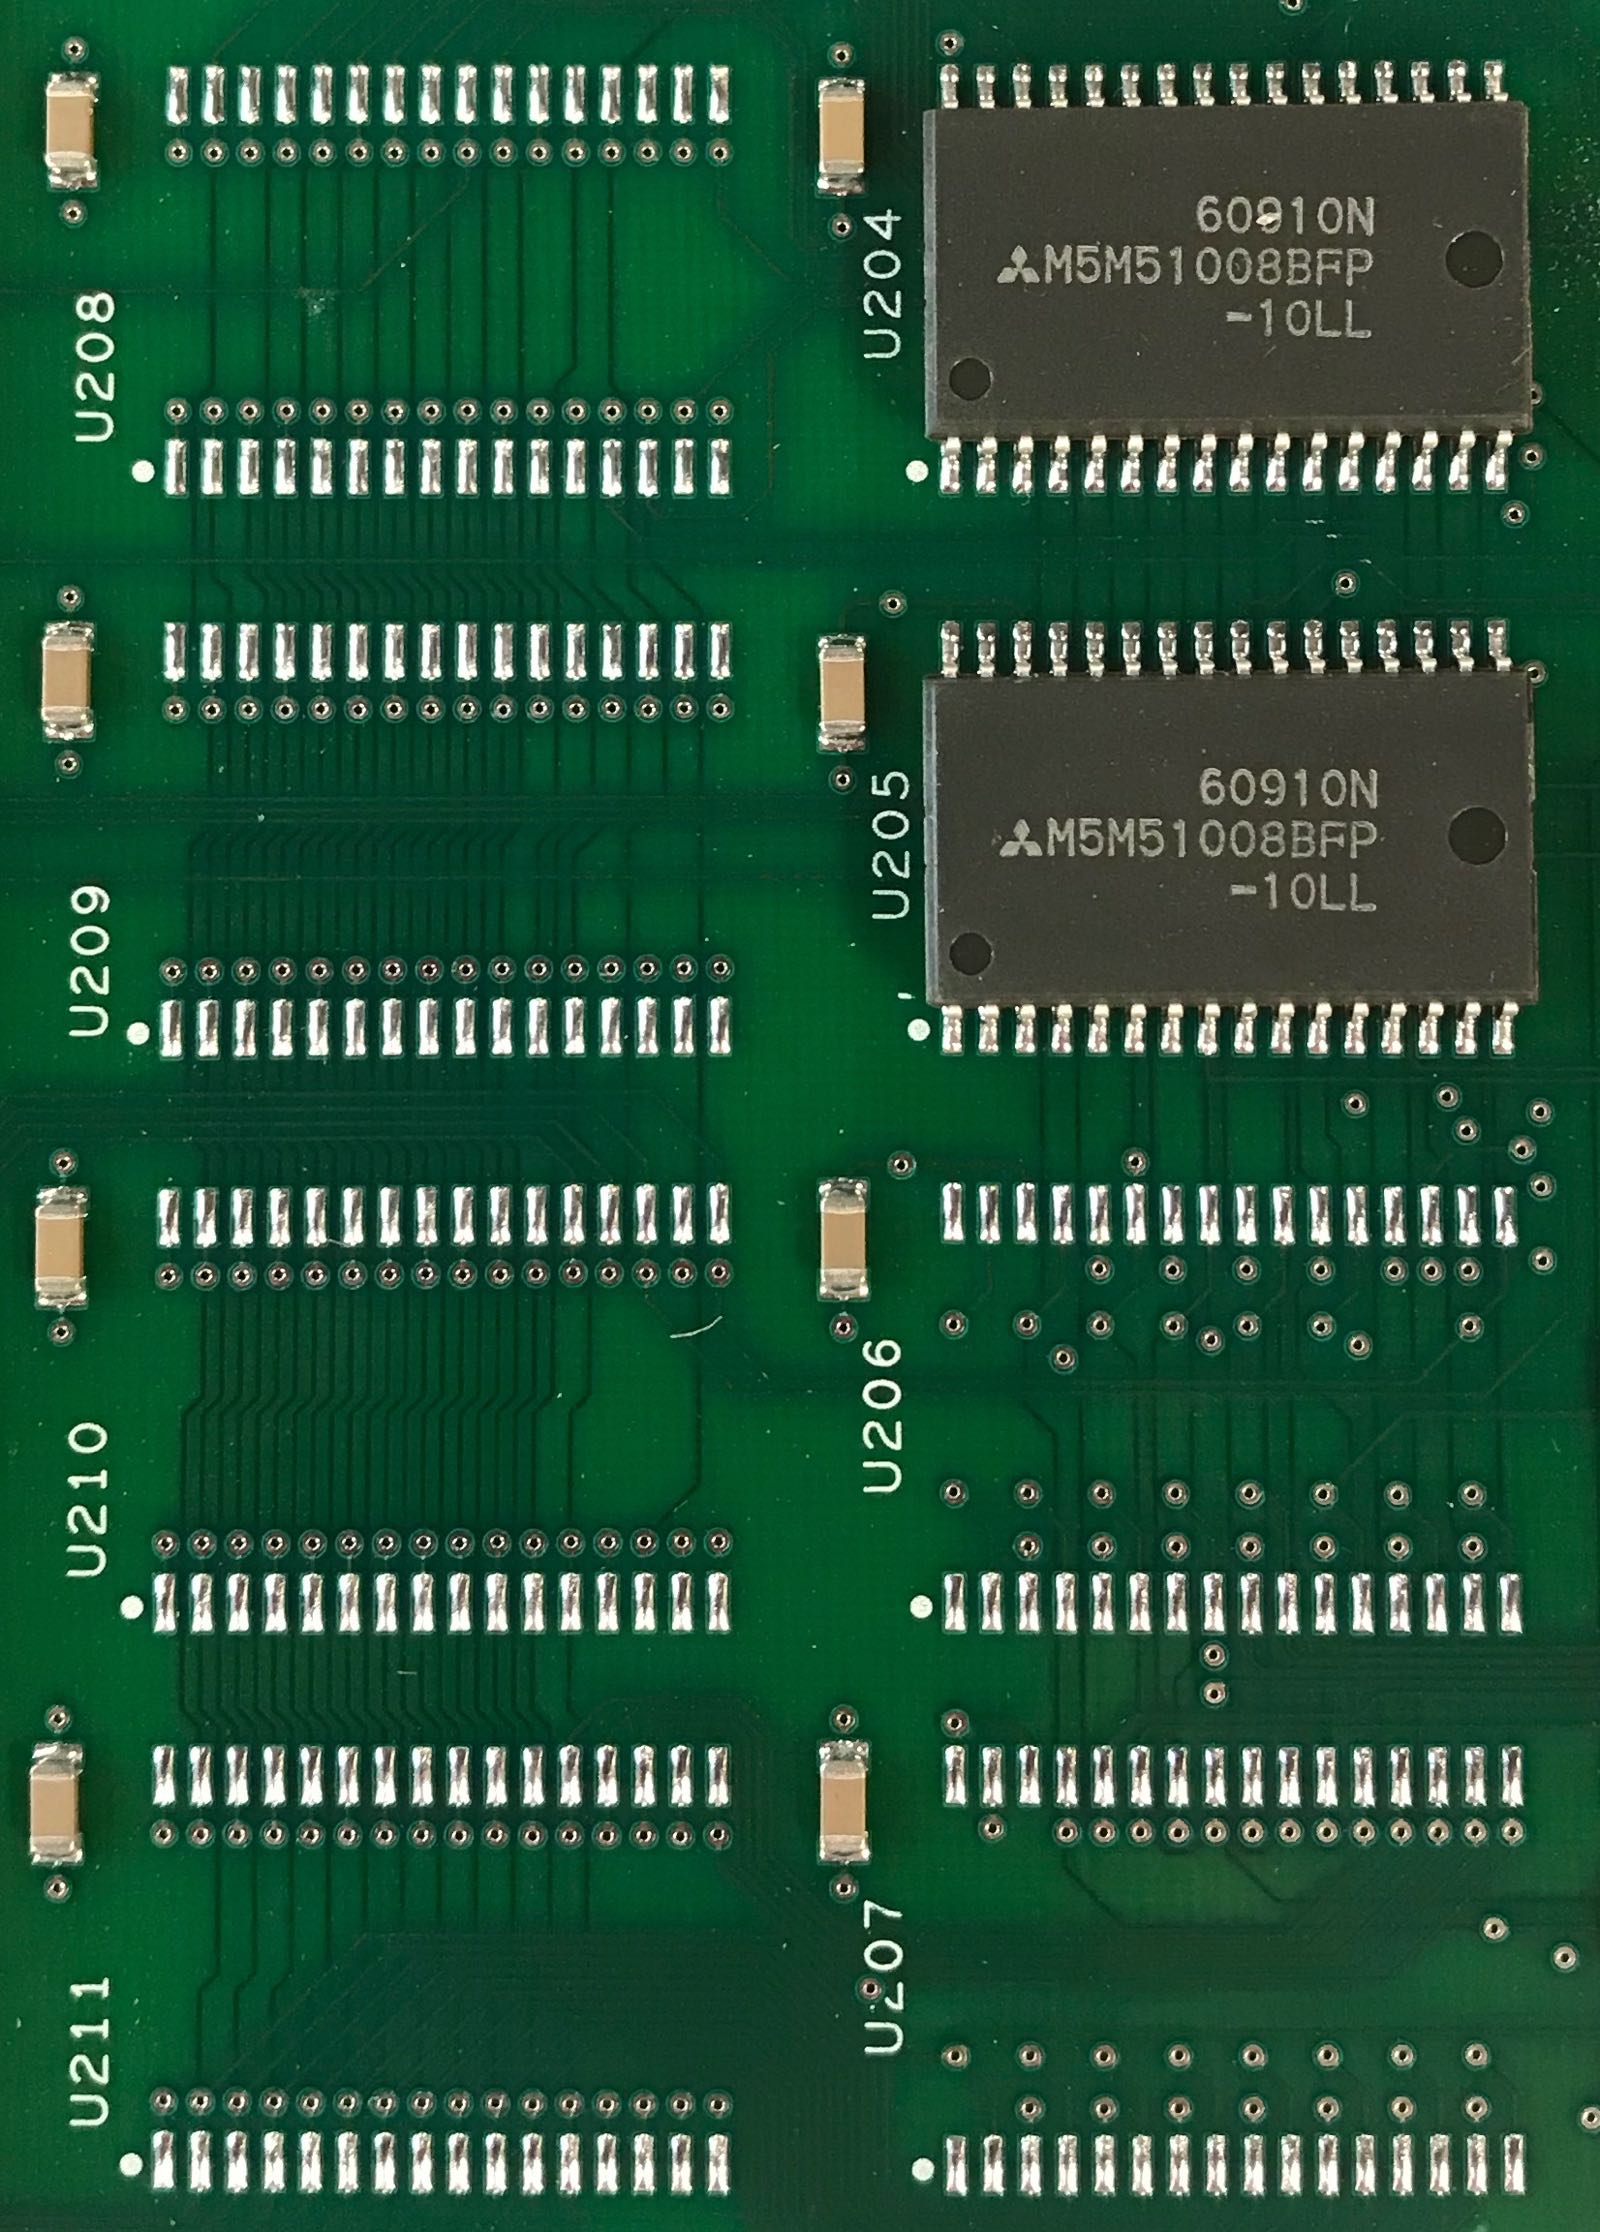
The RAM chips are M5M51008 with a 100ns speed rating, made by Mitsubishi LSI.
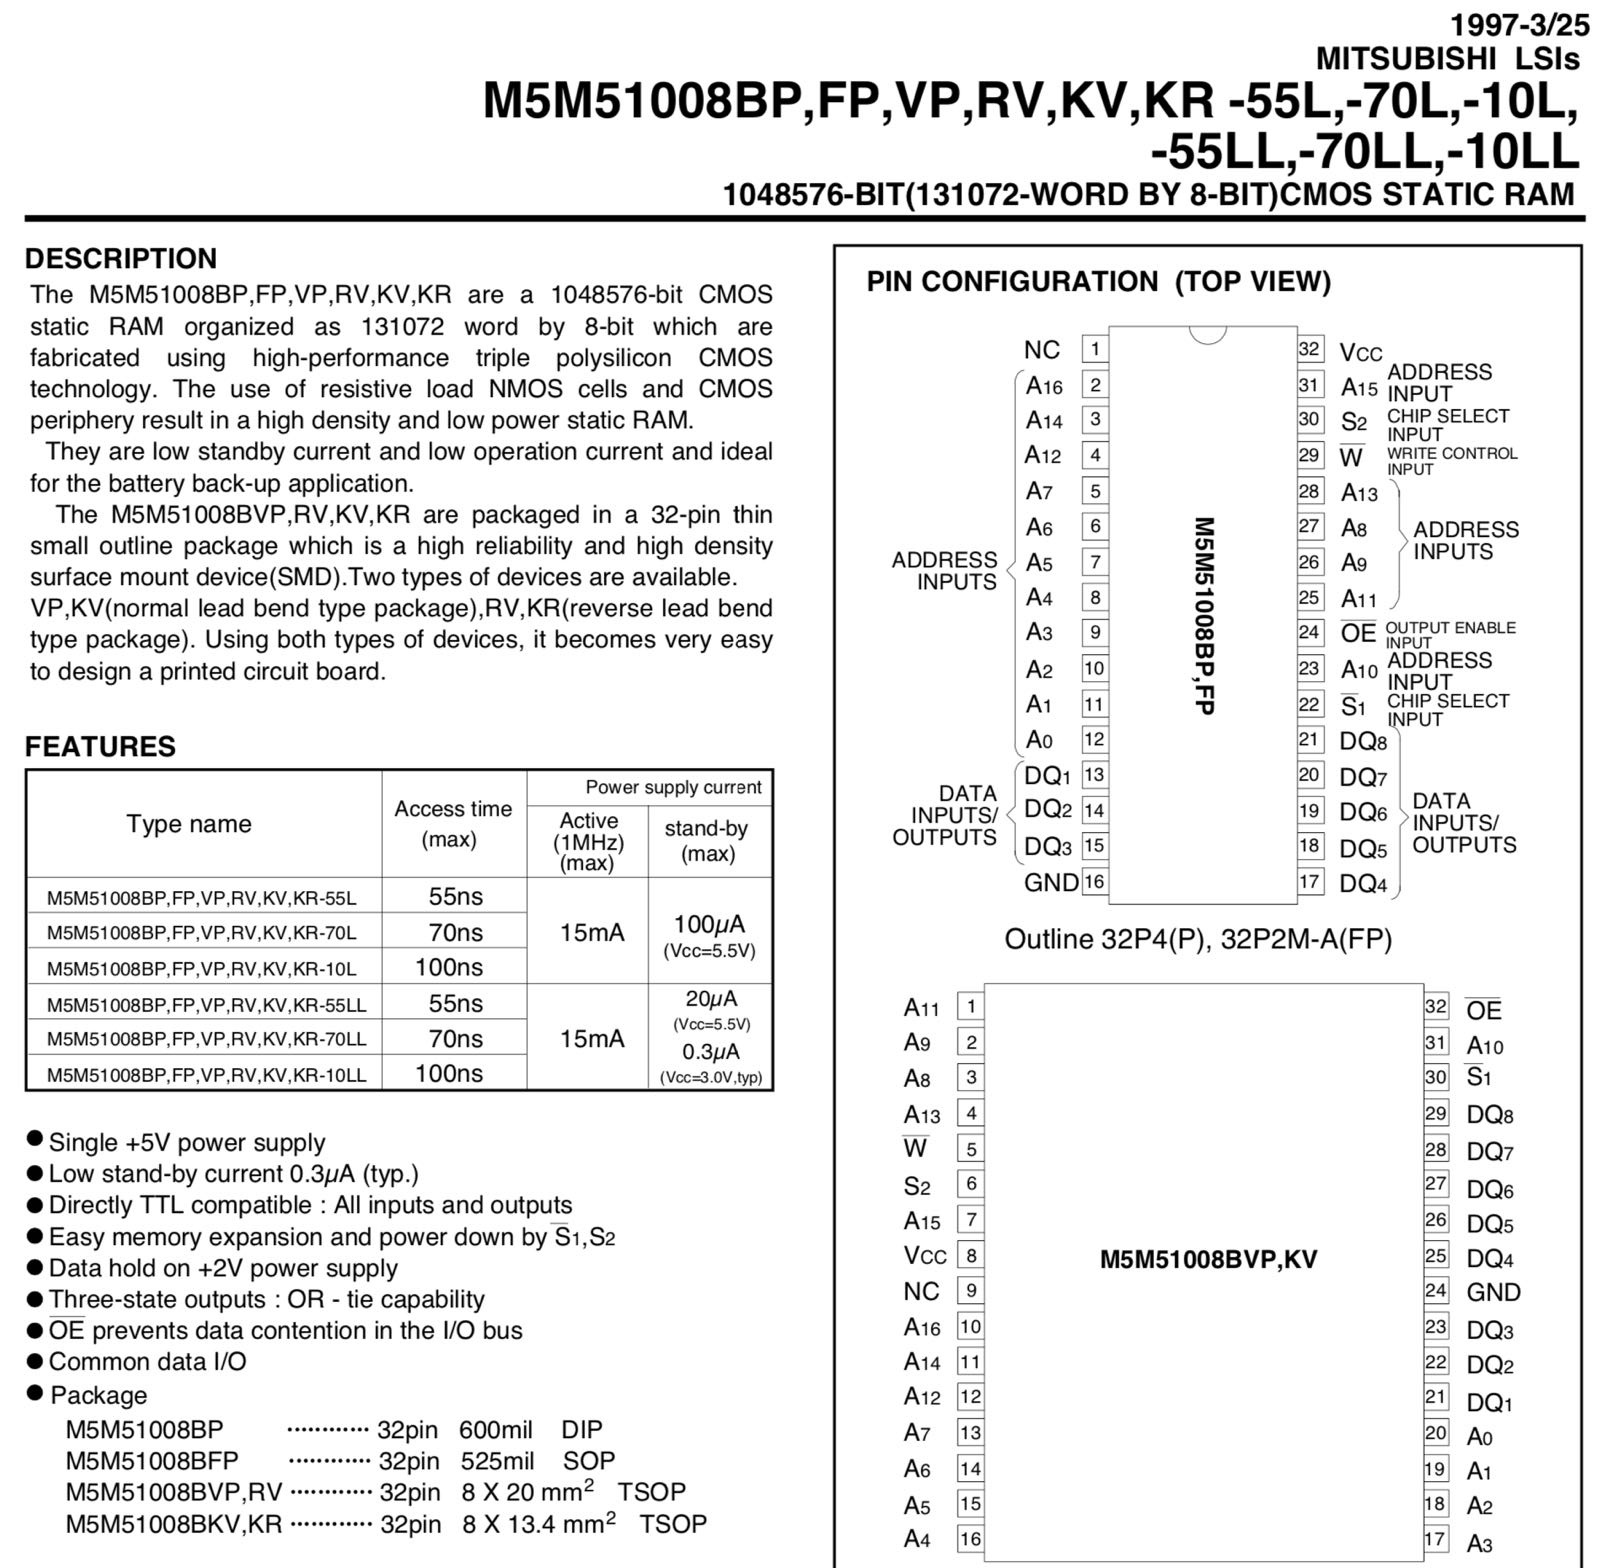
Surprisingly, Digikey still carries these parts: they’re now made by Rochester Electronics, and only available in 70ns or 55ns version, but faster is better, so that shouldn’t be a problem.
They’re cheap too at just $2.56 a piece.
The only issue is a minimum order quantity of 100 parts. $256 for a feature on a 25 years old $190 oscilloscope is a bit too much! Luckily, the parts are available at various Chinese chip brokers: I was able to buy them at UTSource for just $1.81 a piece. Even when buying 10 of them (for redundancy), shipping was the biggest part of the cost:

Once ordered, UTSource let me know that these parts were refurbished…
A few days later, the parts arrived at my front door, ready to be populated on the DSP board:
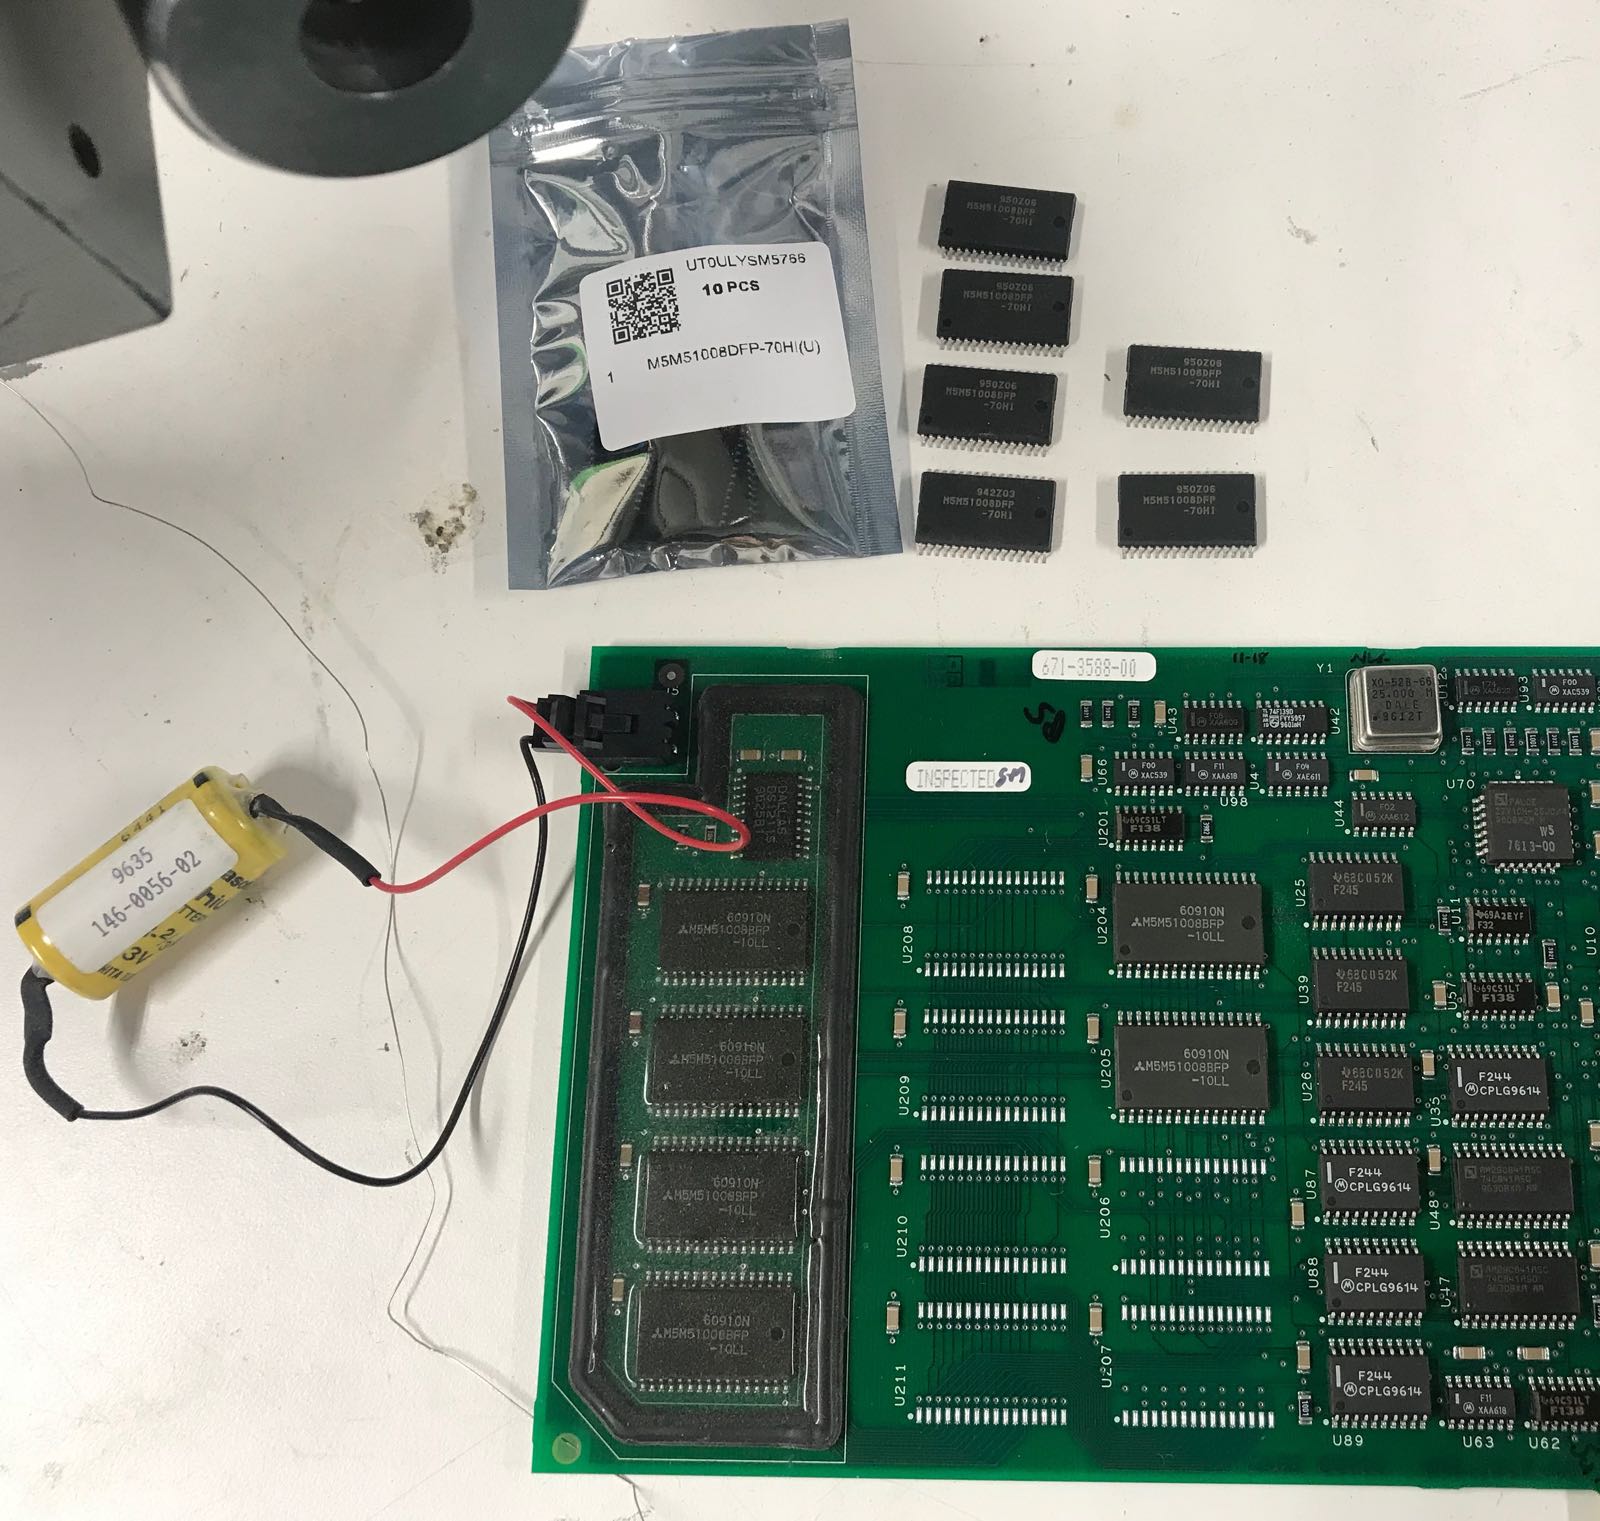
Note how I did not disconnect the battery that’s wired to the board: it’s used to permanently provide power to those 4 RAMs chips on the left that are encased into some transparant polymer gu. Removing the battery will result in lost calibration data (or so they say.)
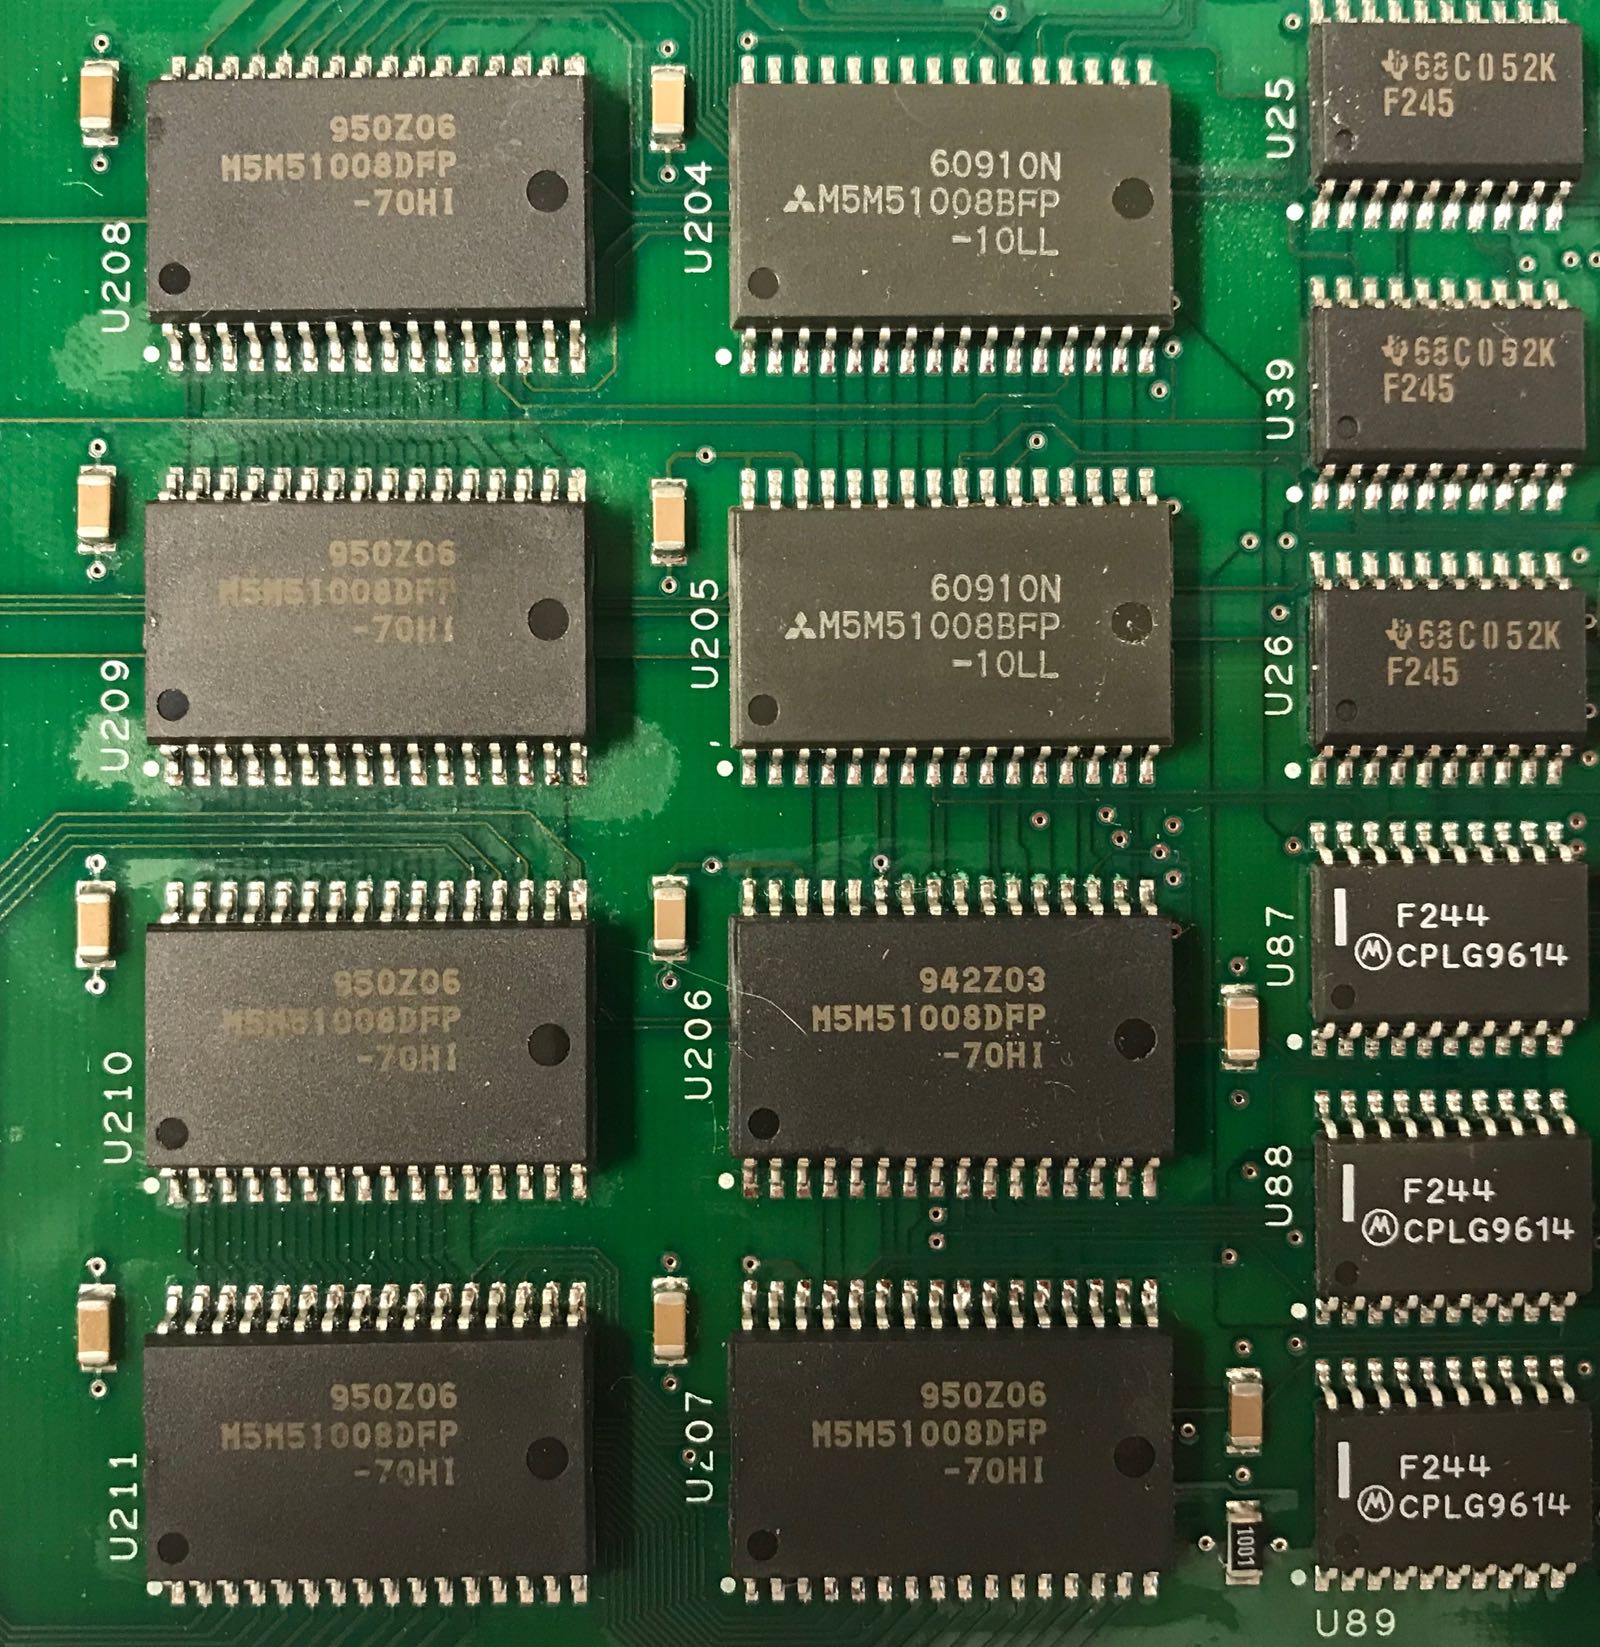
I used a regular soldering iron instead of a hot air gun to attach the 6 RAMs: there was enough solder on the pads and I’m most comfortable doing it that way. Afterwards I Ohm’ed out most of the pins, and I’m glad I did because there were some open connections.
The end result isn’t perfect, but it’s good enough:
Success at Last!
With the RAM populated, it’s time to power on the scope and check the result of the enhancement surgery!
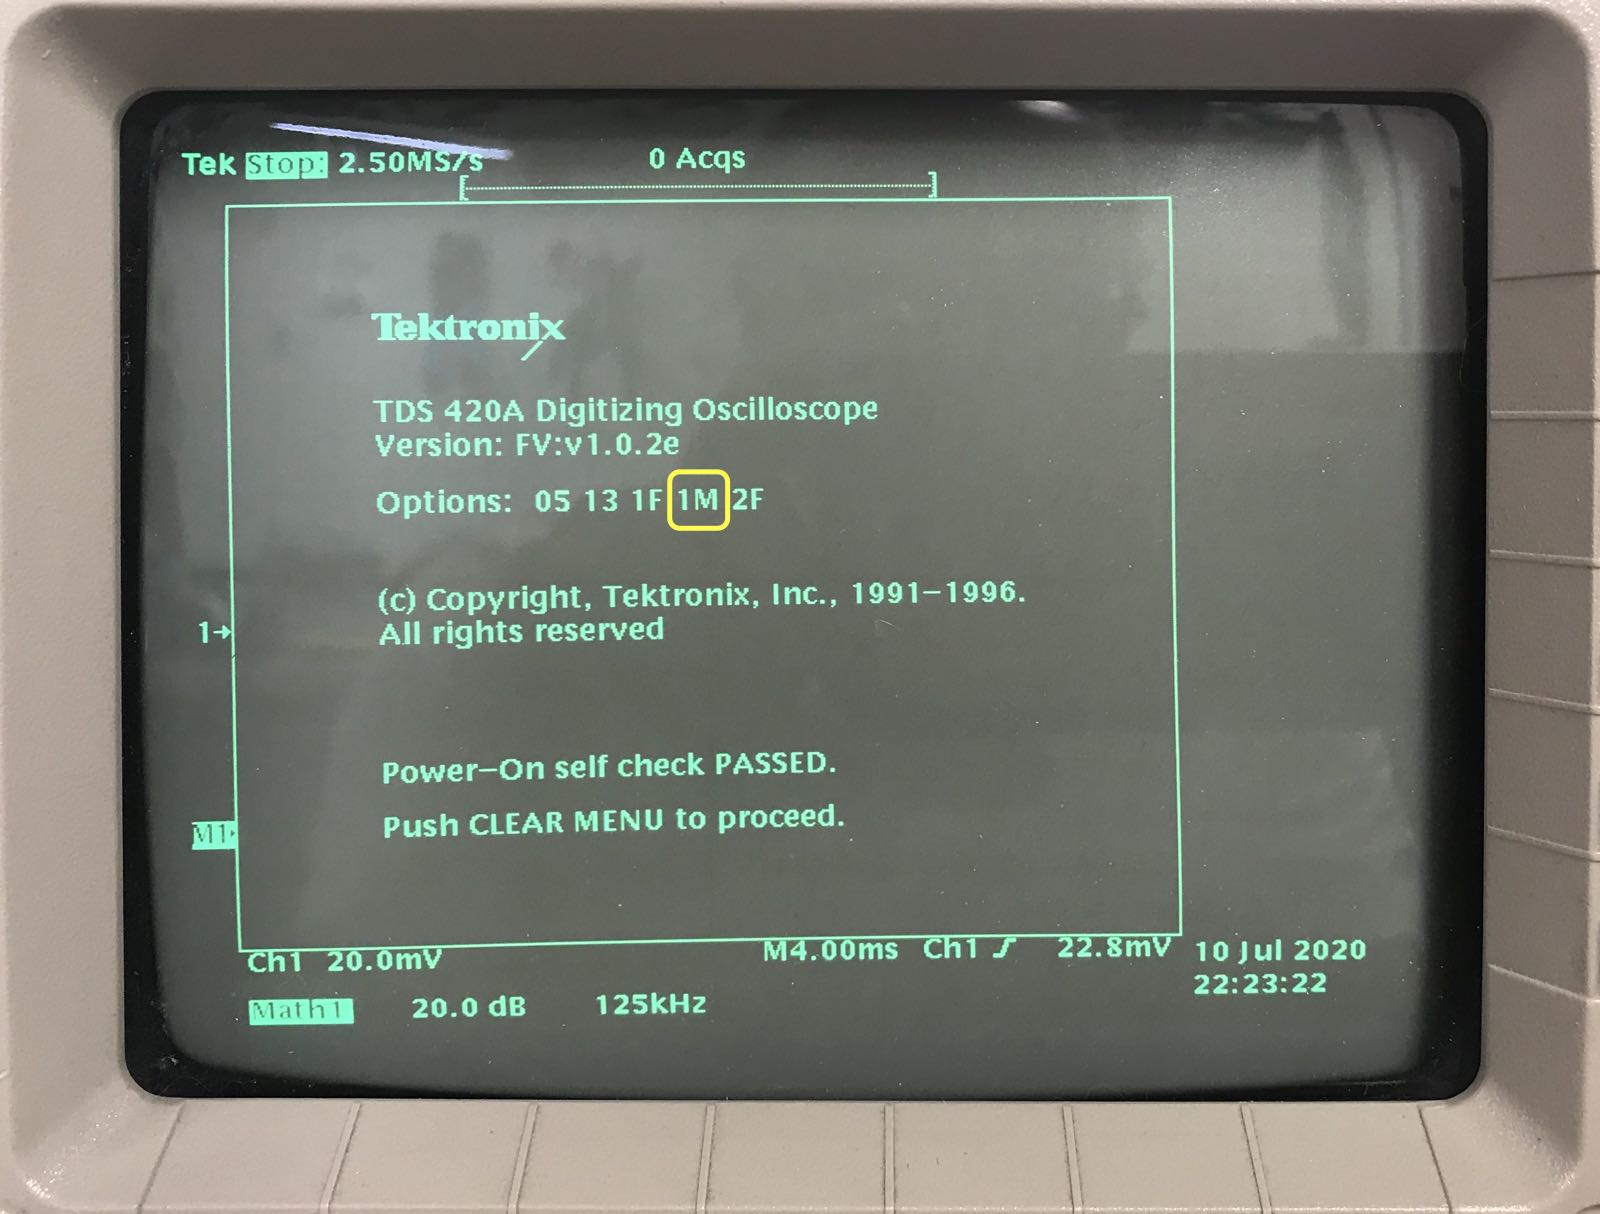
The scope bootup screen looks good:
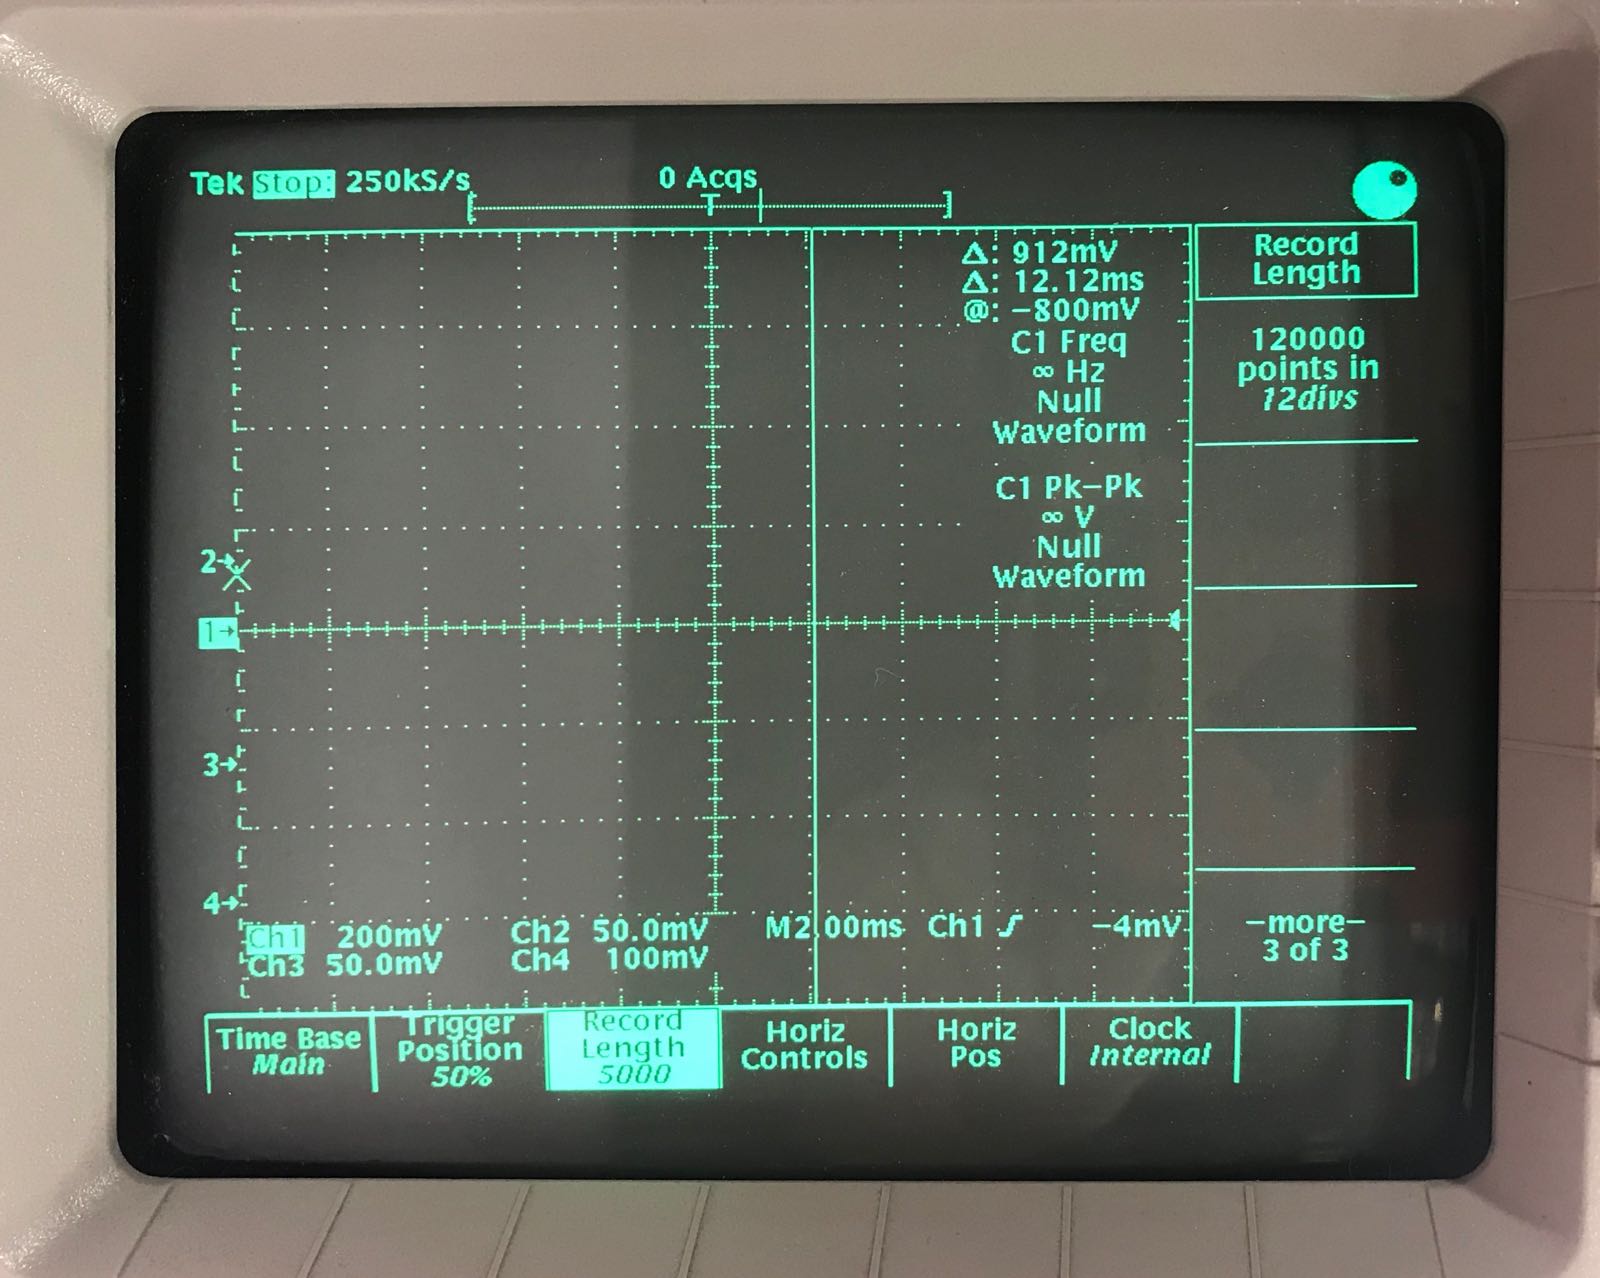
And this formerly grayed out 12000 points menu option is now available:
Victory at Last!
Conclusion
The TDS 420A is an old oscilloscope, and even with those 3 new options enabled, it’s far inferior to my Siglent 2304X or even my HP 54825A (Windows 95!) loaner.
120K sample points is obviously better than 30K, but it still pales in comparison to the 140M sample points of the Siglent.
So what then was the point of this whole exercise?
I got a close up view of oscilloscope internals, I learned Ghidra from scratch and applied it on a real, non-trival project, I added RAM to a 25 year old oscilloscope and it worked, I spent tons of late night hours decoding firmware, and I had an unreasonable amount of fun doing so.
I even started to appreciate the Tektronix user interface a little bit!
It was time well spent.
For now, the scope will remain on my bench while I start adding Tektronix support in glscopeclient. That was the whole point of acquiring the scope to being with!
And if it turns out that it’s really too limited for my use, I can always sell it back on eBay, this time with 3 additional features enabled.
References
-
Upgrade Tektronix: FFT analyzer
Story about upgrading the CPU board from 8MB to 16MB on a TDS420 (not the 420A?) and then FFT in the NVRAM.
-
Enabling FFT option in Tektronix TDS 540A oscilloscope
Not very useful for 420A owners: enables FFT by copying NVRAM EEPROM.
-
Specific comment about how to enable options on the 420A over GPIB. I wasn’t able to get this to work for some reason.
-
Enable TDS754D Options using GPIB
Another one about using GPIB.