Brightness and Contrast Adjustment of Tektronix TDS 500/600/700 Oscilloscopes
Introduction
Less than a week after finishing my TDS 684B analog memory blog post, a TDS 684C landed on my lab bench with a very dim CRT.
If you follow the lives the 3-digit TDS oscilloscope series, you probably know that this is normally a bit of death sentence of the CRT: after years of use, the cathode ray loses its strength and there’s nothing you can do about it other than replace the CRT with an LCD screen.
I was totally ready to go that route, and if I ever need to do it, here are 3 possible LCD upgrade options that I list for later reference:
- The most common one is to buy a $350 Newscope-T1 LCD display kit by SimmConn Labs.
- A cheaper hobbyist alternative is to hack something together with a VGA to LVDS interface board and some generic LCD panel, as described in this build report. He uses a VGA LCD Controller Board KYV-N2 V2 with a 7” A070SN02 LCD panel. As I write this, the cost is $75, but I assume this used to be a lot cheaper before tariffs were in place.
- If you really want to go hard-core, you could make your own interface board with an FPGA that snoops the RAMDAC digital signals and converts them to LVDS, just like the Newscope-T1. There is a whole thread about this the EEVblog forum.
But this blog post is not about installing an LCD panel!
You should first try to increase the brightness of the CRT by turning a potentiometer on the display board. It sounds like an obvious thing to try, but I didn’t find a lot of references to it online. And in my case, it just worked.
Finding the Display Tuning Potentiometers
In the Display Assembly Adjustment section of chapter 5 of the TDS 500D, TDS 600C, TDS 700D and TDS 714L Service Manual, page 5-23, you’ll find the instructions on how to change rotation, brightness and contrast. It says to remove the enclosure and then turn some potentiometers, but I just couldn’t find them!
They’re supposed to be next to the fan. Somewhere around there:
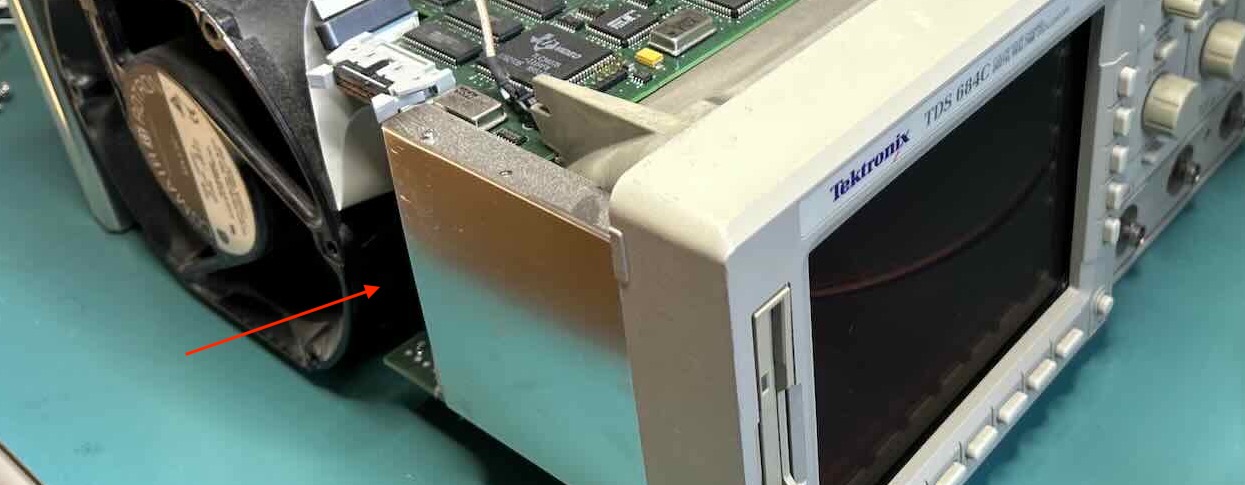
Well, I couldn’t see any. It’s only the next day, when I was ready to take the whole thing apart, that I noticed these dust covered holes:
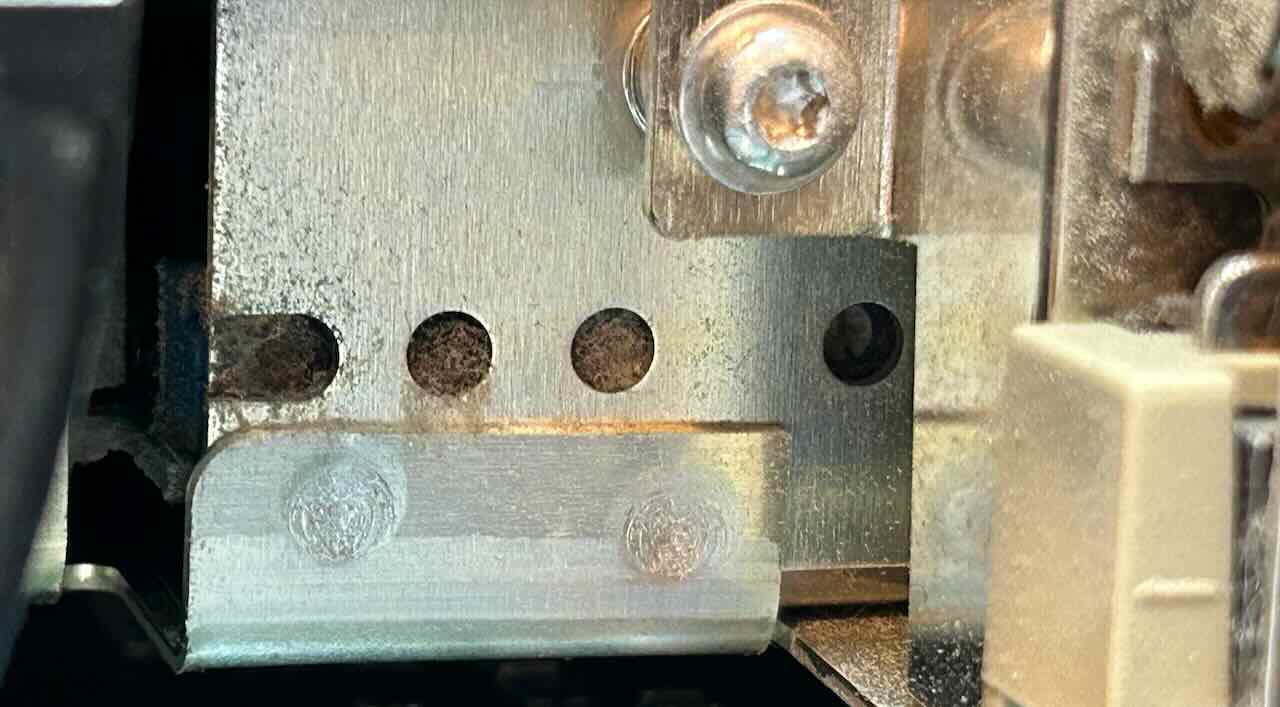
A vaccum cleaning operation later revealed 5 glorious potentiometers:

From left to right:
- horizontal position
- rotation
- vertical position
- brightness
- contrast
Rotate the last 2 at will and if you’re lucky, your dim CRT will look brand new again. It did for me!
The Result
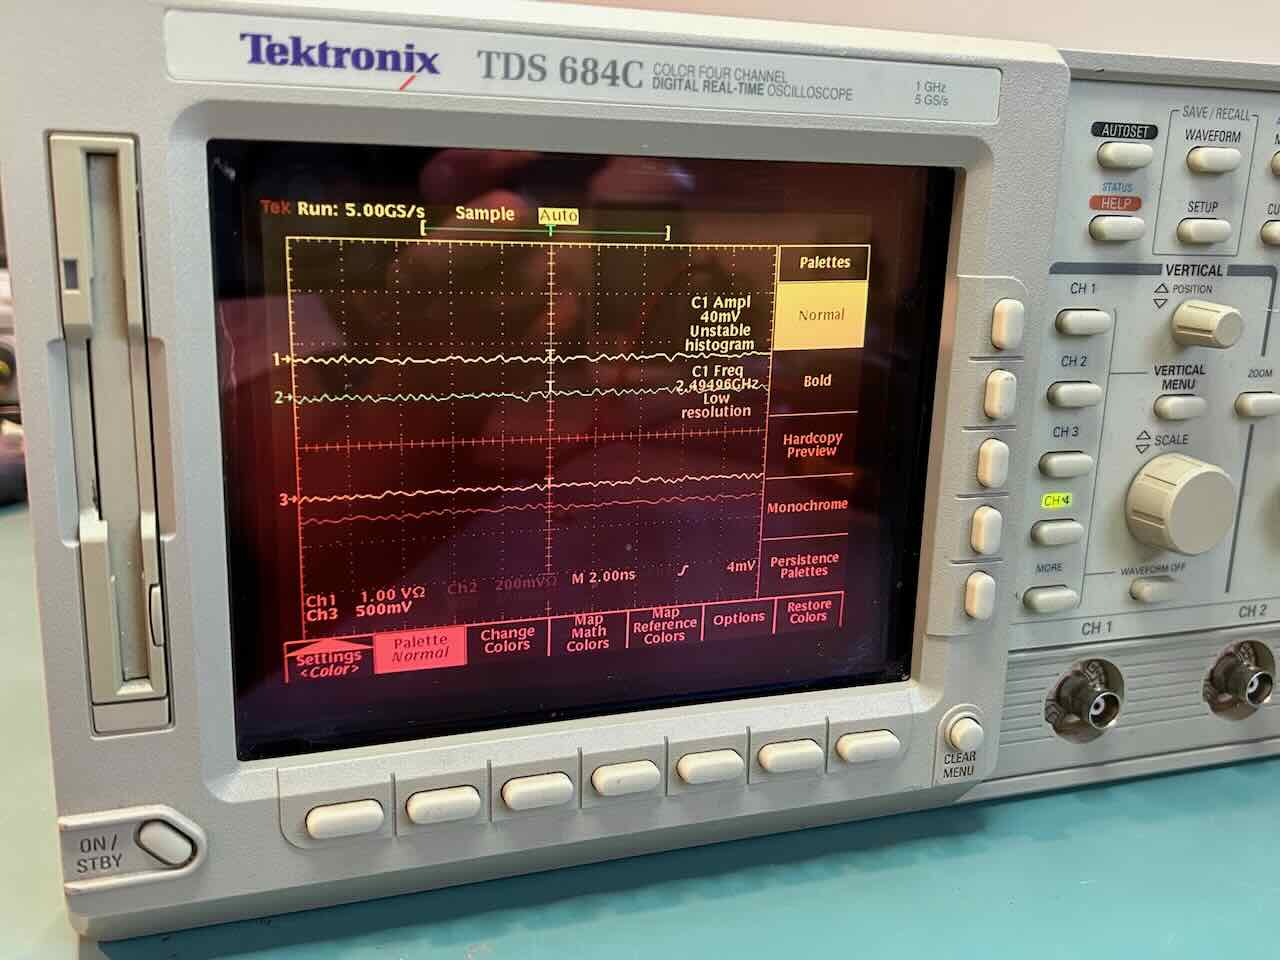
The weird colors in the picture above are a photography artifact that’s caused by the Tektronix NuColor display technology: it uses a monochrome CRT with an R/G/B shutter in front of it. You can read more about it in this Hackaday article. In real life, the image looks perfectly fine!
Hardcopy Preview Mode
If dialing up the brightness doesn’t work and you don’t want to spend money on an LCD upgrade, there is the option of switching the display to Hardcopy mode, like this:
[Display] -> [Settings <Color>] -> [Palette] -> [Hardcopy preview]
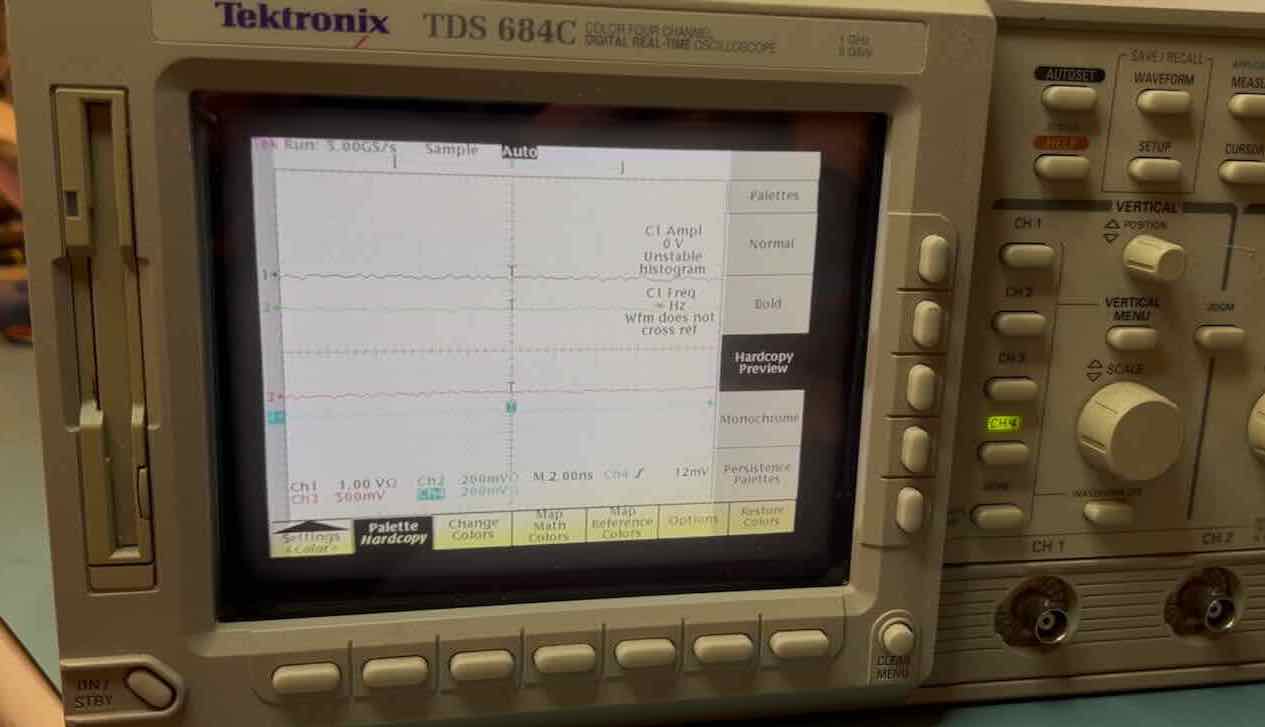
Instead of a black, you will now get a white background. It made the scope usable before I made the brightness adjustment.