The VexRiscV CPU - A New Way to Design
Table of Contents
- Table of Contents
- Introduction
- Designing a CPU the Traditional Way
- A Quick Rehash of SpinalHDL
- The VexRiscV Pipeline Plugin Architecture
- The Barrel Shifter and Multiplier Plugins
- Additional Goodies
- Disadvantages
- Conclusion
Introduction
In an earlier blog post, I made a few references to the VexRiscV, a RISC-V CPU that has been implemented completely in SpinalHDL by Charles Papon (who’s also the creator of SpinalHDL.)
At some point, I created the rv32soc project, where I wanted to compare different RISC-V CPUs against eachother. I also used the VexRiscV as a point of comparison against my own RISC-V CPU, the MR1. The MR1 was no match for the VexRiscV by any possible metric.
In the process, I spent some time trying to understand the internals of the CPU, and the way it was designed. I came back incredibly impressed. Not only does the VexRiscV CPU provide a ton of performance and functionality knobs, it implements those in a way that truly shows the limits of traditional RTL languages such as Verilog, SystemVerilog and VHDL.
The VexRiscV code demonstrates how one can write RTL that is as efficient as the most optimized Verilog, yet at the same time extremely configurable.
It is no surprise that the VexRiscV won the first prize of the RISC-V Summit softCore contest.
That said: understanding the VexRiscV code base is not for the faint of heart. It leverages all the features of a traditional objected programming language, Scala, to make the magic happen. And because it does not follow the standard practices by which a CPU is designed, it took me a while to really get it.
This goal of this article to explain why the VexRiscV design is so important and innovative.
Designing a CPU the Traditional Way
In order to understand the novelty of the VexRiscV design, it’s helpful to contrast it against traditional CPUs of the same class: a standard pipeline, in-order, single issue etc.
There are plenty of open source examples.
If you’re reading this you probably have some understanding about the standard parts of the traditional RISC cpu: instruction processing is split up into a number of pipeline stages. Each stage is responsible for part of the whole operation. The more stages, the lower that amount of work that needs to be done per stage, which reduces the depth of the logic per stage, which ultimately results in a design that can run at a higher clock speed.
The original RISC CPU had 5 stages, but you can find CPU with 2 to 11 (and more) pipeline stages.
It should come as no surprise that the design of such CPUs matches this pipelined architecture: if the CPU has a ‘FETCH’ stage, the RTL will have a corresponding ‘FETCH’ Verilog module as well.
A good example of a well-designed open source RISC-V CPU is the RI5CY CPU of the pulp platform. If you look at the source code directory, you can immediately see a lot of the expected functional blocks: there’s riscv_if_stage.sv, riscv_id.sv, riscv_ex_stage and so forth.
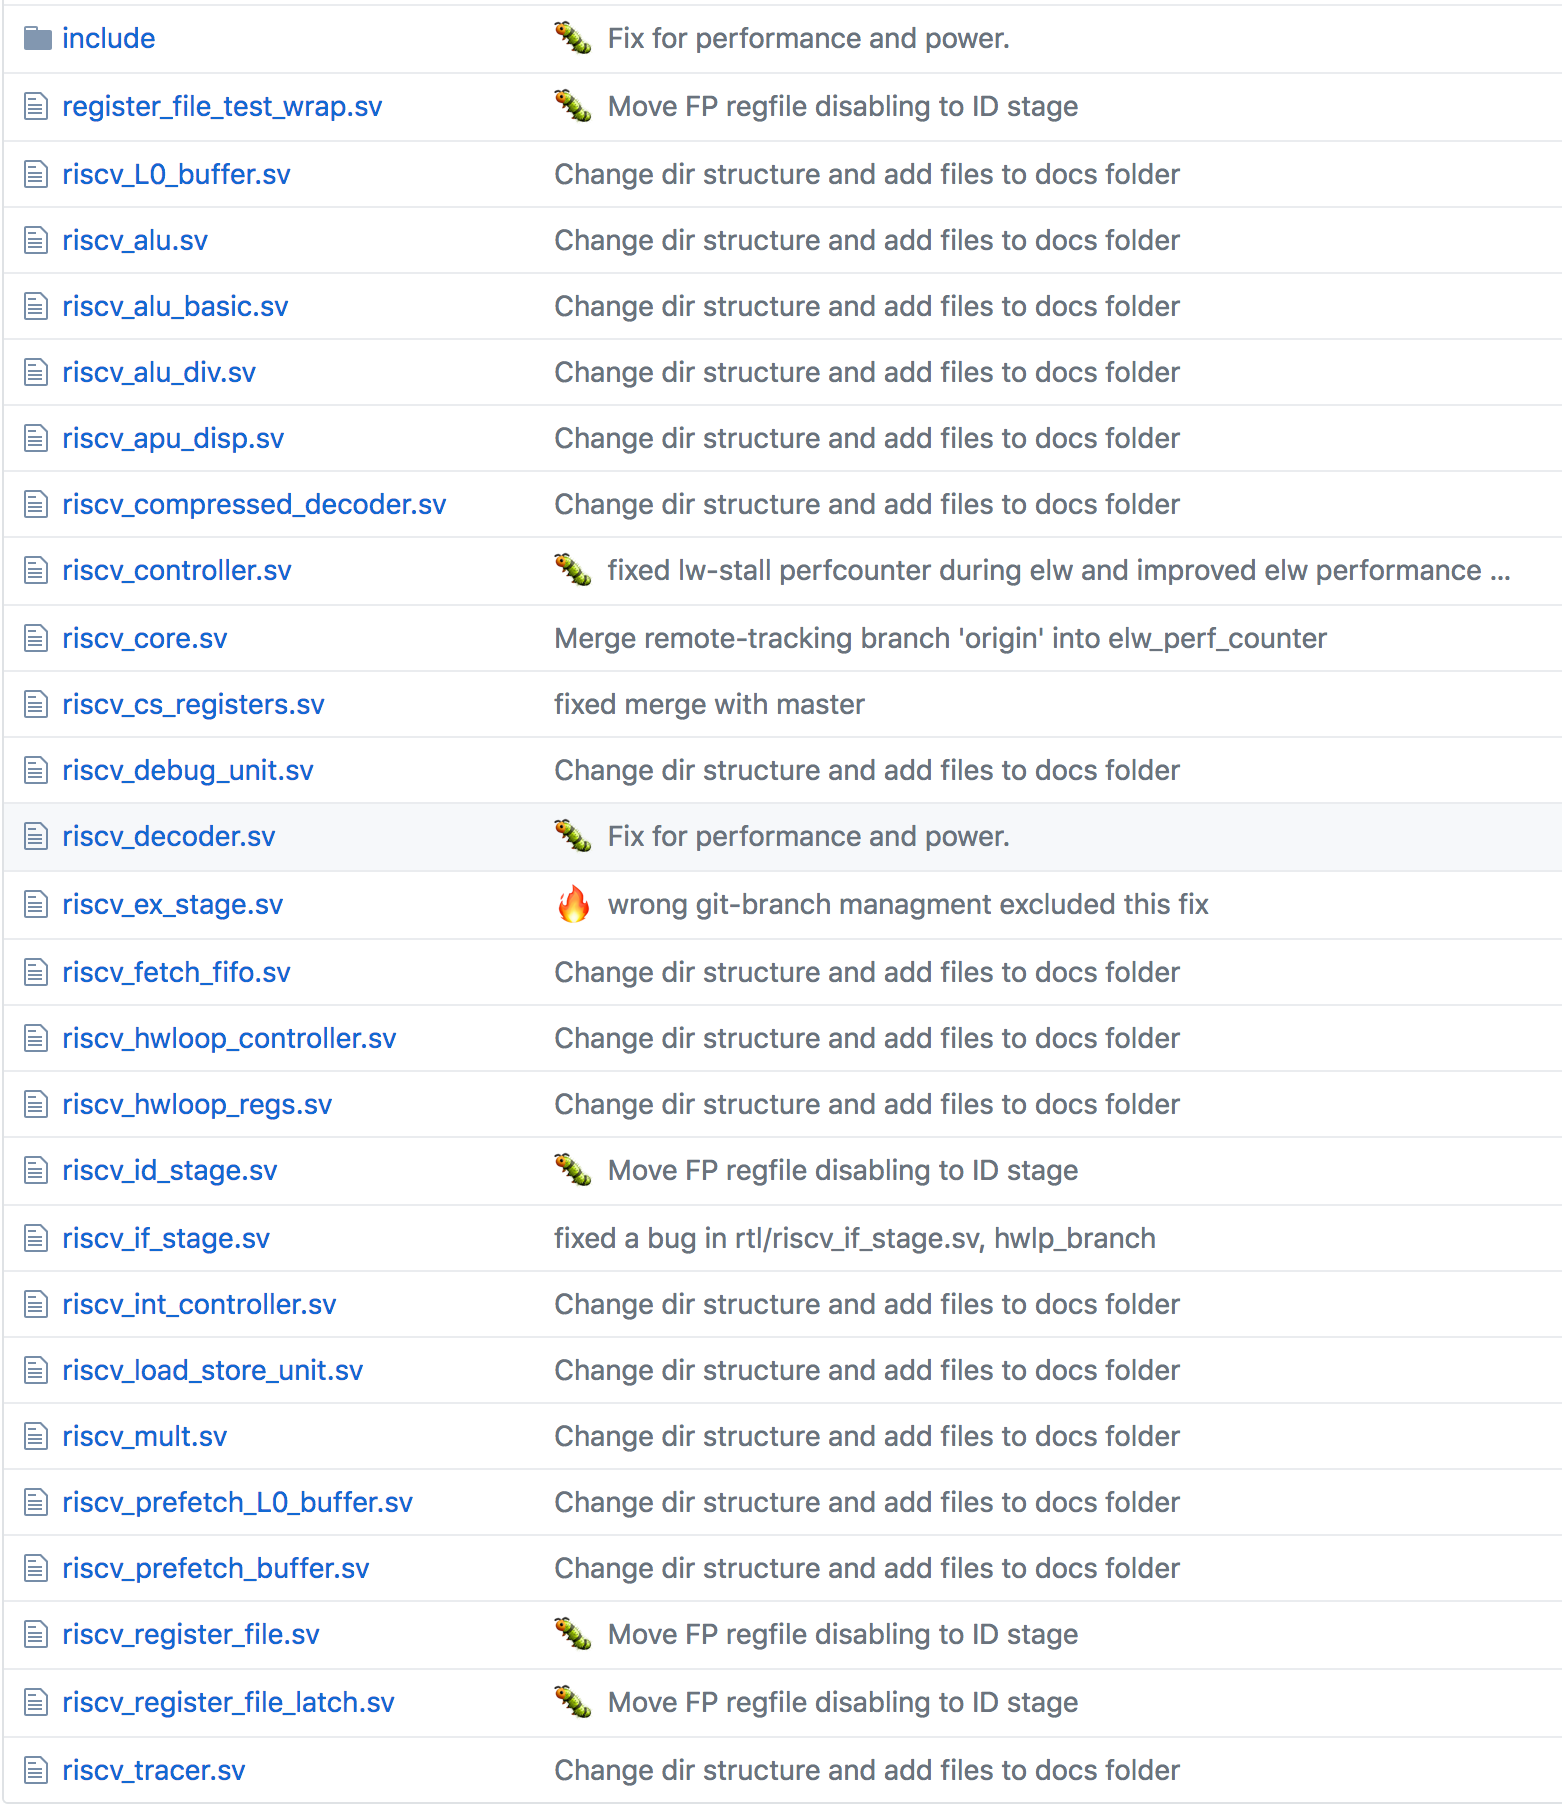
All these traditional functional blocks are tied together in riscv_core.sv.
Perfect, right?
Well, no. It’s not a bad way of doing things, but it does have a few issues: since everything is grouped by pipeline stage, it is not grouped by functionality.
Take a multiplier, for example. The MUL instruction is decoded in the
decoder
module which resides under id.
The result is mul_operator_ex_o,
along with a bunch of additional signals such as operands, and various control signals.
In riscv_core.sv, this signal is then connected from the id stage to the ex
stage which it enters as
mult_operator_i.
Inside the ex stage, it’s then routed to
the riscv_mult
where the actual multiplication happens, with the result_o signal as output.
Back in riscv_ex.sv, it’s connected to mult_result
where it enters a multiplexer
that selects between different ALU results into the regfile_alu_wdata_fw_o signal which goes back to the
id block, where it’s used to
write the result
back into the register file and in the forwarding logic.
Phew! That’s a lot hierarchy to travel. All these signals need to be assigned to ports, wired up etc. With more modern RTL languages like SystemVerilog, you can reduce the amount of wiring up by grouping things into structs or interfaces.
But what’s common everywhere is that the implementation of a specific piece of functionality, a multiplication, is spread among many different files.

An FPGA often has hardware multiplication blocks that can run at very high clock speeds. However, those speeds can only be reached if the multiplier is surrounded by registers: one at the input, and one at the output.
If we want to maintain a throughput of one instruction per clock, but also spread the multiplication over 2 clock cycles, we need to do something like this:

Furthermore, these multipliers are usuall restricted to 18x18 bits. If you need a 32x32 multiplier, as is the case for most 32-bit CPUs, you need to construct them with multiple 18x18 multiplier blocks.
To reach the desired clock speeds, that often means even more register stages. For example, like this:

In the 5 stage pipeline above, we’re abusing the MEMORY and WRITEBACK stage to break a timing path and improve the clock speed of the CPU. We also need to make changes to the FETCH and the DECODE stages to the forwarding and hazard checking logic.
The more we do this, the more files we need to touch, and the more ports need to be added.
That’s not a huge deal if you have a very clear, well defined architecture in mind, but it quickly becomes a maintenance nightmare if you want something highly configurable: if the clock speed requirements of the CPU are modest, you might want to have the multiplication located entirely in the EXECUTE stage and save on resources, while choosing the last option for a very fast one that uses more logic.
Which raises the question: is there a better way?
A Quick Rehash of SpinalHDL
If you don’t feel like reading my SpinalHDL blog post, let me repeat the most important aspect:
It’s a Scala library with hardware primitives that can be connected together.
A traditional language like Verilog works as follows:
Hardware described in Verilog -> Verilog Parser -> Hardware Primitives
The ability to describe hardware is entirely determined by the features of the Verilog language. If the language doesn’t support certain options, you have to resort to tricks to make them happen.
A really simple example are module ports: your CPU may have an optional JTAG debug interface. It’s needed in some configurations, but not in others.
Verilog doesn’t provide any core language features to have optional ports: there is no if generate
equivalent to do that. So either you ignore the JTAG ports on the configuration that doesn’t need them.
Or you use ugliness like this to exclude those ports:
module cpu(
    ...
`ifdef JTAG
    input  jtag_tck,
    input  jtag_tms,
    input  jtag_tdi,
    output jtag_tdo,
`endif
    ...
With something like SpinalHDL, it goes like this:
Scala program to wire together hardware primitives -> Execute Program -> Generate Hardware Primitives
You have full flexibility to wire together those hardware primitives anyway you want.
If you have a configuration that doesn’t need JTAG ports, then you just don’t call the Scala function that creates those IO ports.
This is nicely illustrated in my MR1 RISC-V core:
val rvfi = if (config.hasFormal) RVFI(config) else null
To formally prove the CPU core, an additional IO port is need with an struct that contains a bunch of RVFI signals. But for synthesis or simulation, this IO port is useless.
The if (config.hasFormal) ... else code is regular Scala. The RVFI(config) object is the SpinalHDL Bundle
class that describes a set of signals.
The way to construct hardware is limited by your imagination. You are not bound by the limitations of the Verilog language.
The VexRiscV code takes that approached to the extreme.
The VexRiscV Pipeline Plugin Architecture
The VexRiscV code architecture is built around a set of pipeline stages to which functional objects can be added at will by means of plugins.
You start with a generic Pipeline
object that has stages and plugins.
trait Pipeline {
  type T <: Pipeline
  val plugins = ArrayBuffer[Plugin[T]]()
  var stages = ArrayBuffer[Stage]()
  ...
There is nothing CPU related about this.
A Pipeline object has multiple stages. Items (called Stageable) can be passed along from one stage to the next.
Plugins tie in to the whole pipeline. They can add logic to each stage. They can use one of these
stageables as input for a particular stage of the pipeline, and they can insert new stageables into the
pipeline for the next stage.
The Pipeline object automatically takes care of the management of these stageables. If a plugin requires stageable OP_A in stage EXECUTE, and OP_A was inserted into the pipeline by a different plugin in the DECODE stage, then the Pipeline object will make sure that OP_A gets passed along the pipeline to the DECODE stage.
If the plugin generates a stageable RESULT in the EXECUTE stage and then needs result in the WRITEBACK stage, then the pipeline stage will once again ensure that it gets there, no matter how many intermediate stages there are between EXECUTE and WRITEBACK.
In the case of the VexRiscV, the pipeline stages are defined here:
class VexRiscv(val config : VexRiscvConfig) extends Component with Pipeline{
  type  T = VexRiscv
  import config._

  //Define stages
  def newStage(): Stage = { val s = new Stage; stages += s; s }
  val decode    = newStage()
  val execute   = newStage()
  val memory    = ifGen(config.withMemoryStage)    (newStage())
  val writeBack = ifGen(config.withWriteBackStage) (newStage())

...
You can see that the VexRiscV is a subclass of Component (a SpinalHDL hardware primitive container that corresponds to a Verilog module) with Pipeline characteristics.
There is always a decode and execute stage, but the memory and writeBack stage are optional, depending
on the desired configuration. The order of the stages is defined by the order in which newStage()
is called.
Once the stages of the CPU have been defined, it’now up to plugins to add logic to the pipeline!
And there are many: every aspect of the CPU is encapsulated in one!

Let’s take a closer look at two of them…
The Barrel Shifter and Multiplier Plugins
The VexRiscV has multiple options to implement the RISC-V shift left and shift right instruction.
They are all implemented in ShiftPlugins.scala.
LightShifterPlugin
implements an interative shifter that shifts left or right one bit at a time, for low performance but also
low resource usage.
FullBarrelShifterPlugin
implements a traditional barrel shifter, split up into 3 operations:
- in case of a left shift operation, it first reverses the input
- it performs a right shift with variable number of steps
- in case of a left shift operation, it reverses the output again.
class FullBarrelShifterPlugin(earlyInjection : Boolean = false) extends Plugin[VexRiscv]{
...
At the top of the plugin, we can see the earlyInjection configuration option: this determines
whether or not the final reverse operation is placed in the same pipeline stage as the initial
reverse and barrel shift, or if it’s placed in the next stage. Placing it in the next
stage increases area (you need to pass the intermediate result through the pipeline, which
costs additional flip-flops), but it also reduces the logic depth. And since barrel shifters don’t
map very well to FPGA LUTs, that might very well reduce a critical timing path.
Let’s see how this is implemented. Let’s start with the initial reverse and shift:
    execute plug new Area{
      import execute._
      val amplitude  = input(SRC2)(4 downto 0).asUInt
      val reversed   = Mux(input(SHIFT_CTRL) === ShiftCtrlEnum.SLL, Reverse(input(SRC1)), input(SRC1))
      insert(SHIFT_RIGHT) := (Cat(input(SHIFT_CTRL) === ShiftCtrlEnum.SRA & reversed.msb, reversed).asSInt >> amplitude)(31 downto 0).asBits
    }
First we tell that the blob of logic (grouped into an ‘Area’) should be placed in the EXECUTE stage.
The shift amplitude is fetched from the pipeline with input(SRC). The shift direction is fetched with input(SHIFT_CTRL).
Meanwhile, the result is inserted in the pipeline with insert(SHIFT_RIGHT).
The second part, the
reversing back of the SHIFT_RIGHT result looks like this:
    val injectionStage = if(earlyInjection) execute else memory
    injectionStage plug new Area{
      import injectionStage._
      switch(input(SHIFT_CTRL)){
        is(ShiftCtrlEnum.SLL){
          output(REGFILE_WRITE_DATA) := Reverse(input(SHIFT_RIGHT))
        }
        is(ShiftCtrlEnum.SRL,ShiftCtrlEnum.SRA){
          output(REGFILE_WRITE_DATA) := input(SHIFT_RIGHT)
        }
      }
The first line is key here: based on that configuration parameter earlyInjection, the if-statement
places the following blob of logic either in the EXECUTE stage or the MEMORY stage!
Once again, input(SHIFT_CTRL) is fetched from the pipeline to determine whether a shift needs to be made.
And input(SHIFT_RIGHT) is used to generate REGFILE_WRITE_DATA which is then inserted in the pipeline.
And here’s the beautiful part: if earlyInjection is true, input(SHIFT_RIGHT) will
translate to plain combinatorial assignment operation to the data inserted earlier with
insert(SHIFT_RIGHT). However, if earlyInjection is false, the Pipeline object will
correctly insert a register stage as needed.
The multiplier is implemented similarly with MulPlugin.scala:
4 sub-multiplications are performed in the EXECUTE stage. Some partial results are added in the MEMORY stage. And the final result is created in the WRITEBACK stage.
The conceptual code organization looks like this:

All the multiplication code is logically organized in the same file. It’s super easy to replace one implementation by a different one, or leave it out altogether.
Additional Goodies
You may have noticed that both the FullBarrelShifterPlugin and the MultPlugin end with an output(REGFILE_WRITE_DATA) command.
That’s fine: this will be dealt with automatically in a simple way. By default, a pipeline stage will simply pass through
a stageable from the previous stage. This value gets overwritten if a plugin desires to do so. If multiple plugins
overwrite the same stageable in the simple stage, it’s still not a problem because only 1 instruction is active
per stage, and plugins are naturally only supposed to overwrite a stageable when they have been activated.
The instruction decoder, DecodeSimplePlugin, is a piece of magic. It contains a logic optimizer to generate the simplest possible decoding logic.
There is support for riscv-formal to formally prove the generated CPU, though I haven’t tried this.
You can spend hours exploring various aspects of the CPU. I did.
Disadvantages
I can think of 2 major disadvantages:
The learning curve is very, very steep for a traditional RTL designer. That’s mostly because Scala is a rich language, and SpinalHDL/VexRiscV make use of most of this richness. My approach to this is to learn and use SpinalHDL gradually: first by using it as a Verilog replacement that does away with all the verboseness, introducing more complex concepts later on.
But the biggest one to this system used by the VexRiscV is the fact that the generated Verilog is a flat file. That makes it difficult to debug and understand.
Conclusion
Irrespective of whether one will use the VexRiscV and SpinalHDL, I think the implementation is a complete departure from the traditional way of designing RTL. I found going through the code and figuring out how it all worked fascinating and even entertaining.
The VexRiscV is not only amazing in the way its designed, it’s also very high performance for a low amount of resources, with a near infinite amount of configuration options. The difference between a small 0.5 Dhrystone/MHz or a large 1.4 Dhrystone/MHz core is just a few lines of configuration code.
Even if you’re not committed to using SpinalHDL, you can still use it by adding the generated Verilog to your project. That’s what I did here before I started to learn SpinalHDL.
However, since I’ve switched to SpinalHDL for my personal project, the choice is almost obvious: unless there’s a good reason to use my own MR1 core, I’ll use the VexRiscV.