Pano Logic G2 Disassembly
Introduction
I always told that the Pano Logic G2 Spartan-6 LX150 FPGA was not supported by a free Xilinx ISE version. That apparently changed in February 2018 with the release of Xilinx ISE 14.7 for Windows 10.
Suddenly, the Pano Logic G2 becomes very interesting: the FPGA is huge by hobby standards, and the devices are dirt cheap on eBay. It also helps that I once accidentally bought 25 of them ($75 for all, including shipping!) thinking they were G1 devices. :-)
So with out further ado, let’s disassemble those things and see what’s inside!
Disassembly
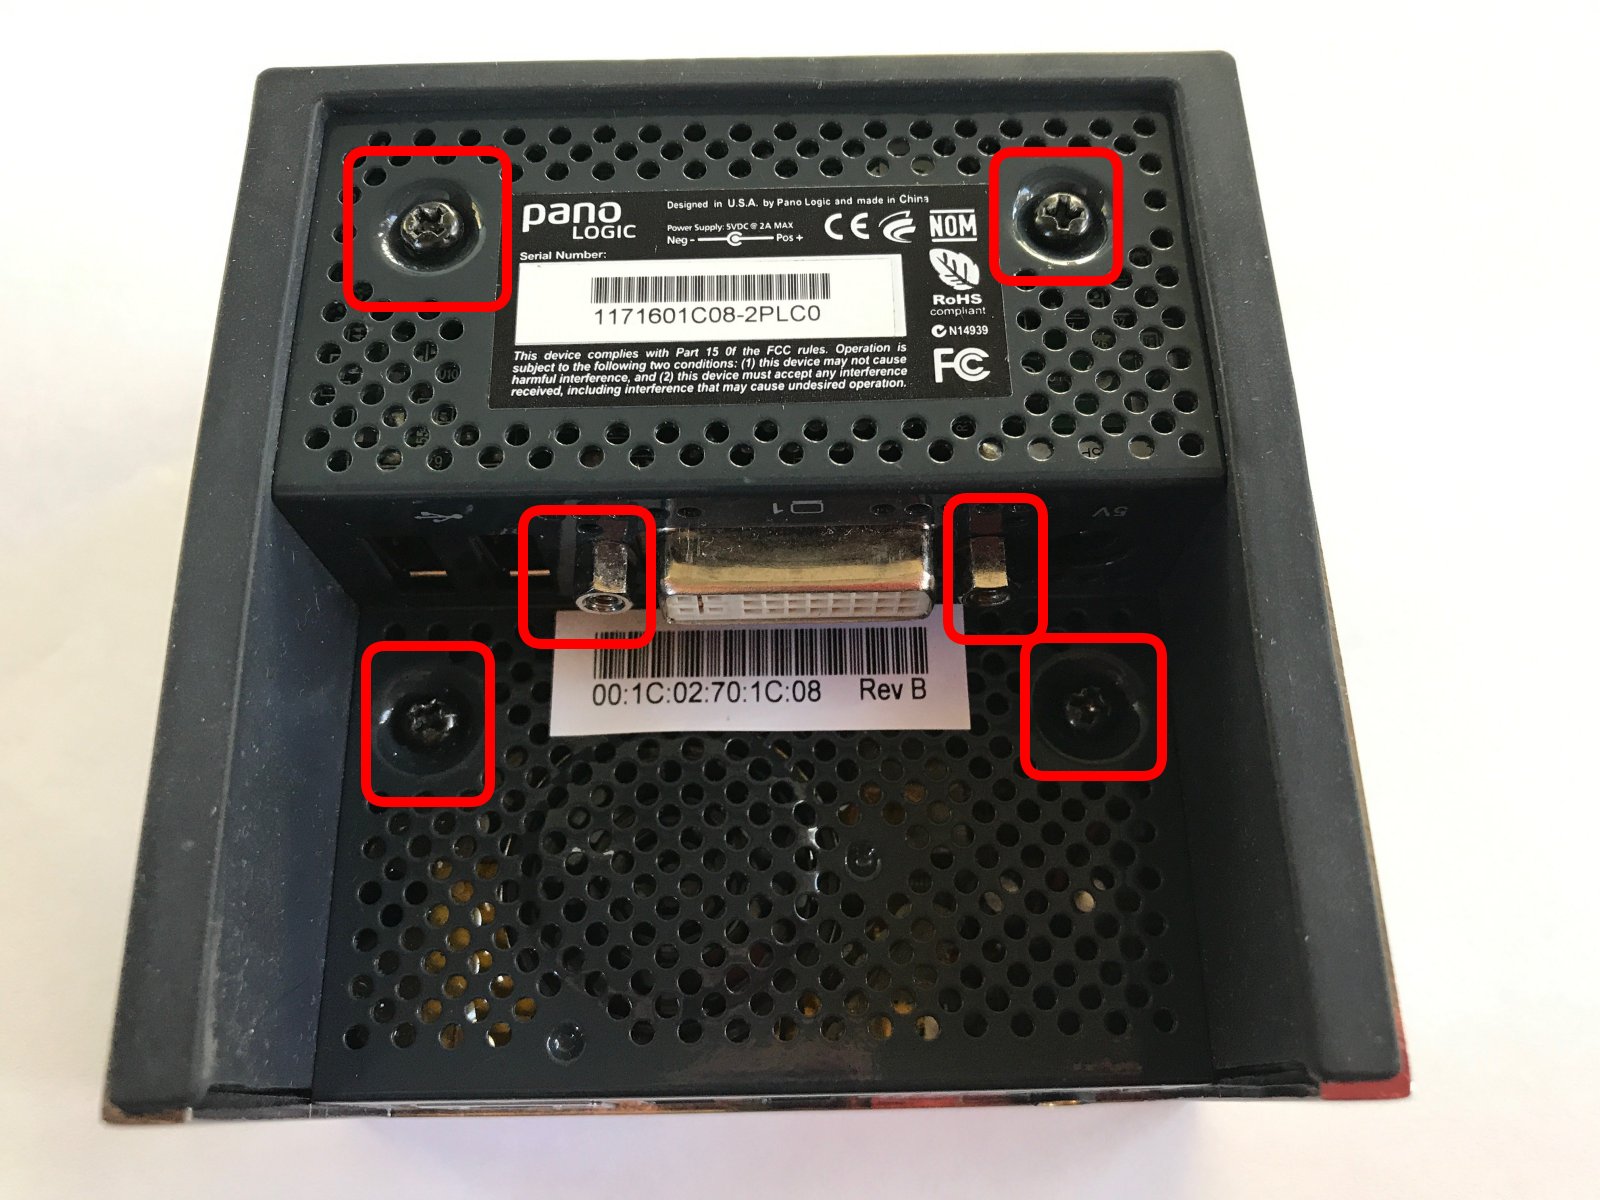
By modern electronics standards (Apple…), these things are a breeze to take apart. All you need is a screw driver, and a inverted Allen key to remove the DVI connector screws.
The Pano G2 has the following ports:
- DVI
- HDMI-micro
- Audio (input and output)
- 4 USB ports
- Ethernet

4 regular screws, 2 VGA inverted hex screws:
Once removed, slide the bottom grill out. The bottom grill has a loudspeaker that’s also attached to the motherboard. So unplug that audio connector once your feel some resistance.
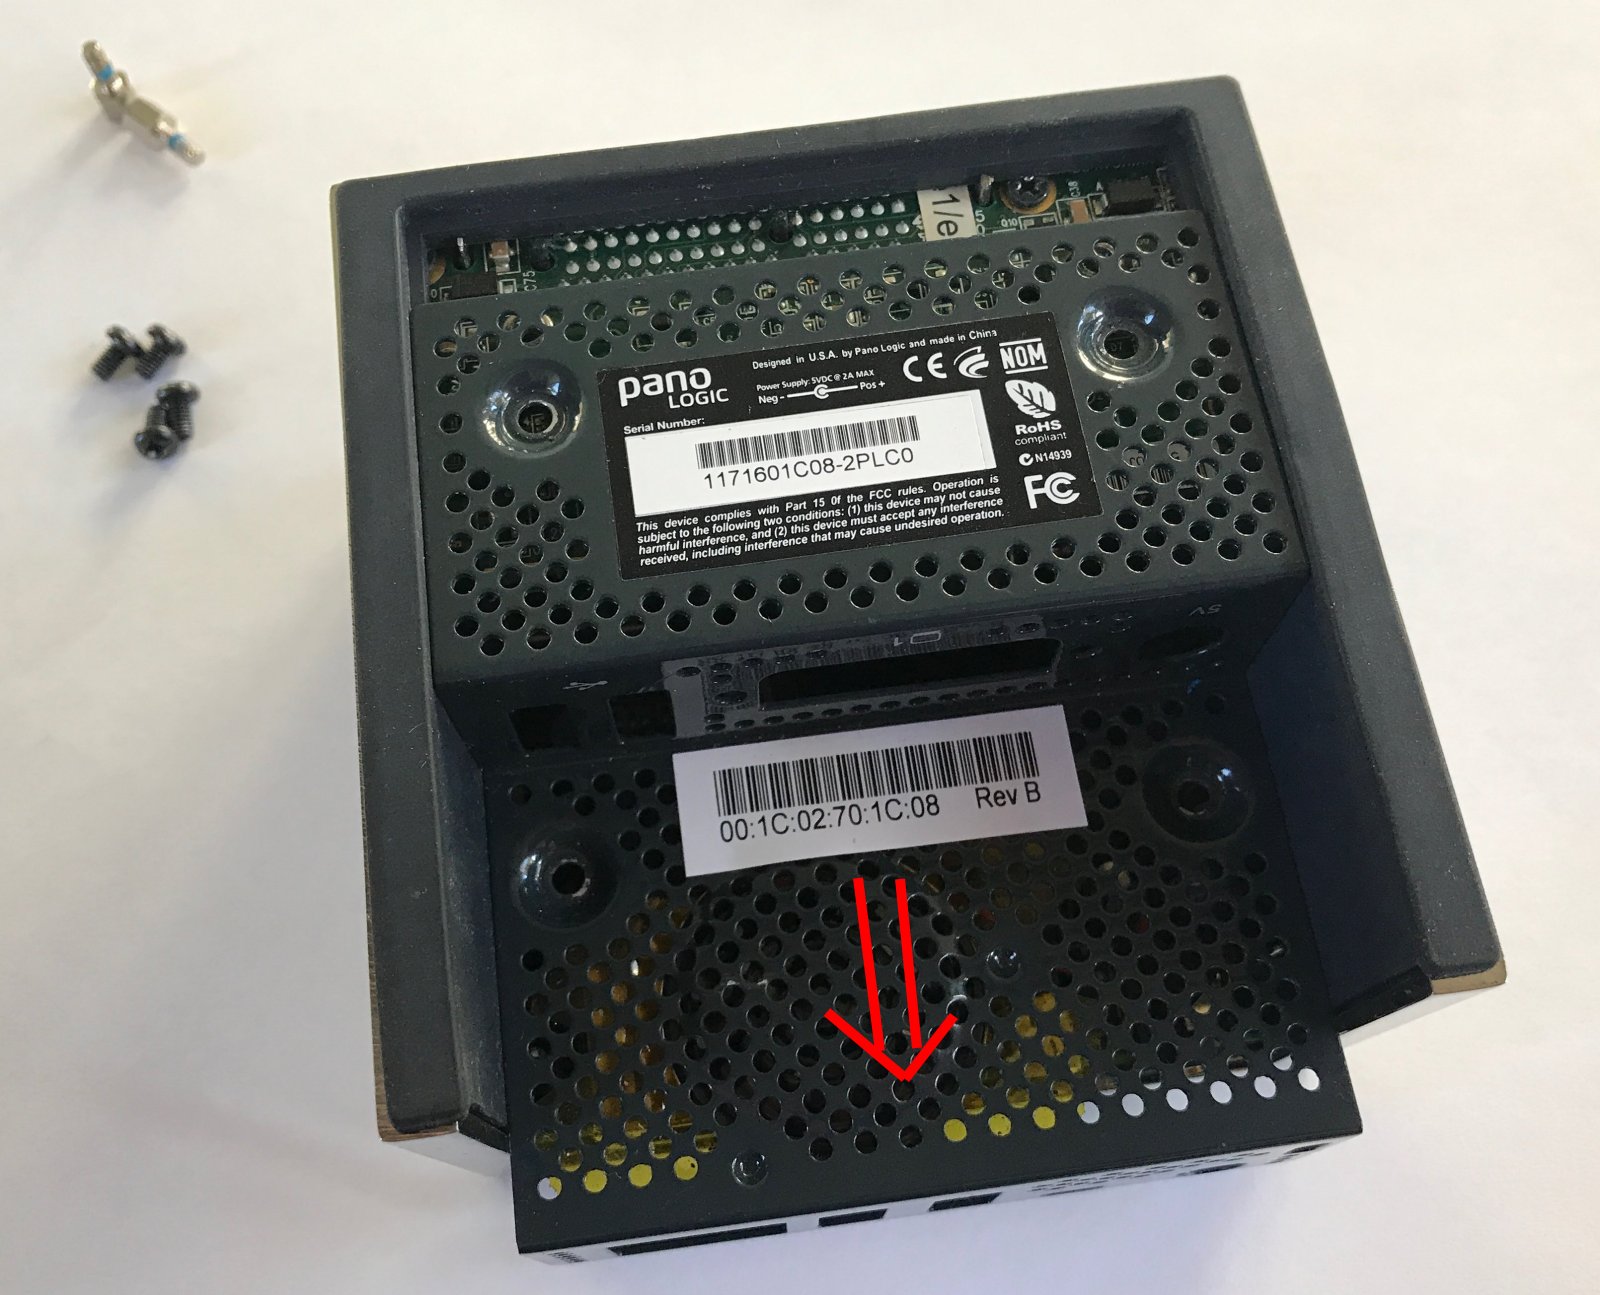
Once the botton grill is removed, you should be able to slide out the rubber siding. There are now 7 screws left. 3 on the auxiliary PCB (which has the DVI connector.) 3 on the main motherboard.
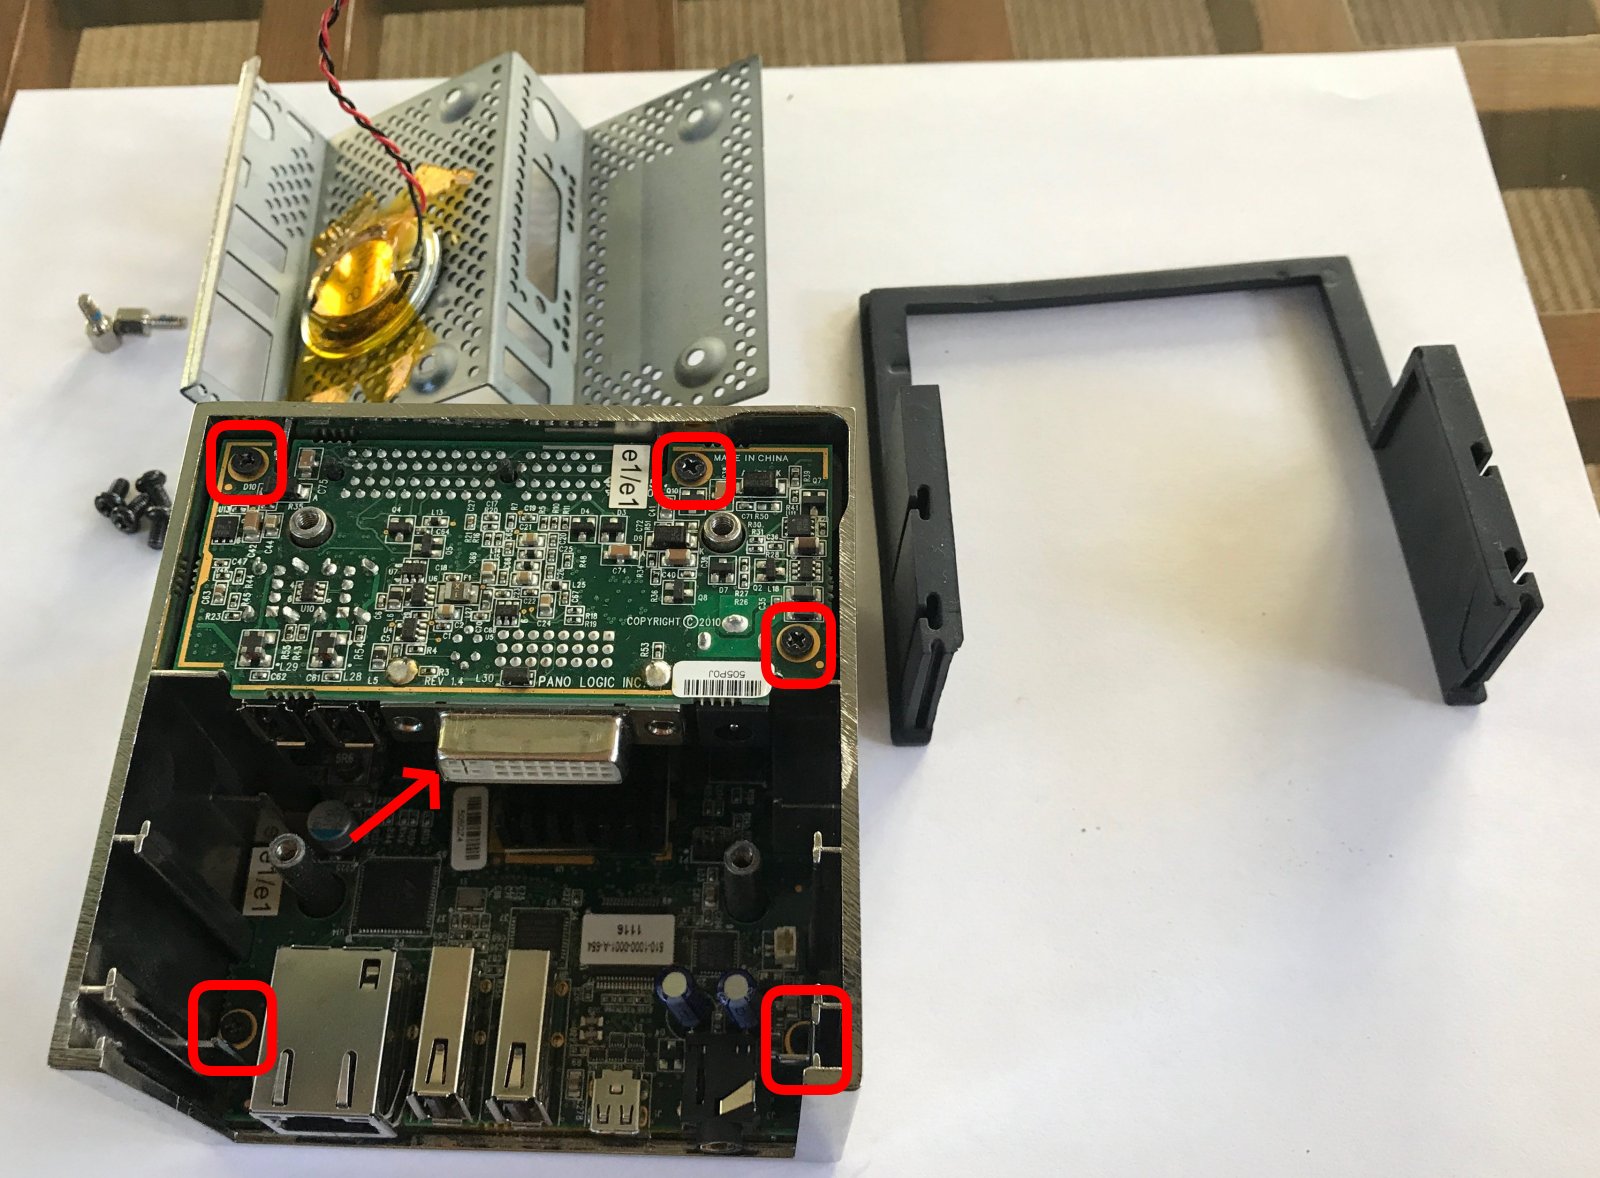
All main components exposed!
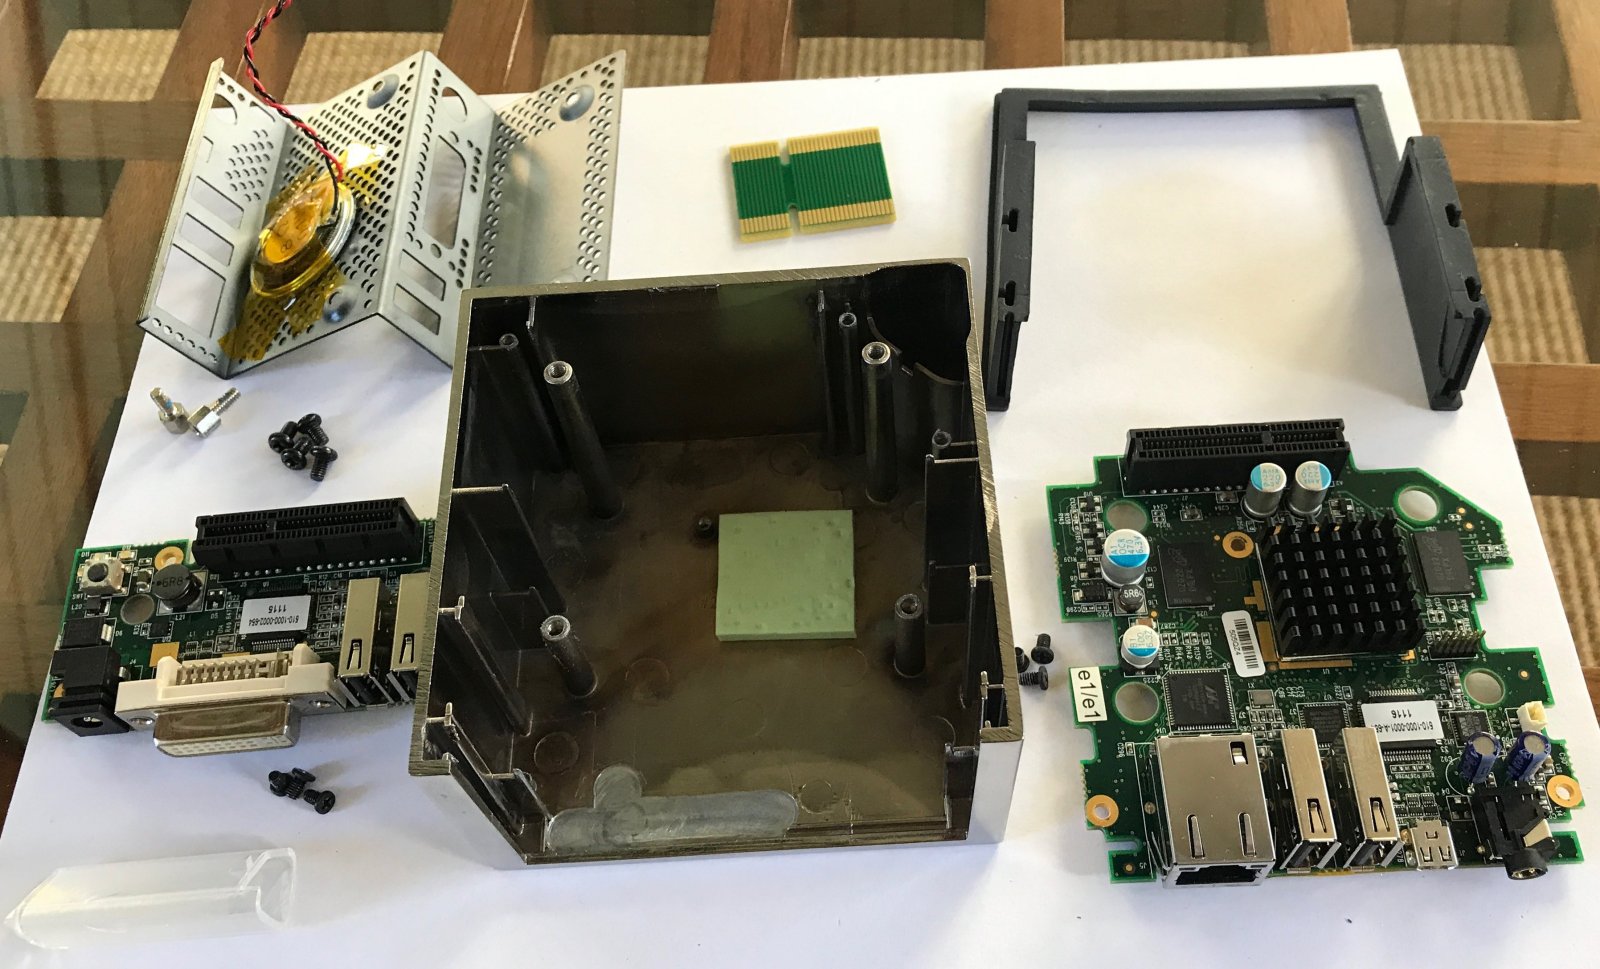
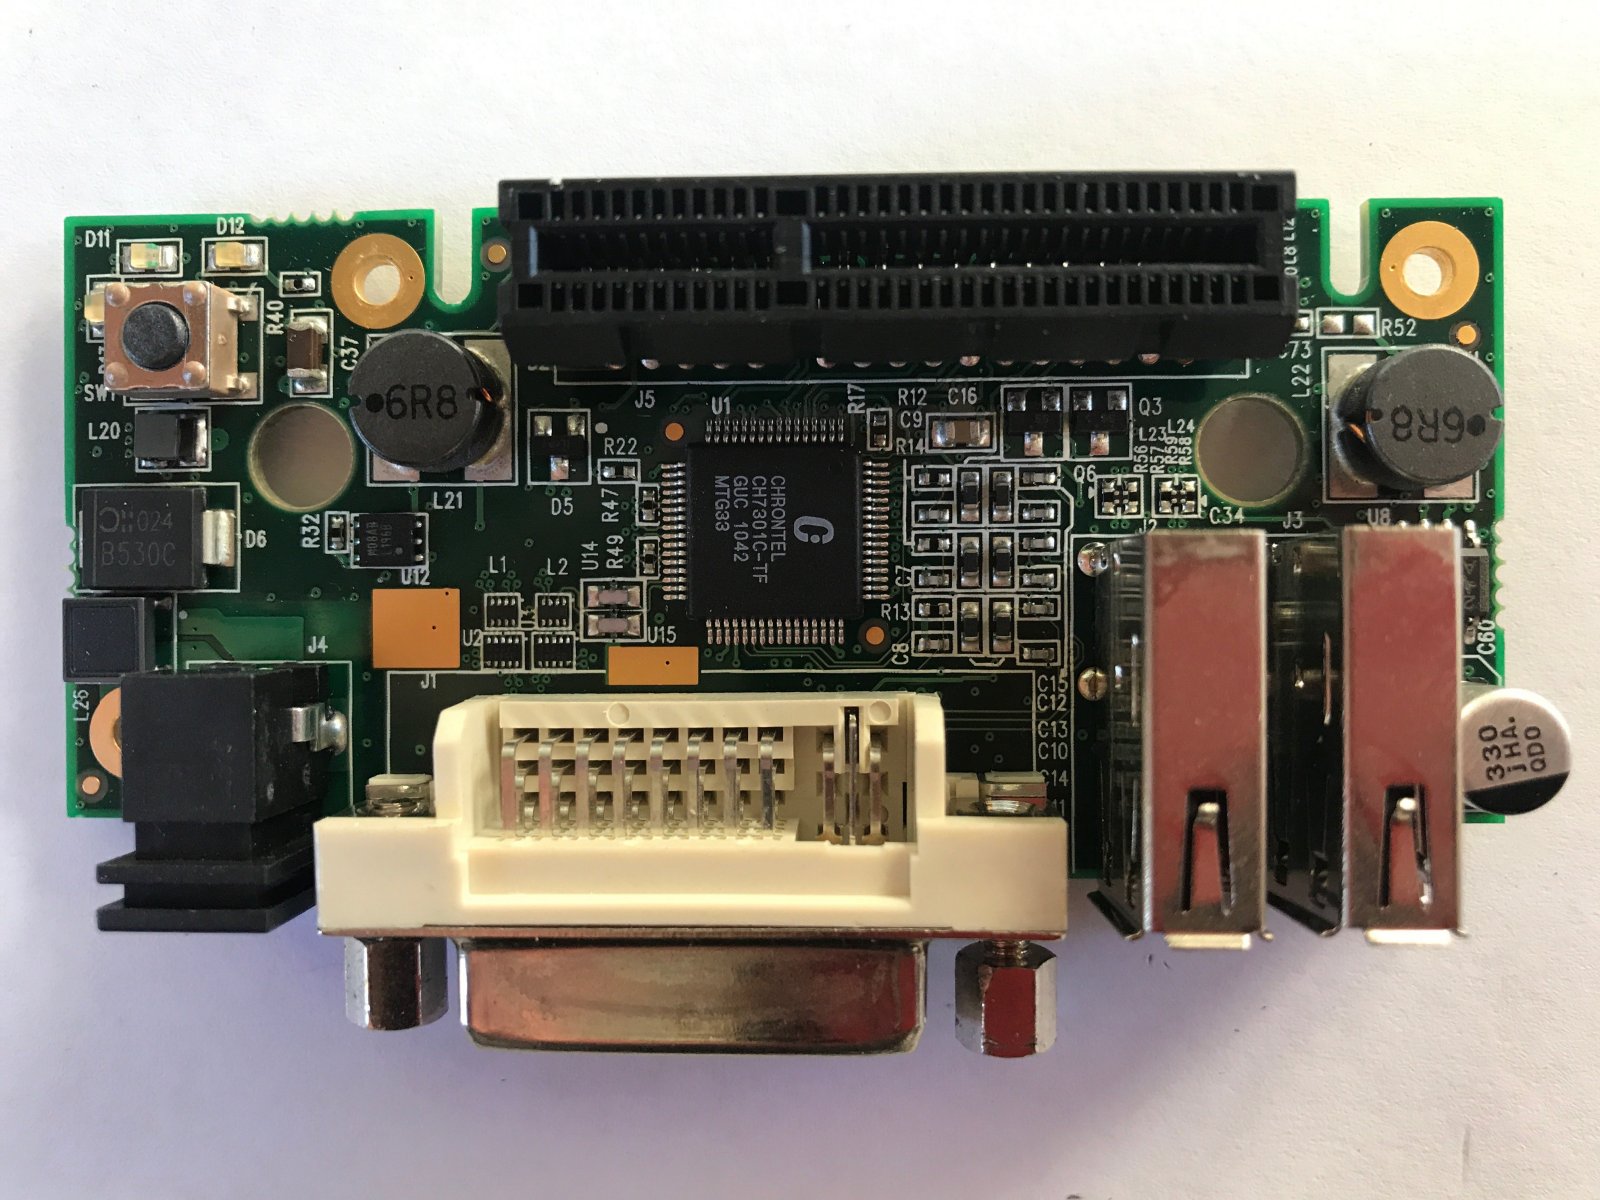
Top of auxiliary PCB. It has a Chrontel chip to drive DVI.
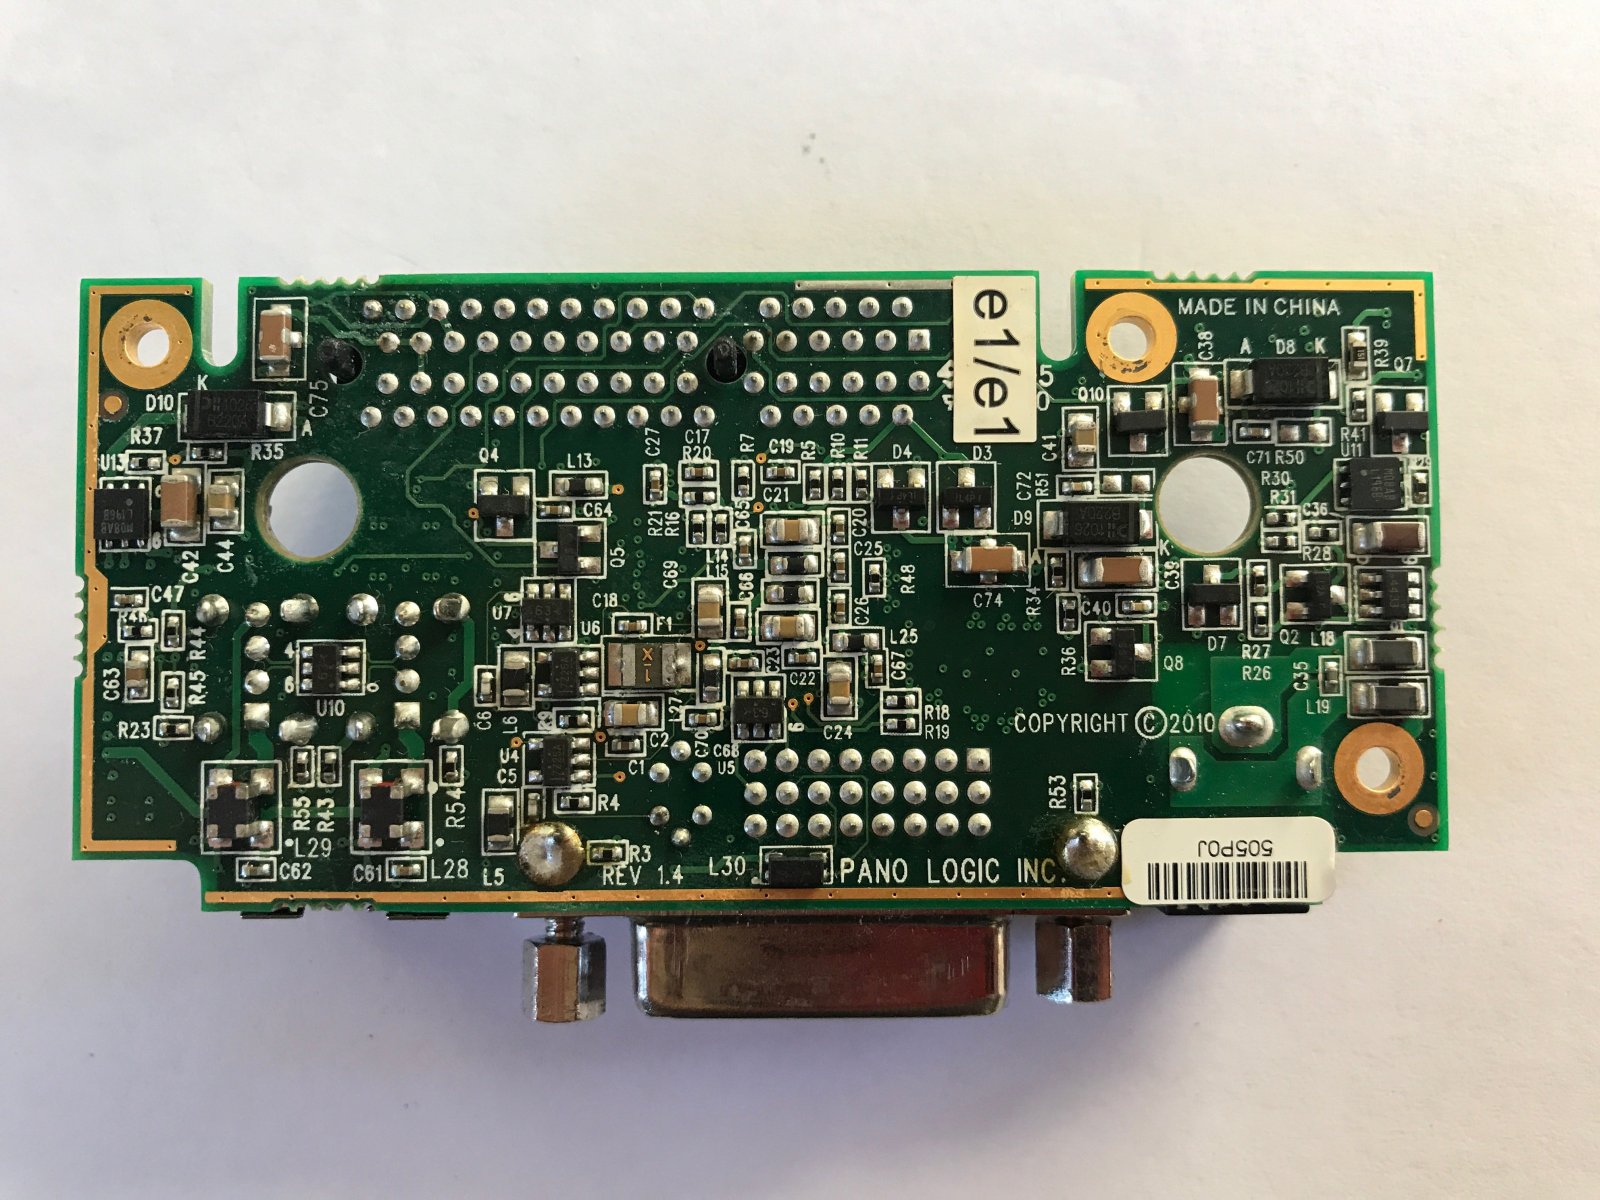
Bottom of auxiliary PCB.
Top of main motherboard. There’s no need to remove the heatsinks of the FPGA if you already knows what’s underneath anyway.
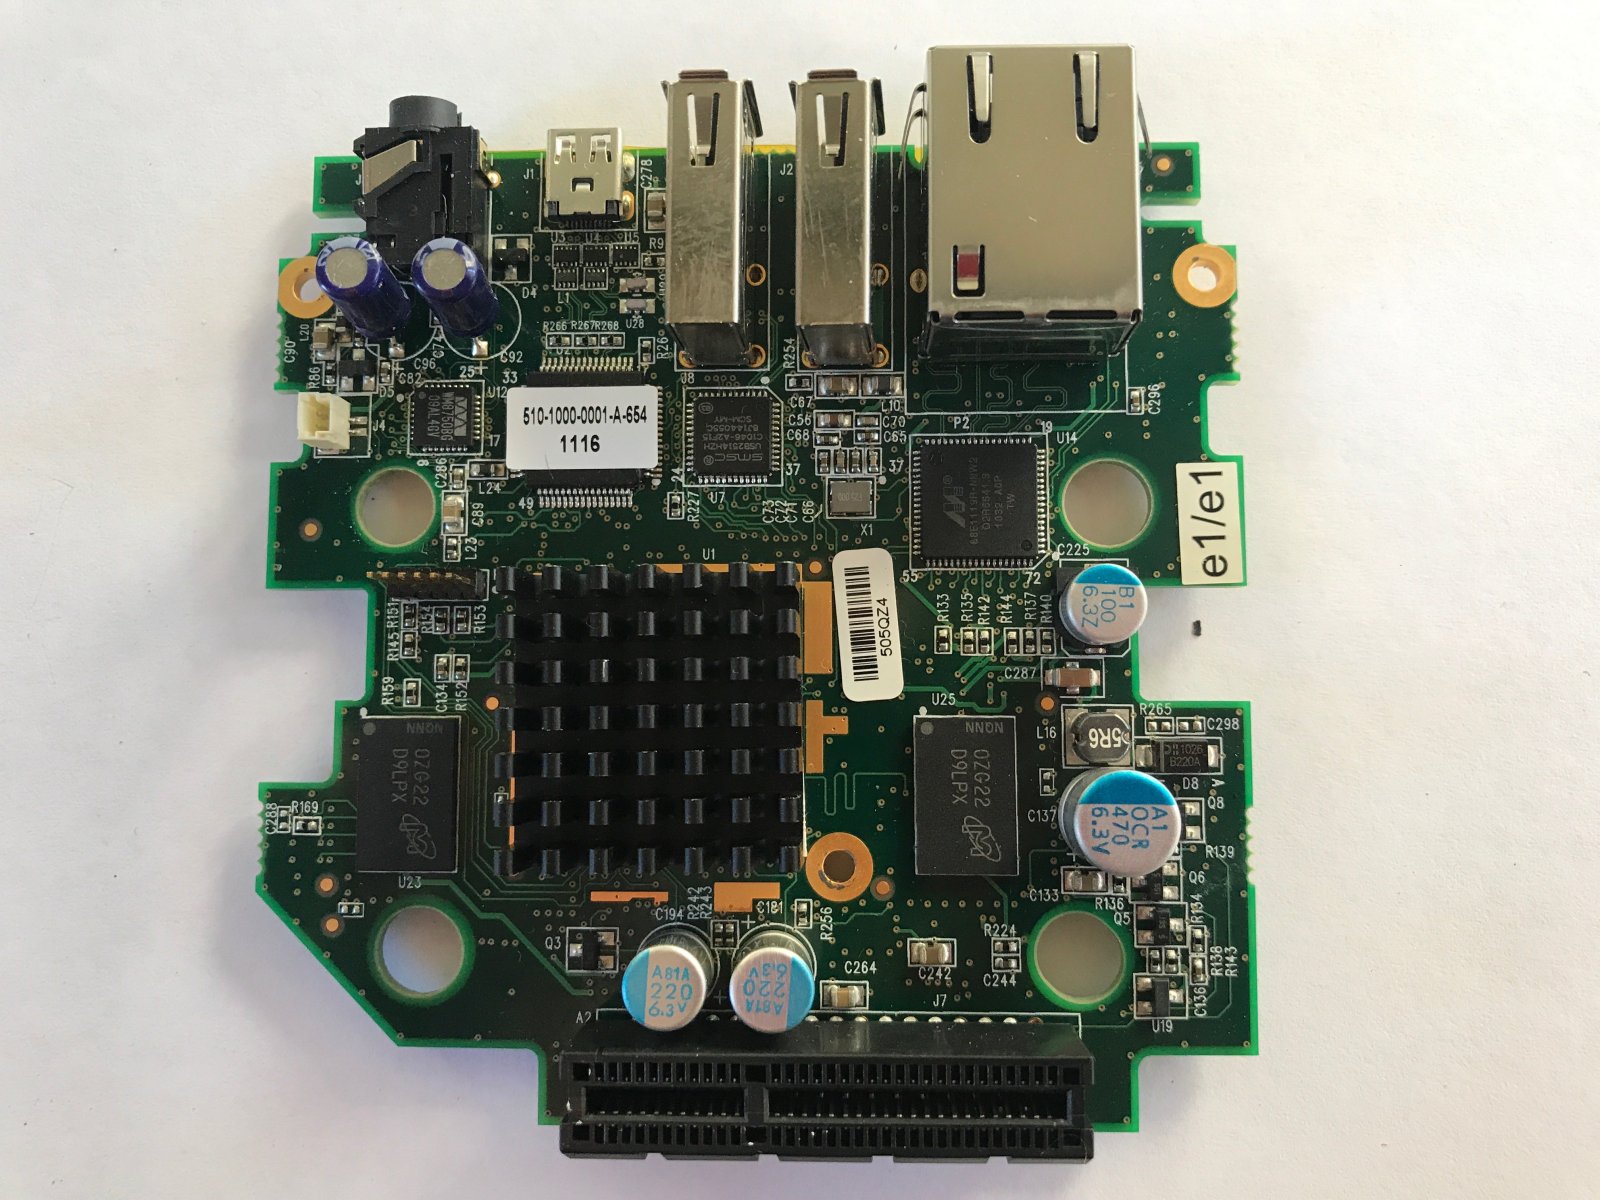
But I wanted to be able to see all components in detail…
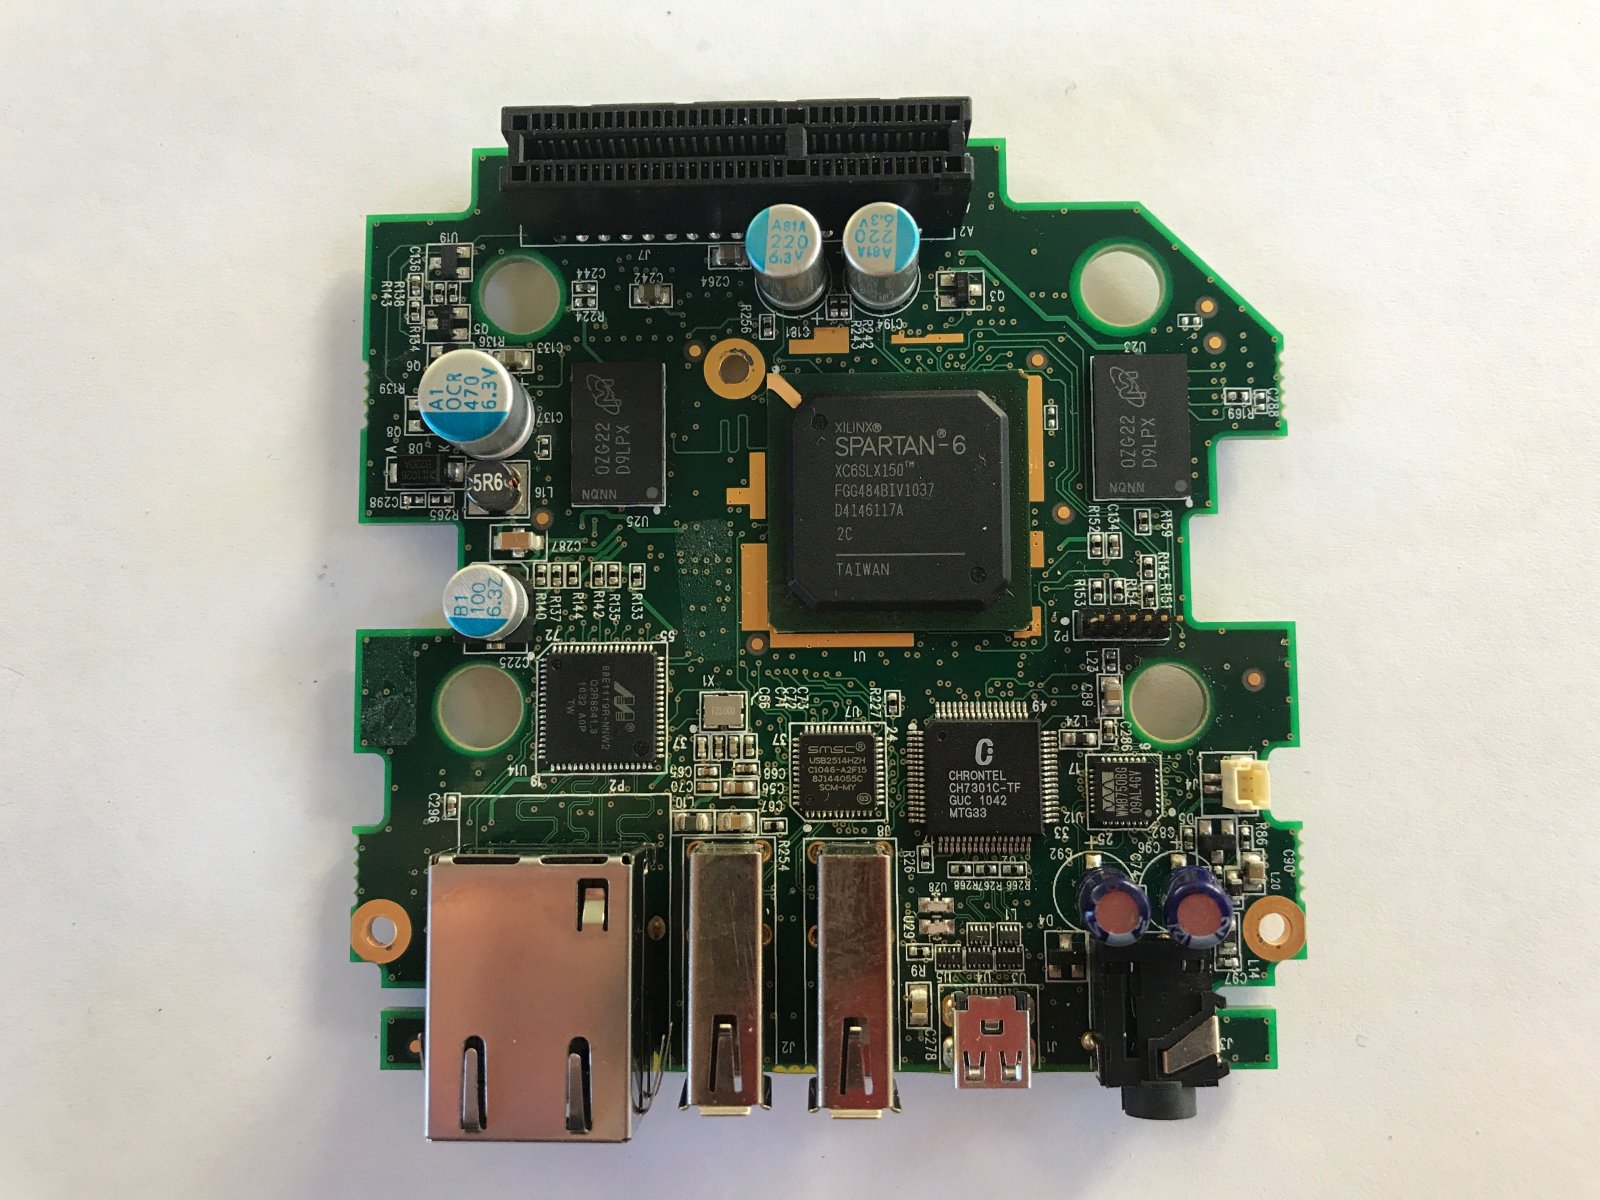
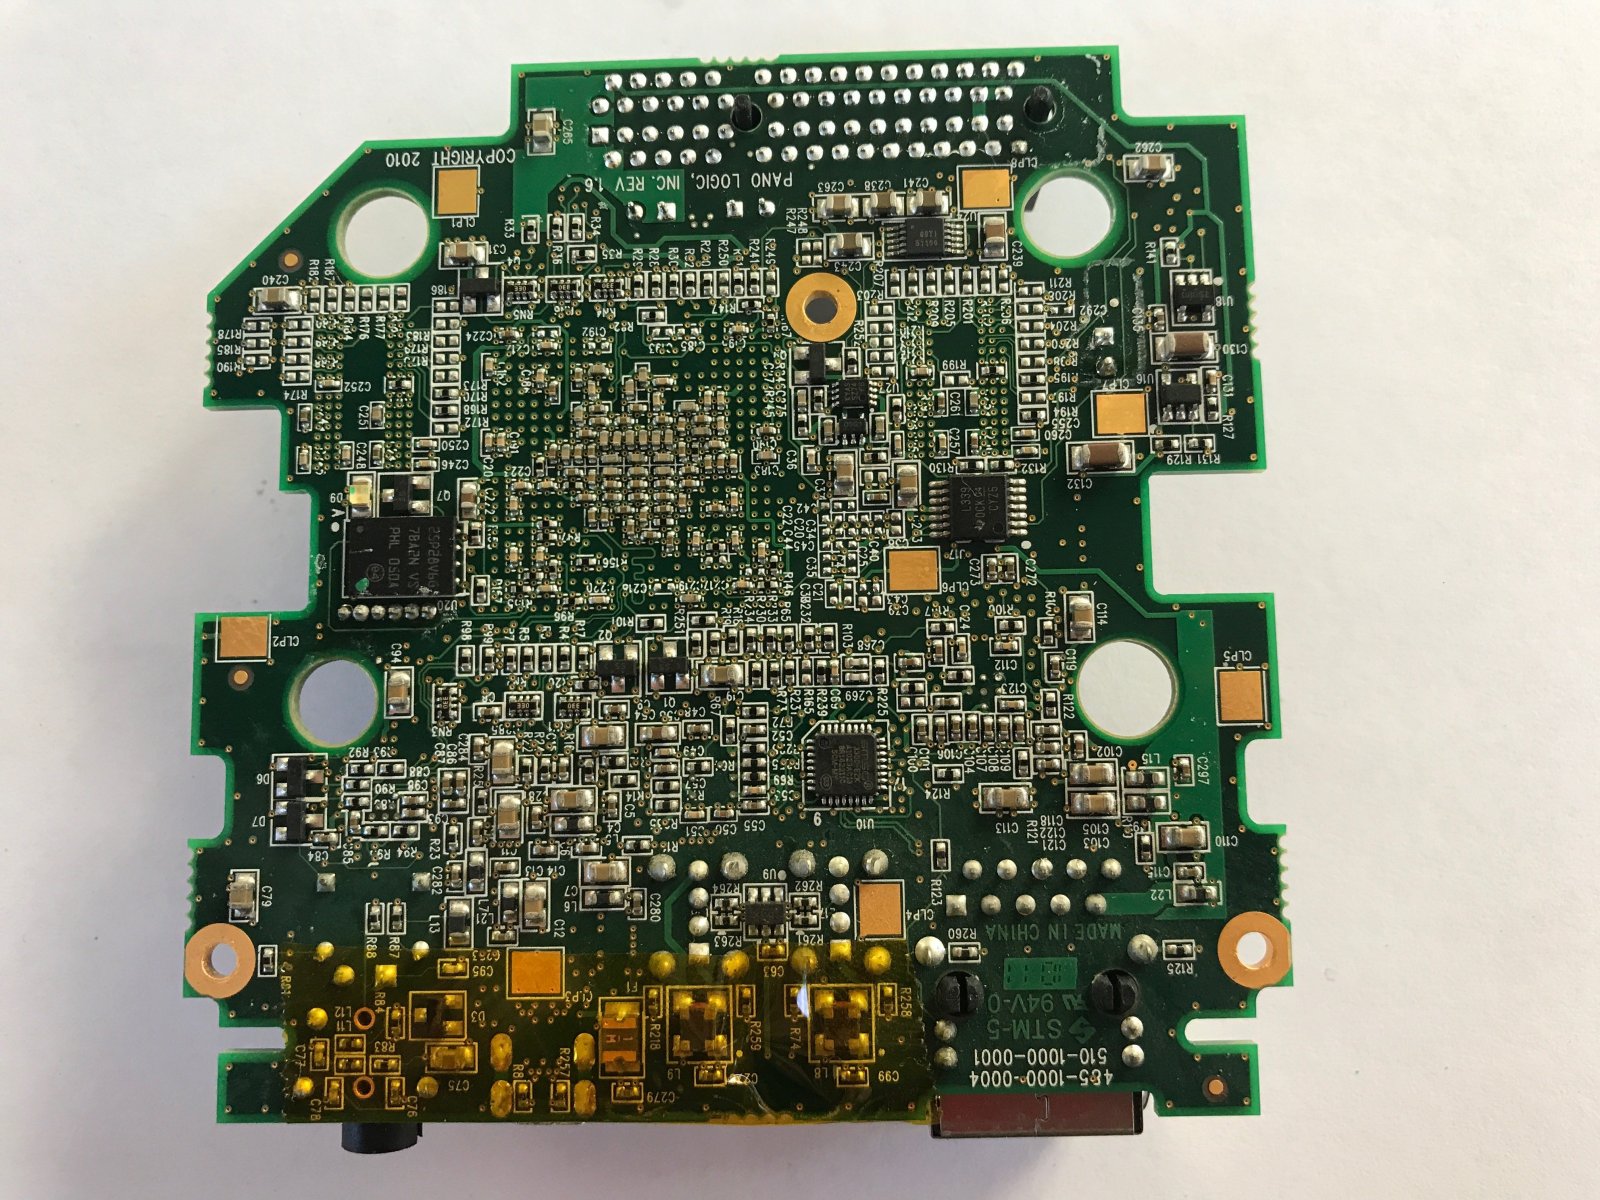
Bottom of the motherboard PCB. Contrary to the Pano G1, there are a fair number of active components here.
Done! That was the easy part. :-)