Zephyr Ravenna Control Board Replacement
Blog post that probably has an audience of one, myself.
- Introduction
- Zephyr Ravenna - Confusing Information
- Two PCBs - Control Board & Switch Assembly
- Switch off the Breaker!!!
- Glass Canopy Removal
- Duct Cover Removal
- Swapping the Control Board
- Reassembly
- Conclusion
Introduction
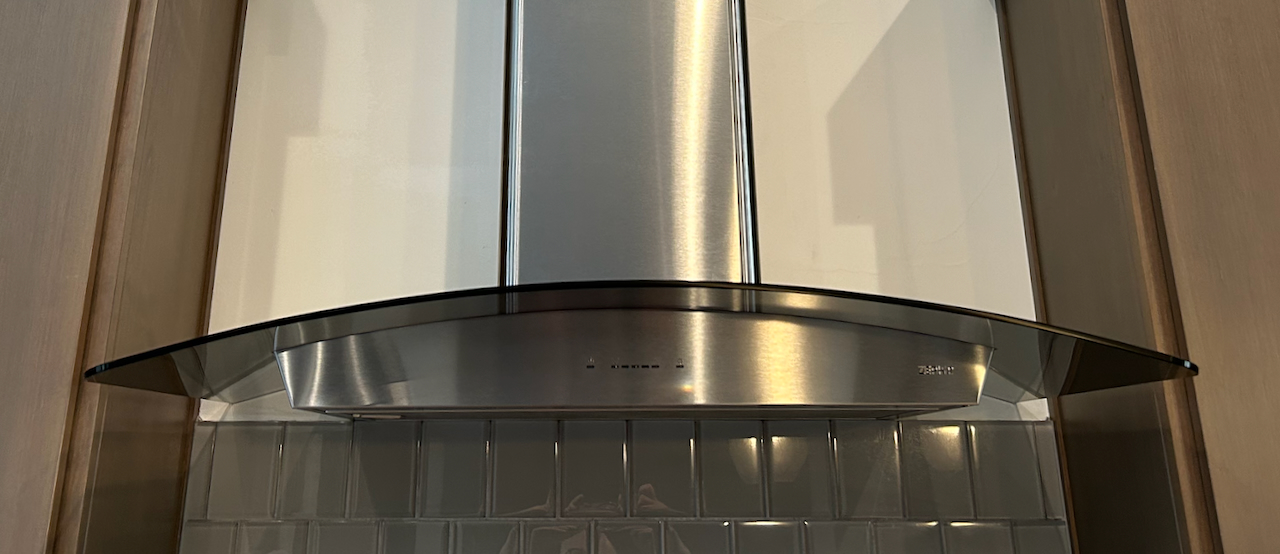
Our house has a Zephyr Ravenna kitchen hood that started to behave erratically:
- the LED strip didn’t want to switch off entirely
- the buttons usually worked, but sometimes didn’t
The hood was still usable, but it didn’t give us that warm and fuzzy feeling.
I tried to power cycle the thing by toggling the power breaker, but that didn’t help. In fact, a few times it made things worse: all the blue indicator LEDs would light up for 15 minutes before it went back to almost working.
I hate working on appliances that are still functional enough: yes, it’s possible that I can fix it, but there’s also a considerable chance that I’ll end up with something worse, and that we’ll need to call in a $$$ technician. But my wife wanted it to be fixed, so I gave it a try.
This blog post is written for the very narrow audience of owners of a broken Zephyr Ravenna with a telescopic duct cover, who are frustrated with the official documentation, and who may need to this again in the future: myself.
Zephyr Ravenna - Confusing Information
The product page of the Zephyr Ravenna Wall has a tab with Specifications & Documents. Of those documents, the Hood User Manual was the most useful, because in addition to being a user manual, it also contained the most comprehensive installation instructions.
That said, it’s a combo manual that targets multiple similar Zephyr products, and the technical drawings are not always correct. A Zephyr phone technician also gave incorrect information.
- There are different models: the Wall version has the duct against the wall, the Island Range version is used for kitchen islands with the hood floating above.
- There are different kind of duct covers. Our ceiling was just a bit too high so a telescopic extension was needed. There was no information about this in the manual.
- The Zephyr technician told us that the control board could be accessed from underneath the hood by simply removing the aluminum mesh filter. However, that’s only true for the Savona model, not the Ravenna model.
- The control board, located inside the duct cover, was not located the way it was shown in the technical drawings.
- There weren’t any technical drawings about how to remove the glass canopy, other than “secure glass canopy to hood body by 4 screws”. Which screws?
These are all minor details in the grand scheme of things, but they don’t help with the anxiety that goes with tackling such a job.
Important: only do this kind of repair if you’re comfortable doing it and if you accept potentially catastrophic outcomes. Hire a qualified installer if you’re not. The step-by-step instructions below are specific to my situation, I’m writing them down in case I need to do it again. Don’t assume that your installation is the same. I’m not responsible if bad things happen!
Two PCBs - Control Board & Switch Assembly
The Zephyr technician told me that there are 2 PCBs in the unit: the control board and the switch assembly, which contains the LEDs and the touch buttons.
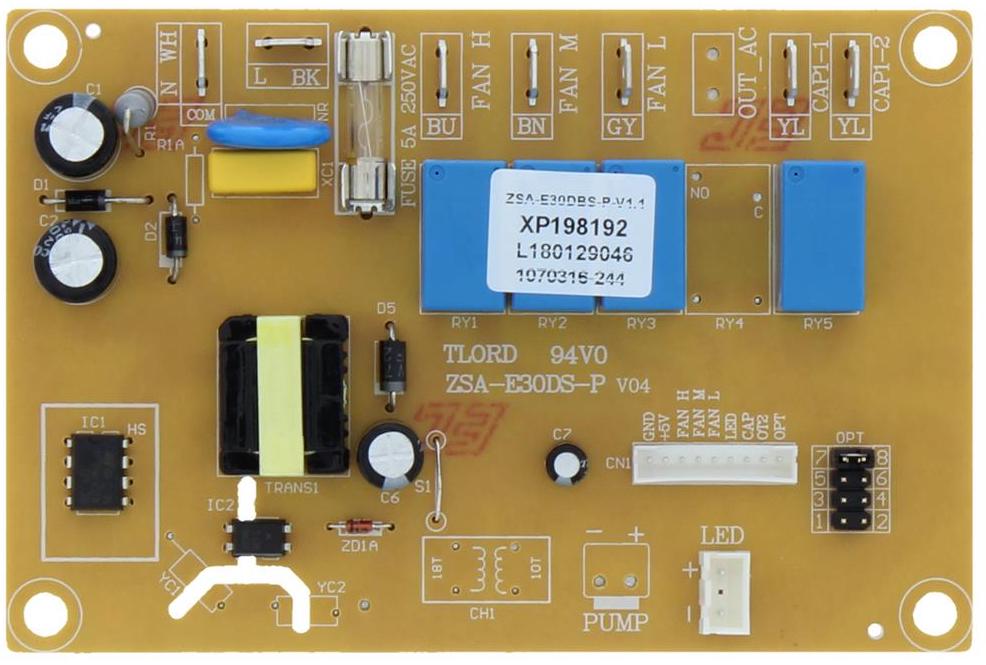
Since the interface was mostly working, I speculated that the main control board was the culprit so I ordered Control board 1101078 from the Zephyr Online store for $99.
The switch assembly 11000119 board costs $119, but I didn’t order one.

Switch off the Breaker!!!
It goes without saying, but I’m saying it anyway:
Switch of the power to the kitchen hood in your breaker panel.
Glass Canopy Removal
The control board is located behind the duct cover, which is a large and clumsy piece to remove. You definitely should remove the glass canopy first.
To do that, remove the aluminum filter mesh at the bottom of the hood. (Now is a good time to give it a cleaning!)
There are 4 screws that hold the canopy in place. Here are 2 of them, the 2 others are on the other side:
When these screws are gone, you can lift the canopy from the hood. Put it somewhere safe…
Duct Cover Removal
The telescopic duct cover consists of 2 pieces. The top part slides telescopically out of the bottom part.
The top part is held in place with 2 screws that are the very top against the wall:
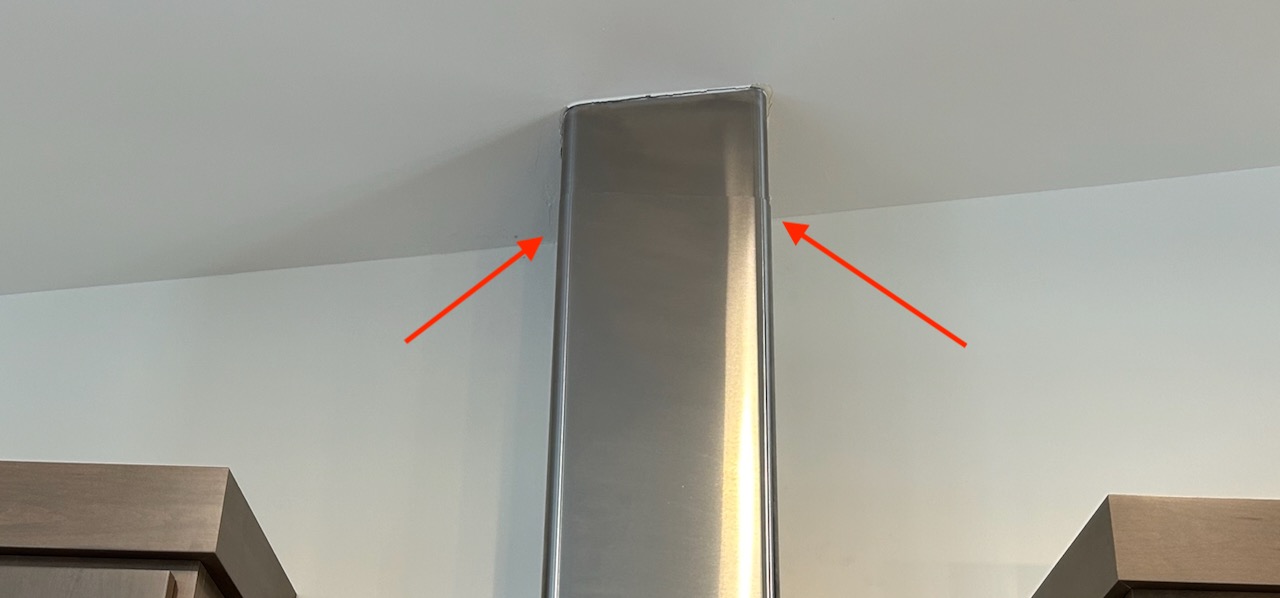
To remove the duct cover, remove those 2 screws. Once the second screw is gone, the top will fall down onto the hood. To prevent that, push your hand against the top duct cover and let it slide down in a slow, controlled manner.
You can now lift the duct cover. Be careful: the bottom of the duct cover is quite sharp. You can easily cut your finger. (I did…)
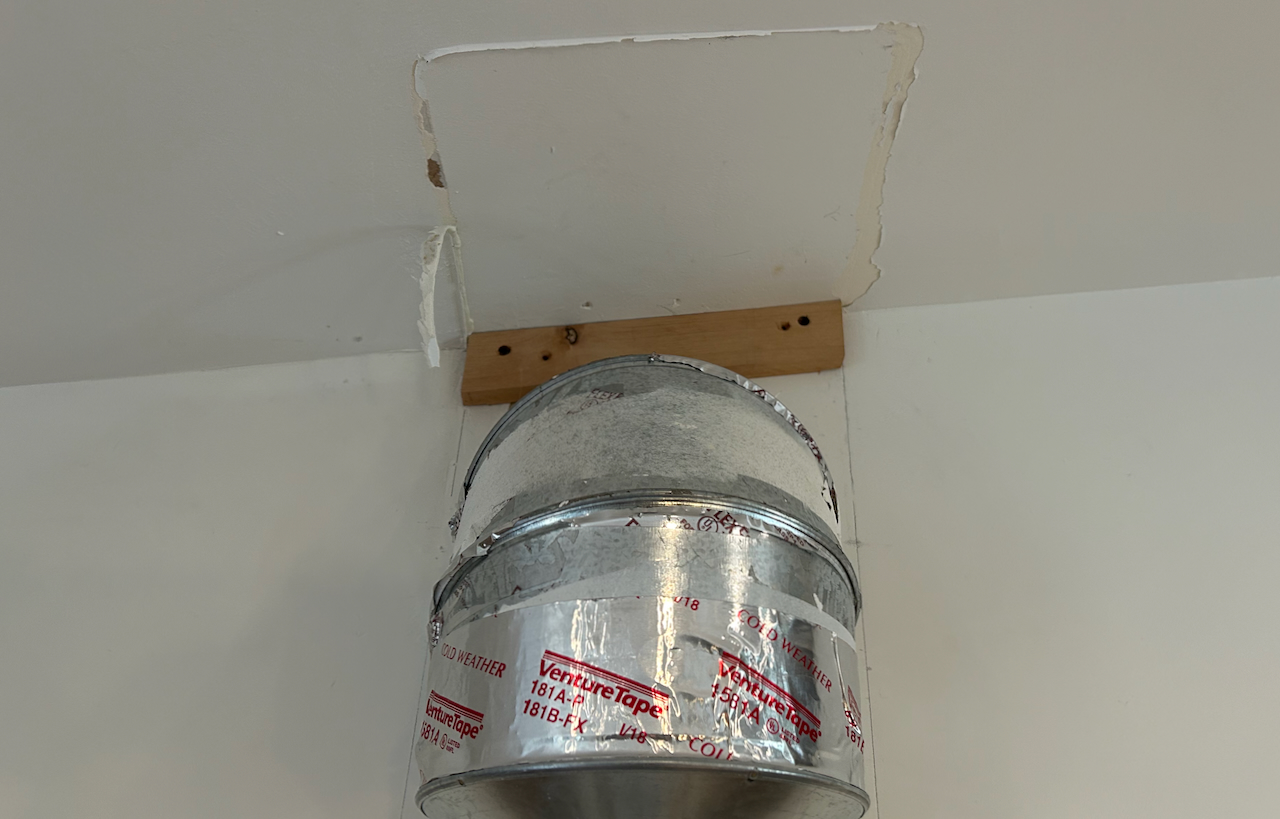
After removing the duct, things looked like this:

The kitchen had been painted and the duct cover was caulked after installation. Removing the duct cover ripped away some of the ceiling paint. We’ll need to do some touch-ups after reinstallation.
Swapping the Control Board
In the manual, the control board box is accessible after removal of the duct cover:
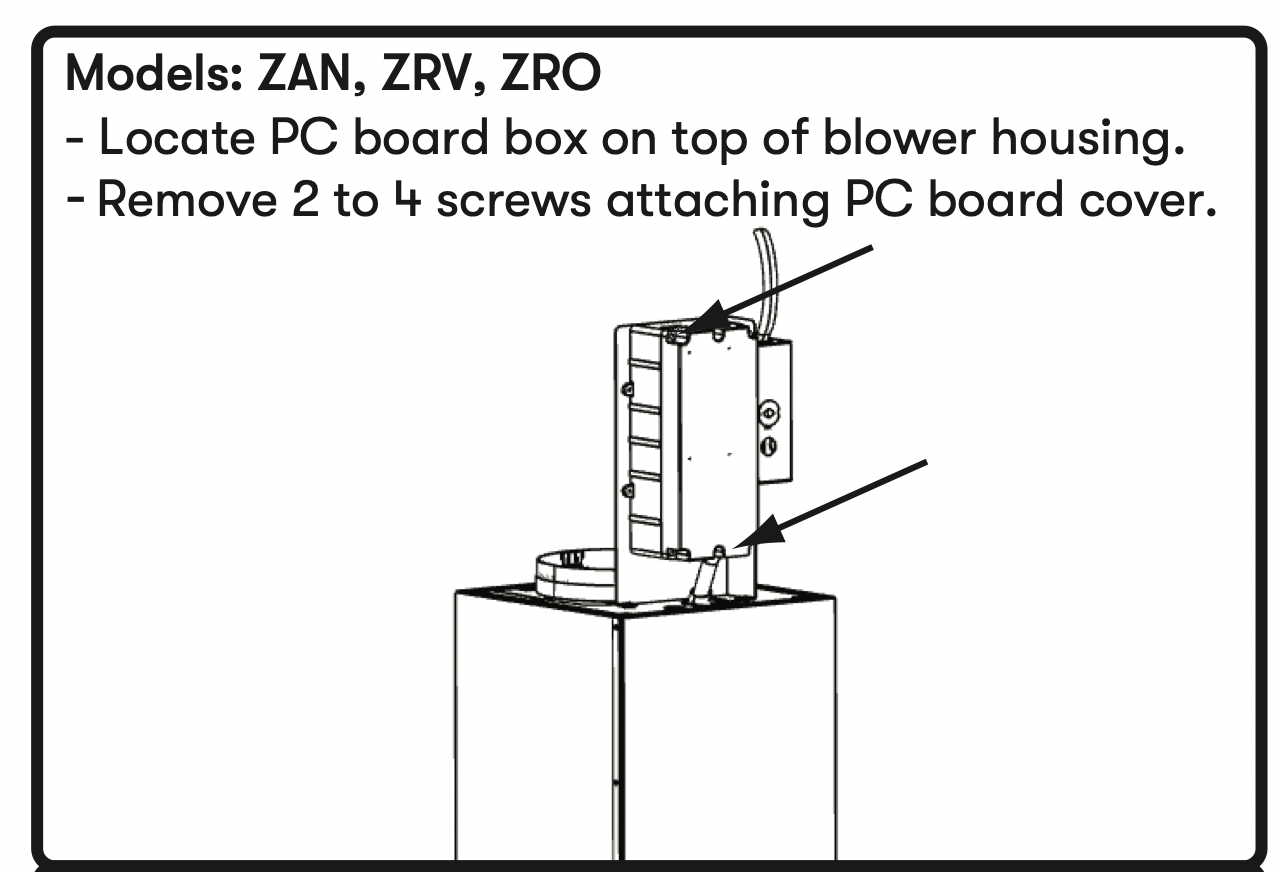
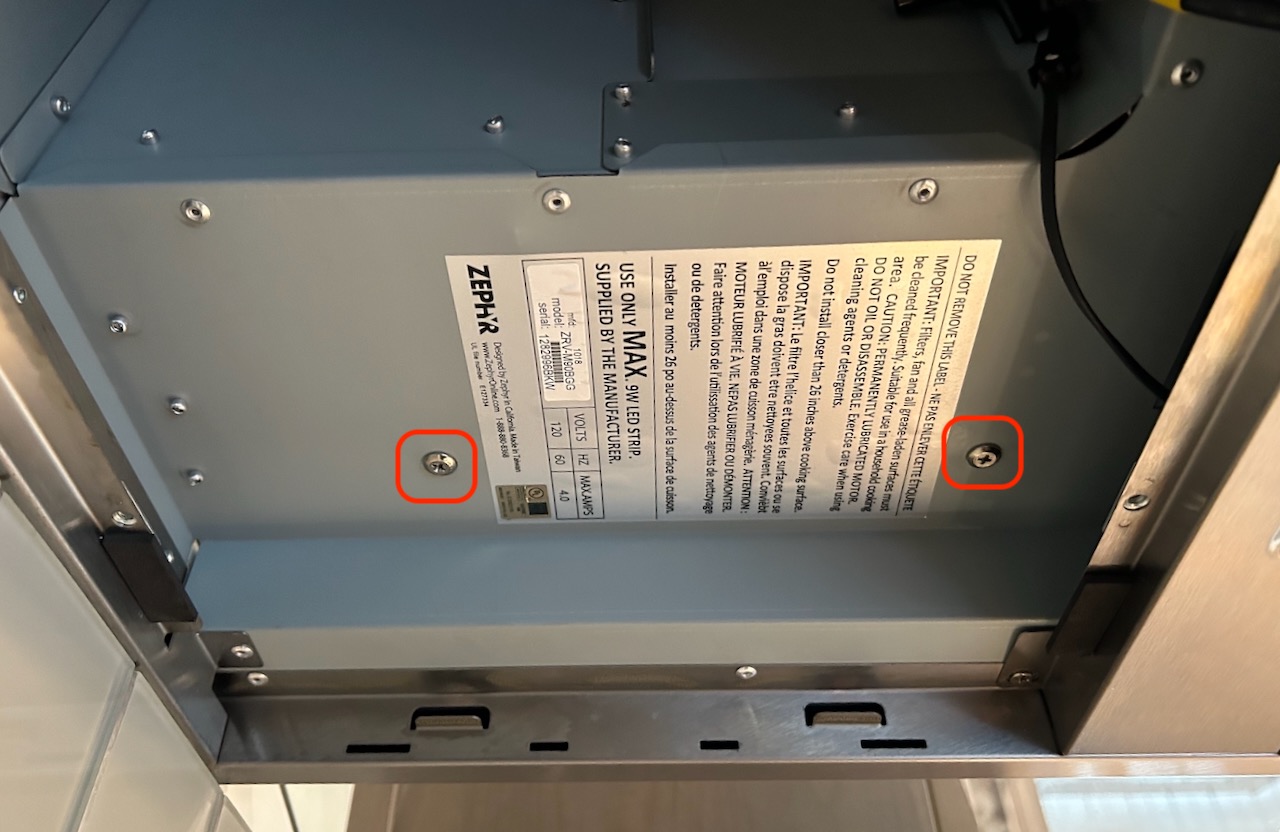
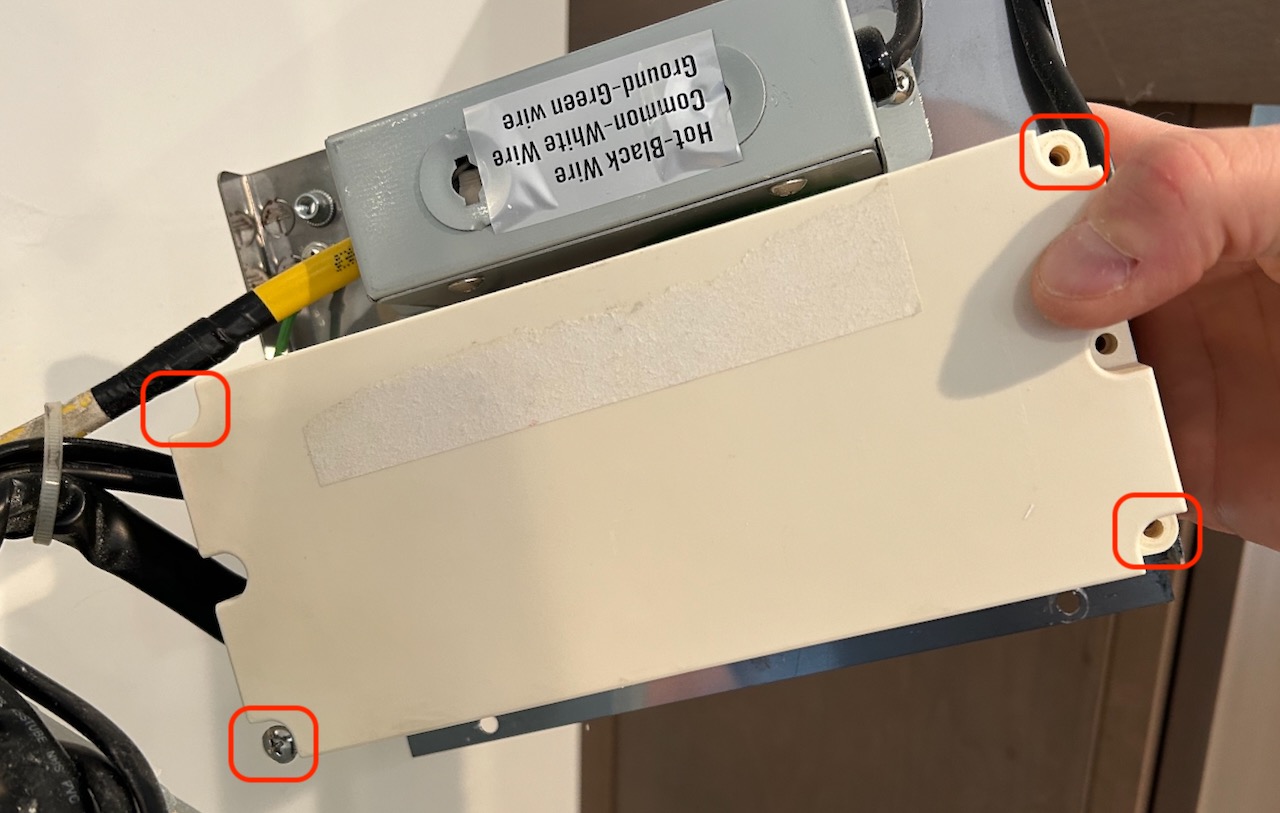
In the previous picture, you can see that this is not the case for our unit. The white control board box is located behind the metal plate.

Just remove the 2 screws marked with the red rectangles to get access to the box.
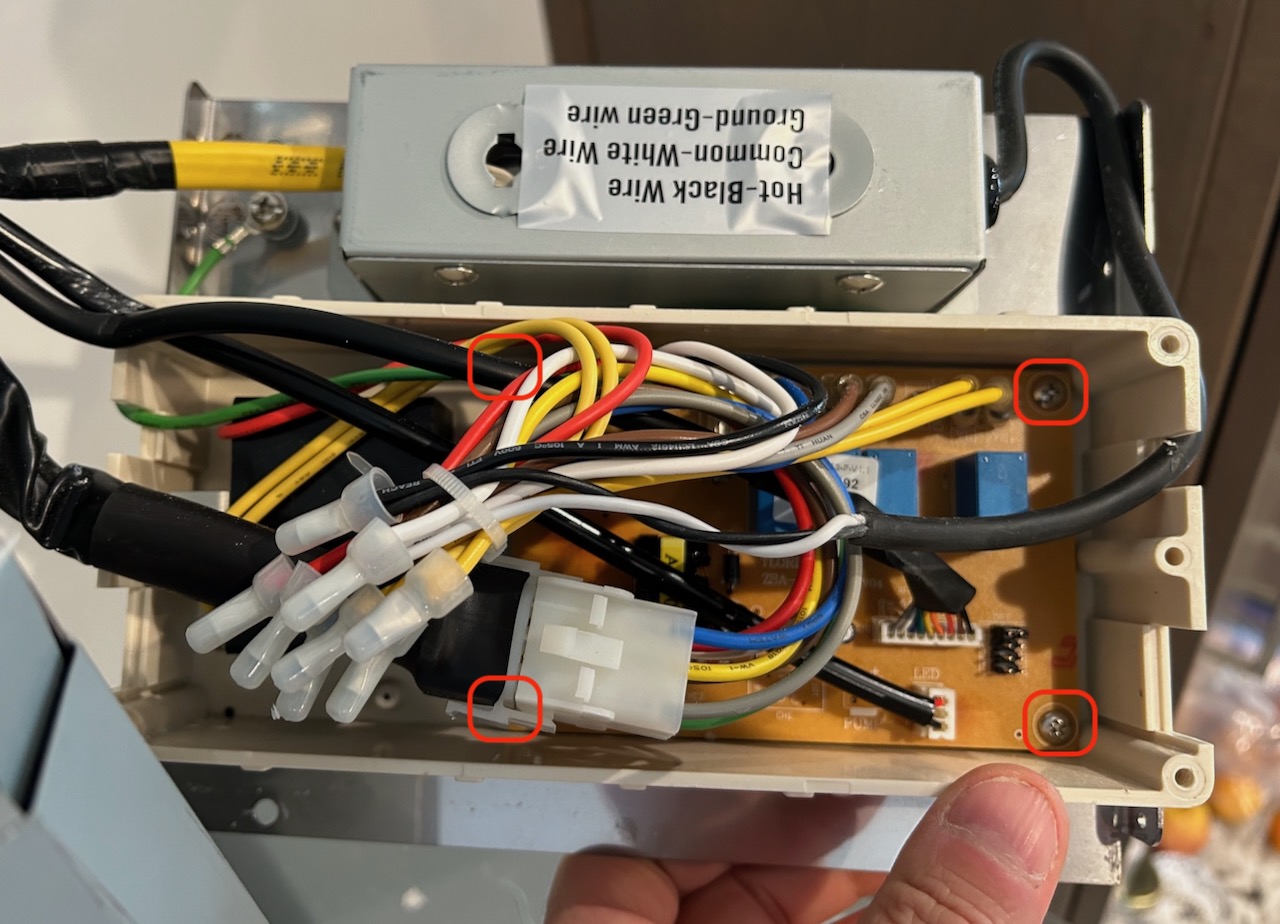
You can now remove the 4 screws to remove the cover of the control box:
There are once again 4 screws that hold the control board in place.
It takes a bit of fiddling , but I first removed those 4 screws before disconnecting the wires, for two reasons:
- it allowed me to disconnect a wire and immediately reconnect it to the new board, thus avoiding connection mistakes.
- the connectors are very tight. With the control board loose, I could use a screw driver to lift the connector from the board instead of having to pull hard on the wire of the connector.
After swapping the control board, I toggled the breaker to check if the hood behaved correctly. It did!!! I then toggled the breaker back to off for reassembly.
Reassembly
In theory, reassembly is a matter of doing the previous steps in reverse, but there was one step where I needed to call in help from a neighbor: it’s almost impossible to hold the top part of the duct cover against the ceiling while at the same time screwing in the top screw, and my wife was not tall enough to reach the ceiling.
Conclusion
The hood is working again, wife is happy, I’m happy, and all that’s left are some touch-ups.
Total repair time: 2 hours, but that included a lot going back and forth through the manual and watching irrelevant Youtube videos. A professional could probably do this in 20 minutes.
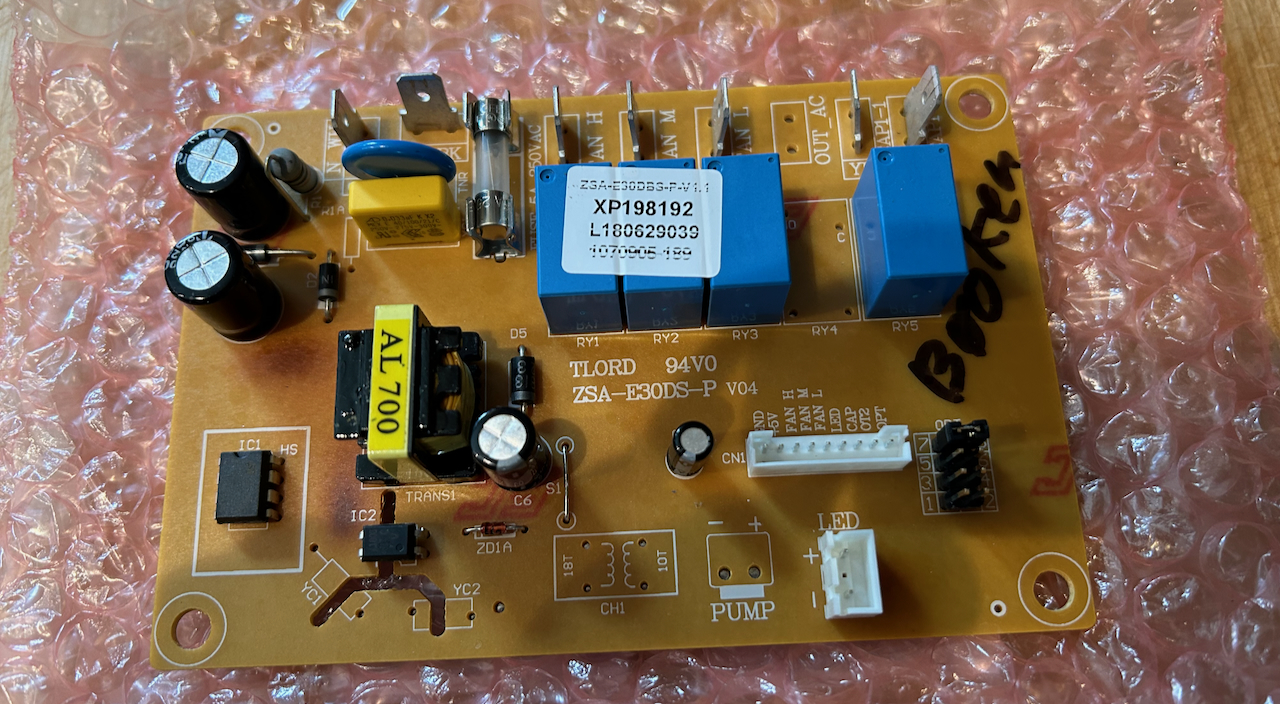
It’s tempting to try to root cause the problem of the broken controller board, though that will probably never happen. But if you look as the left bottom of the picture below, you can see thatthe PCB has darker brown burn marks. It’s scary to think what could have happened in the long run if I hadn’t replaced this broken controller.