In The Lab - Soldering Prototypes with Enamel Magnet Wire
Introduction
I’m not a huge fan of breadboarding. For many, it’s been the tried and true way to quickly hack a circuit together, but somehow it rubs me the wrong way: it’s too impermanent, I’m terrible at arranging the components just right. I always run out of just the wires that I need. And I’ve experienced bad contacts a number of times.
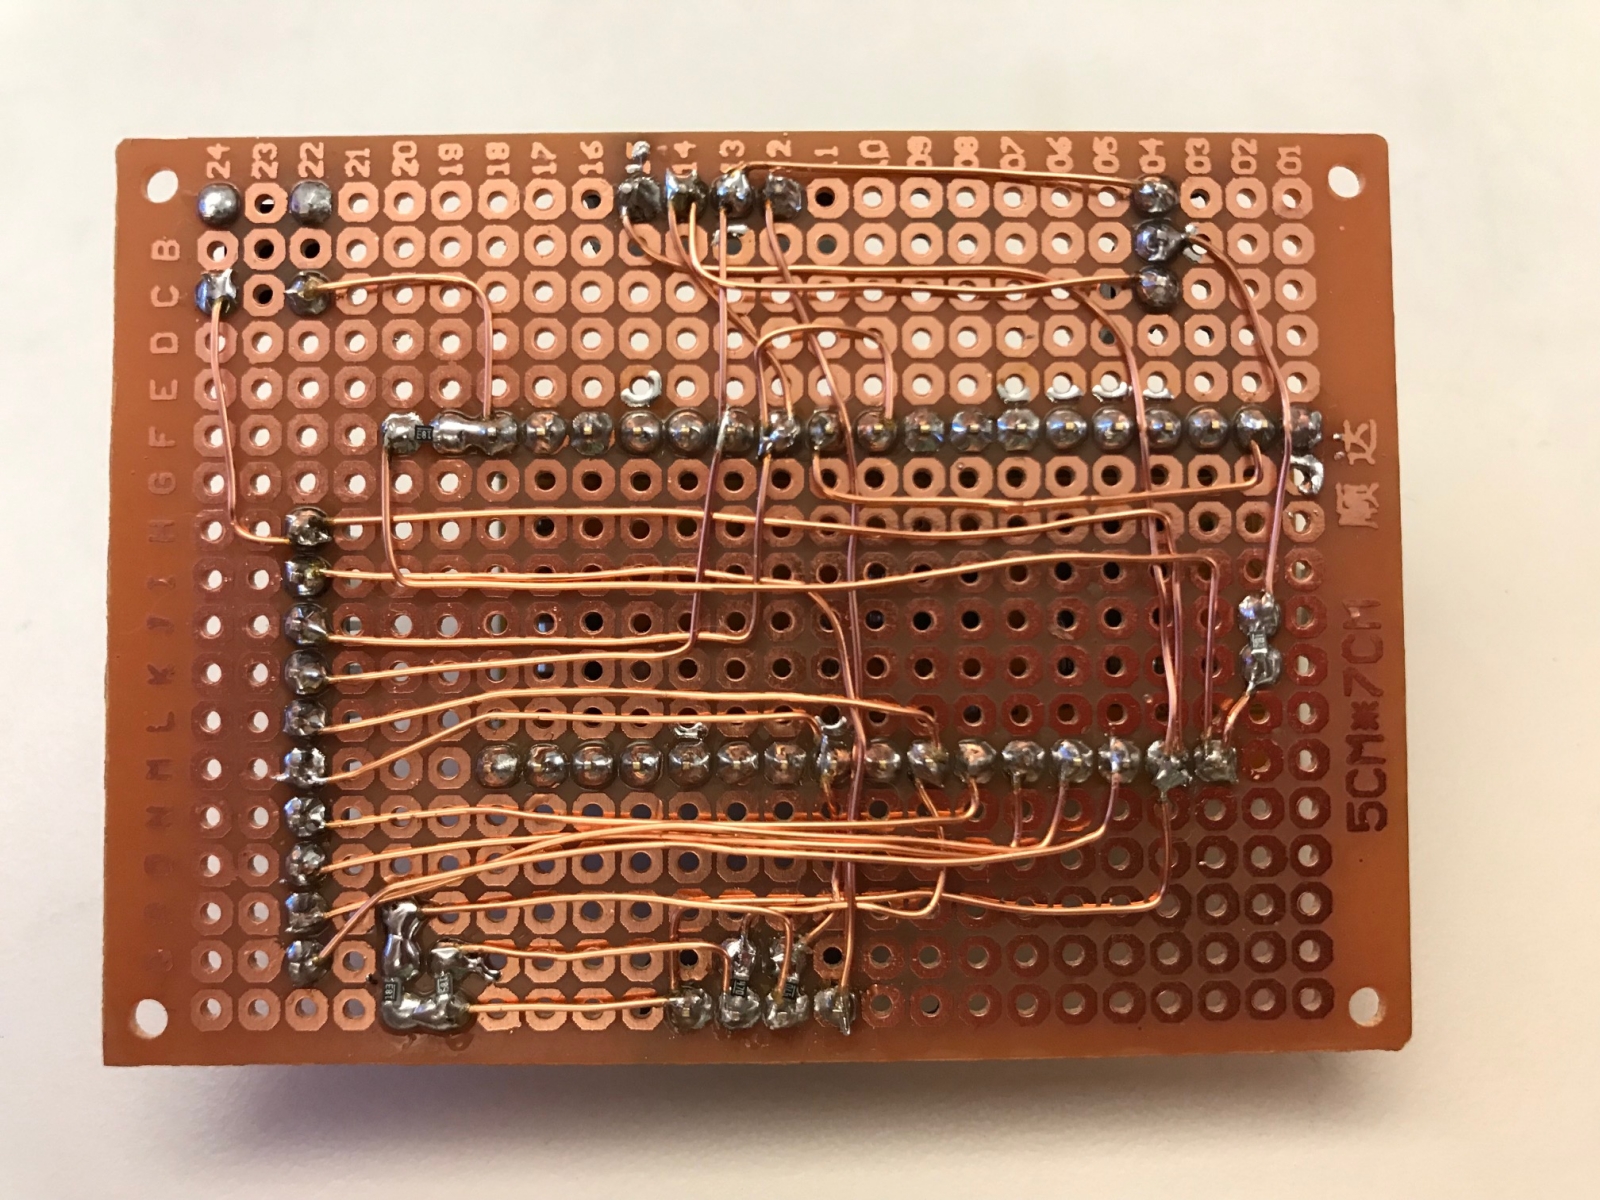
So when I’m too impatient to have a PCB made, I like to solder a prototype board together instead.
In the past, I’d use regular wires with plastic isolation, but those can be a pain to strip, even with a semi-decent stripping tool.
Recently, I switched to enamel magnet wire, and it has been a pleasure.
This blog post simply describes and shows the process that I use to solder magnet wire. For completeness, I also give an overview of my soldering setup.
When it comes to soldering, I still consider myself a beginner. I’m probably doing a lot of things wrong, and improvements are most definitely possible! So feel free to reach out on Twitter if you have any comments!
Soldering Enamel Magnet Wire
For me, soldering magnet wire is a 6-step process:
-
Boil away a millimeter or 2 of enamel without cutting the wire off the spool. (~1min00 mark in video below.)
I use a helping-hands soldering aid to hold the wire. The soldering iron is pointed down and I poke the end of the wire into a blob of solder that’s the tip of the iron. Make sure that the blob of solder is fresh: the flux of the solder will make the wire repel less.
After a few second, you’ll see tiny bubbles at the contact between enamel and solder. That’s the flux boiling away the enamel.
Make sure you clean the soldering iron tip after enamel removal! The enamel makes the solder dirty.
-
Solder the end of the wire to the source contact point on the PCB. (~1min50 mark)
At this point, the wire still hasn’t been cut to length. Since the wire is still of ‘unlimited’ length, I typically don’t need a tweezer to hold the tip of the wire in place: it will take a bit of time for the wire to heat up, and by then, it should be fastened and ready to let go.
-
Route the wire to the destination contact point on the PCB and cut to length.
Magnet wire is very pliable and easy to put exactly where you want it. I often use tweezer as a post around which I bend the wire.
-
Bend the new end of the wire away from the PCB. (~2min30 mark)
By bending it from the surface of the PCB, I have a lot of space for the soldering iron to boil of the second end of the wire.
-
Boil away the second end of the wire. (~2min50)
-
Solder the second end of the wire where it needs to be. (~3min25 mark)
Unlike step 2, tweezer are usally essential here, because the wire will often already be laying flush against the PCB, which makes it hard to handle with just your fingers.
In the video below, I solder 2 wires this way. With a camera placed between my and the action, and without the use of the magnifier lamp that makes me see what I’m doing, things are a bit less neat than usual, but I hope it gets the point across.
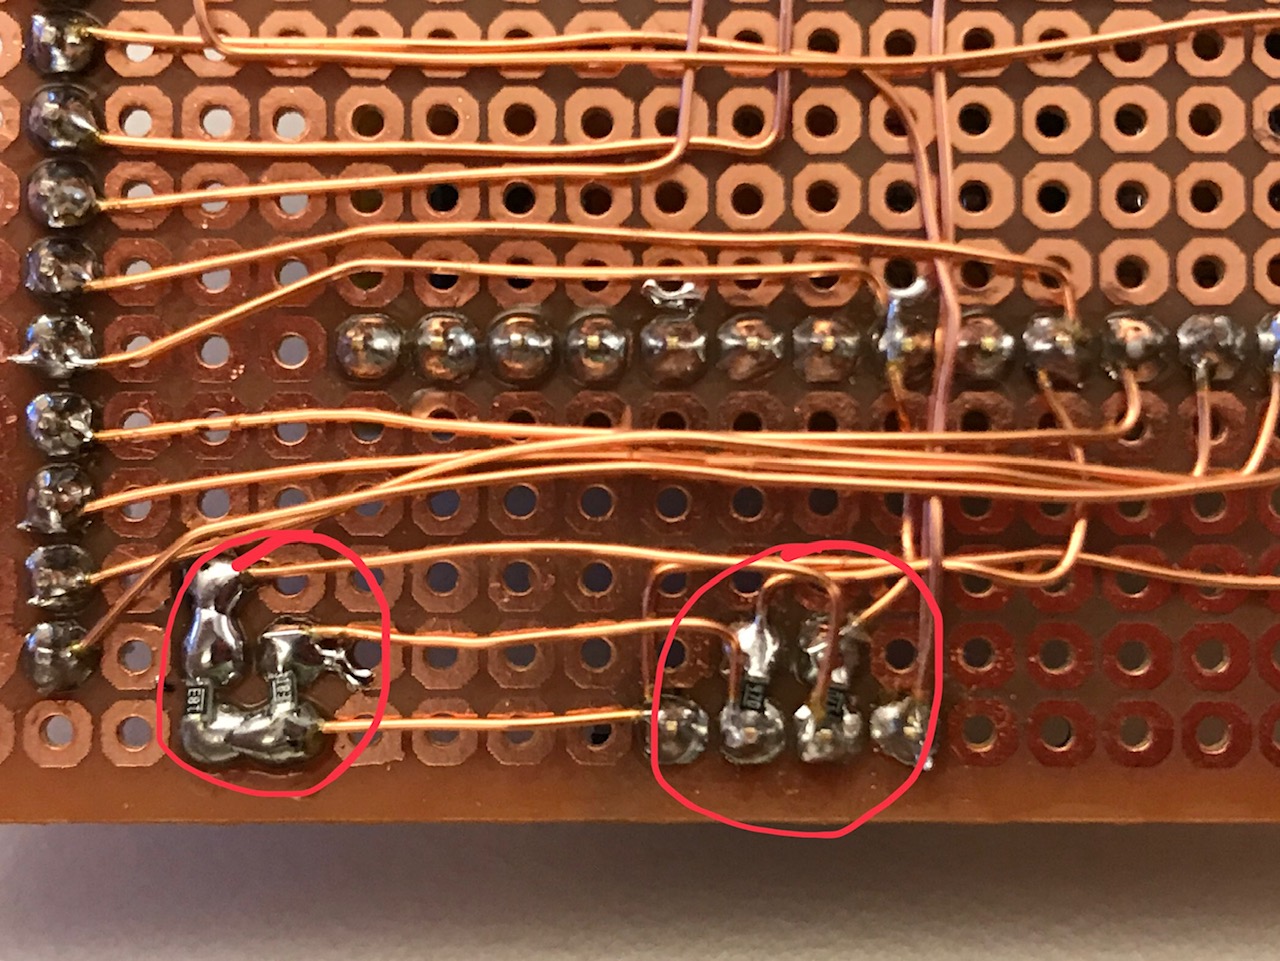
SMD instead of Through-Hole Resistors
A bit off-topic, but for prototypes, I’ve moved away completely from through-hole resistors and I’m now using 0603 SMD resistors instead: they are tiny enough fit between soldering pads with 2.54 mm spacing, yet they’re still relatively easy to handle (with a magnifying lamp, in my case.)
My Setup
My soldering desk is just a bench in my garage, though remodelling works are ongoing to create a bone fide hobby room. Whether or not my soldering tools will migrate to that new room is a matter of ongoing debate. :-)
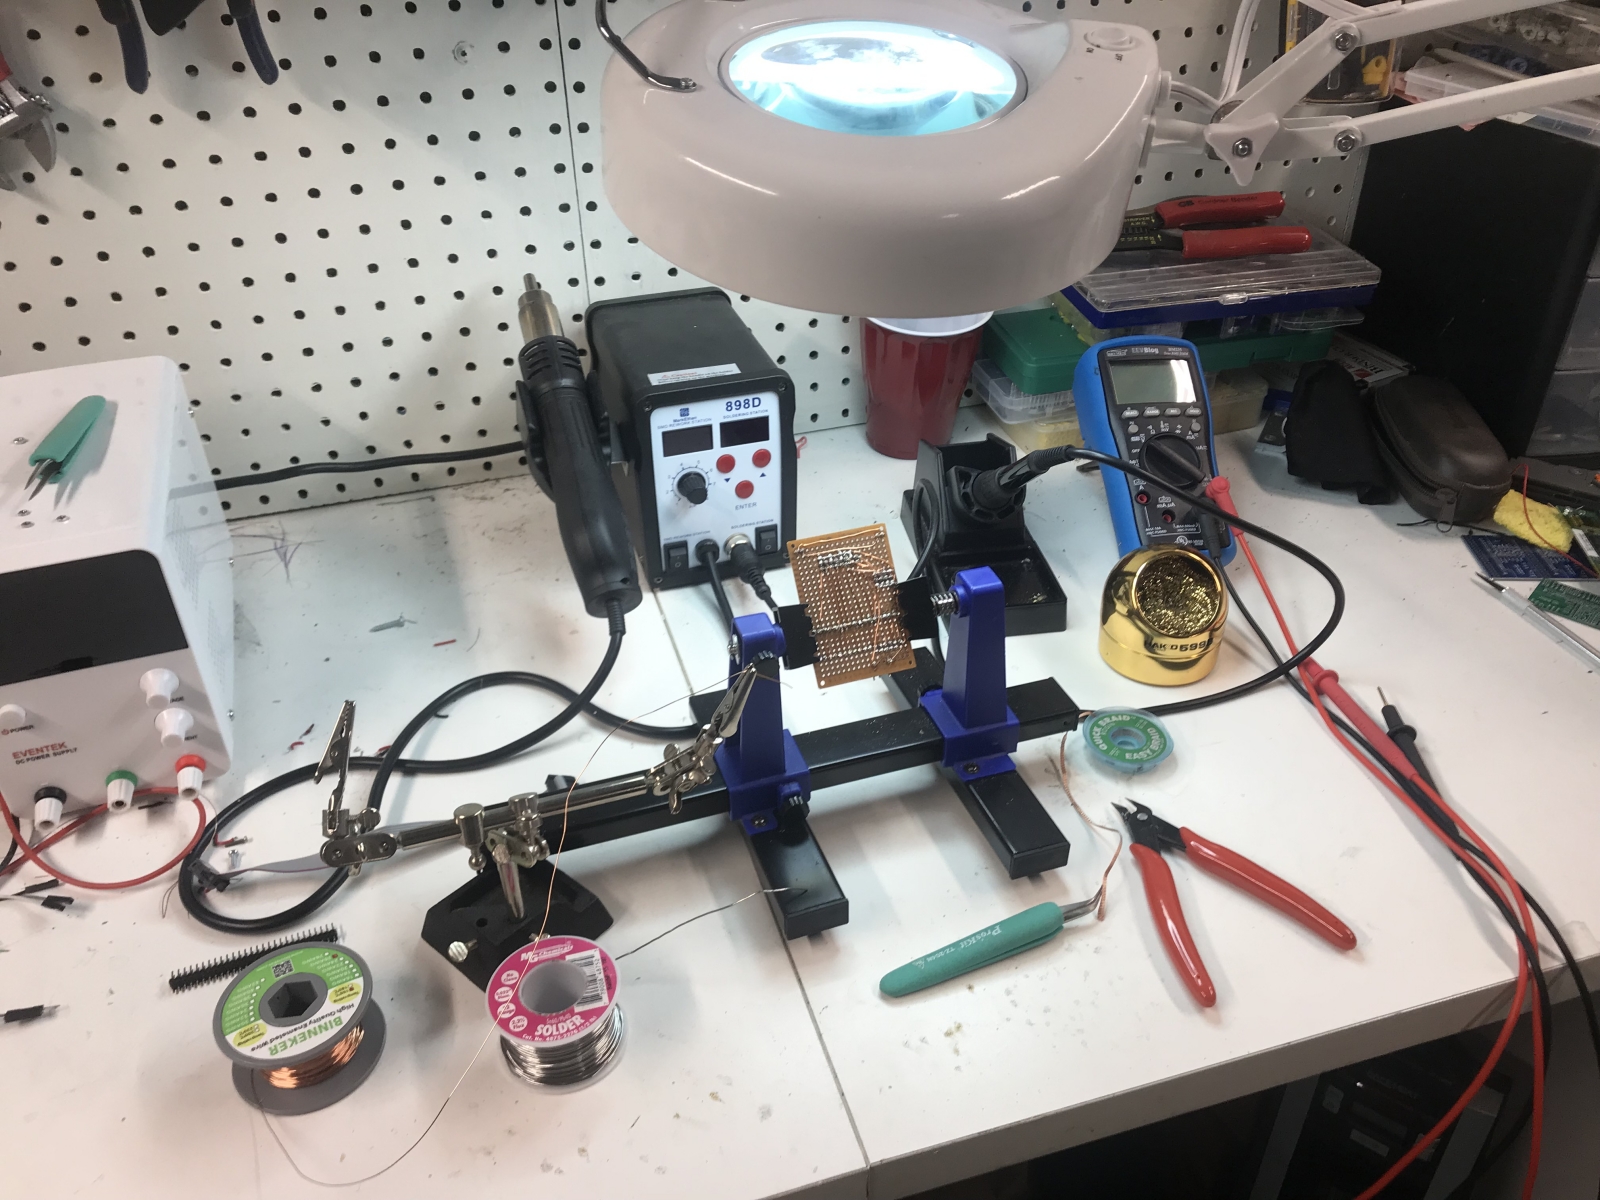
Here are all the tools:
-
Enamel Magnet Wire: $6 on Amazon
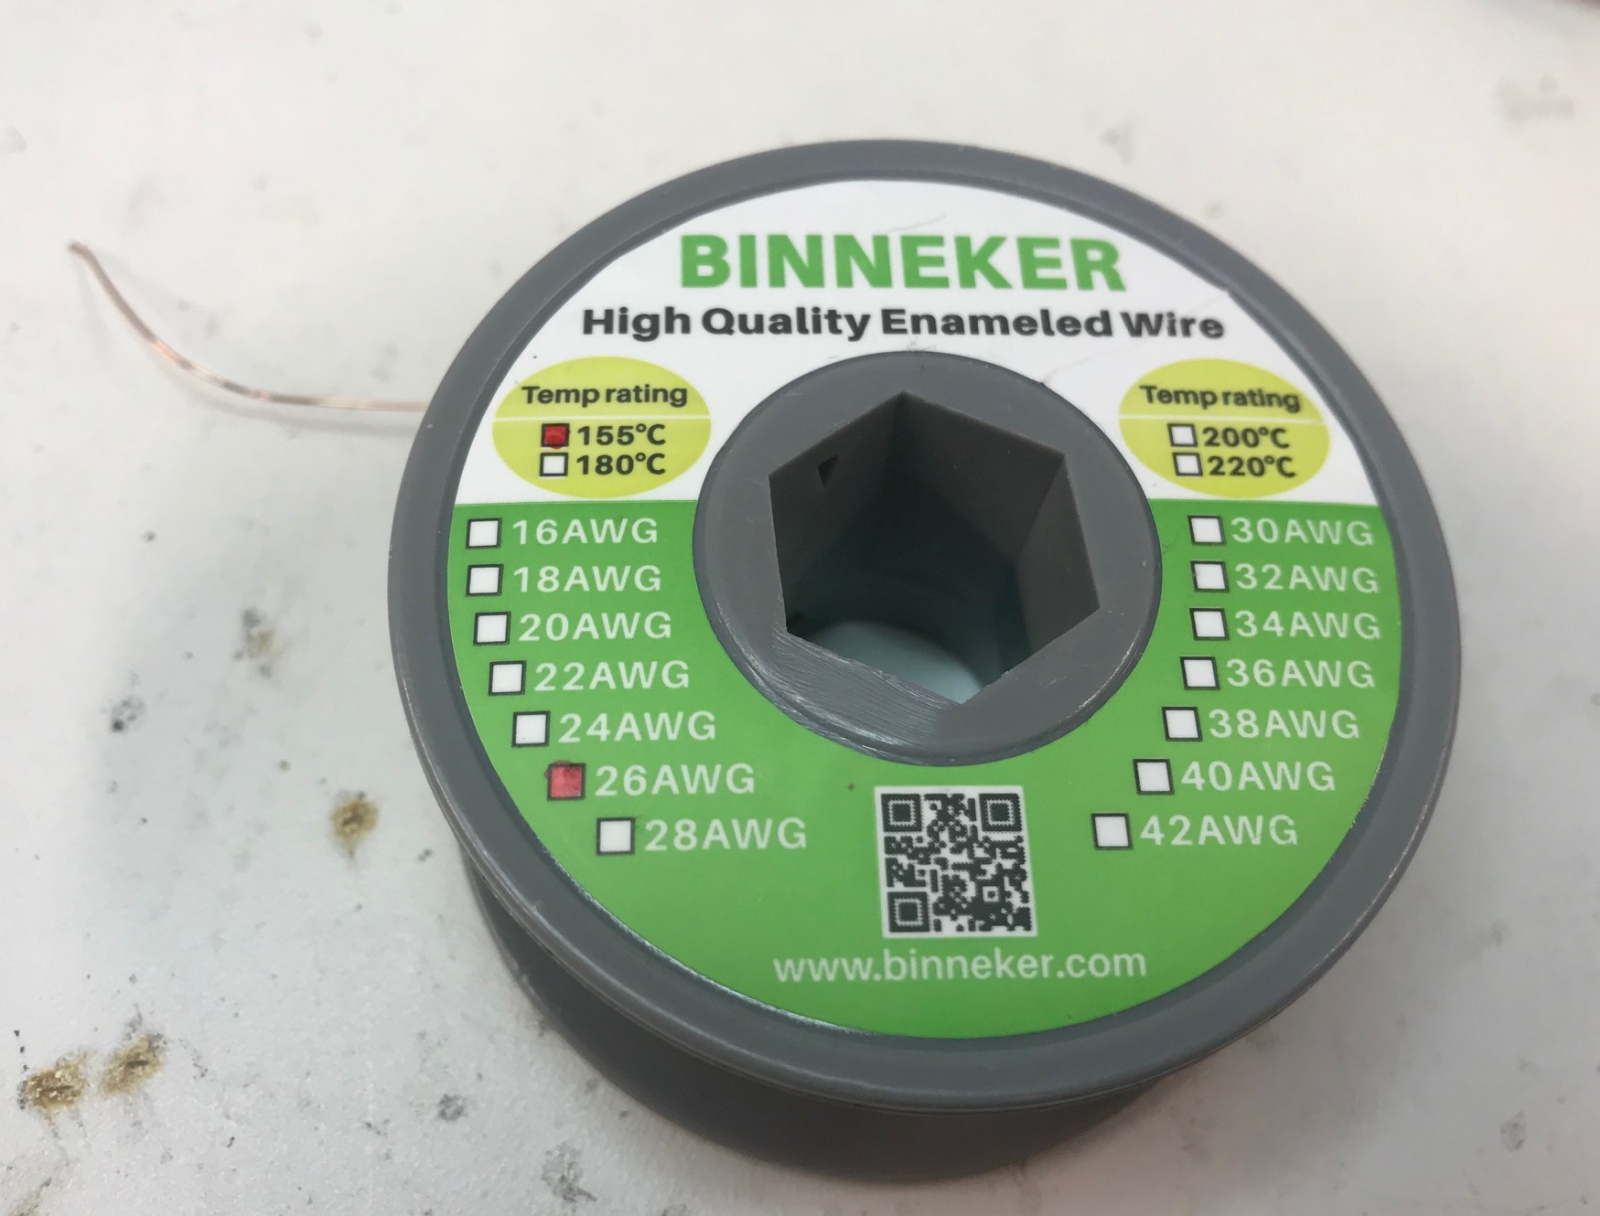
The star of the show!
I use 26 AWG wire. It’s a great trade-off between handling and thickness.
Note the temperature rating of 155C. I’m assuming that lower is better here, in because it will make it easier to remove the enamel.
-
Hot-air rework/soldering station: $50 on Amazon

People often recommend pricier quality tools but when I bought this, I went with the cheapest that I could find. So far, I have no regrets.
I got myself a soldering iron and a hot-air heat gun(?), both with temperature control. The box came with a lot of different solder tips, air nozzles and even a replacement heating element, but so far everything is in its default state. Like I said: I’m not a very sofisticated soldering jockey…
Mine is a Yihua 898D, but ignore that brand: you’ll find 20 similarly looking alternatives on Amazon and eBay. Prices seem to have gone up a little bit in the past 2 years (due to China import tariffs?).
The hot-air gun has proven to be incredible useful to desolder components from throw-away PCBs. I’ve also used it to solder a component with solder paste. That worked, but even at the lowest air speed setting, it had the tendency to blow tiny resistors off the paste.
You’ll notice in the picture that the hot air thing is pointing towards a painted wall. Don’t do that when it’s blowing 350C air!
-
PCB Soldering and Assembly Holder: $10 on Amazon
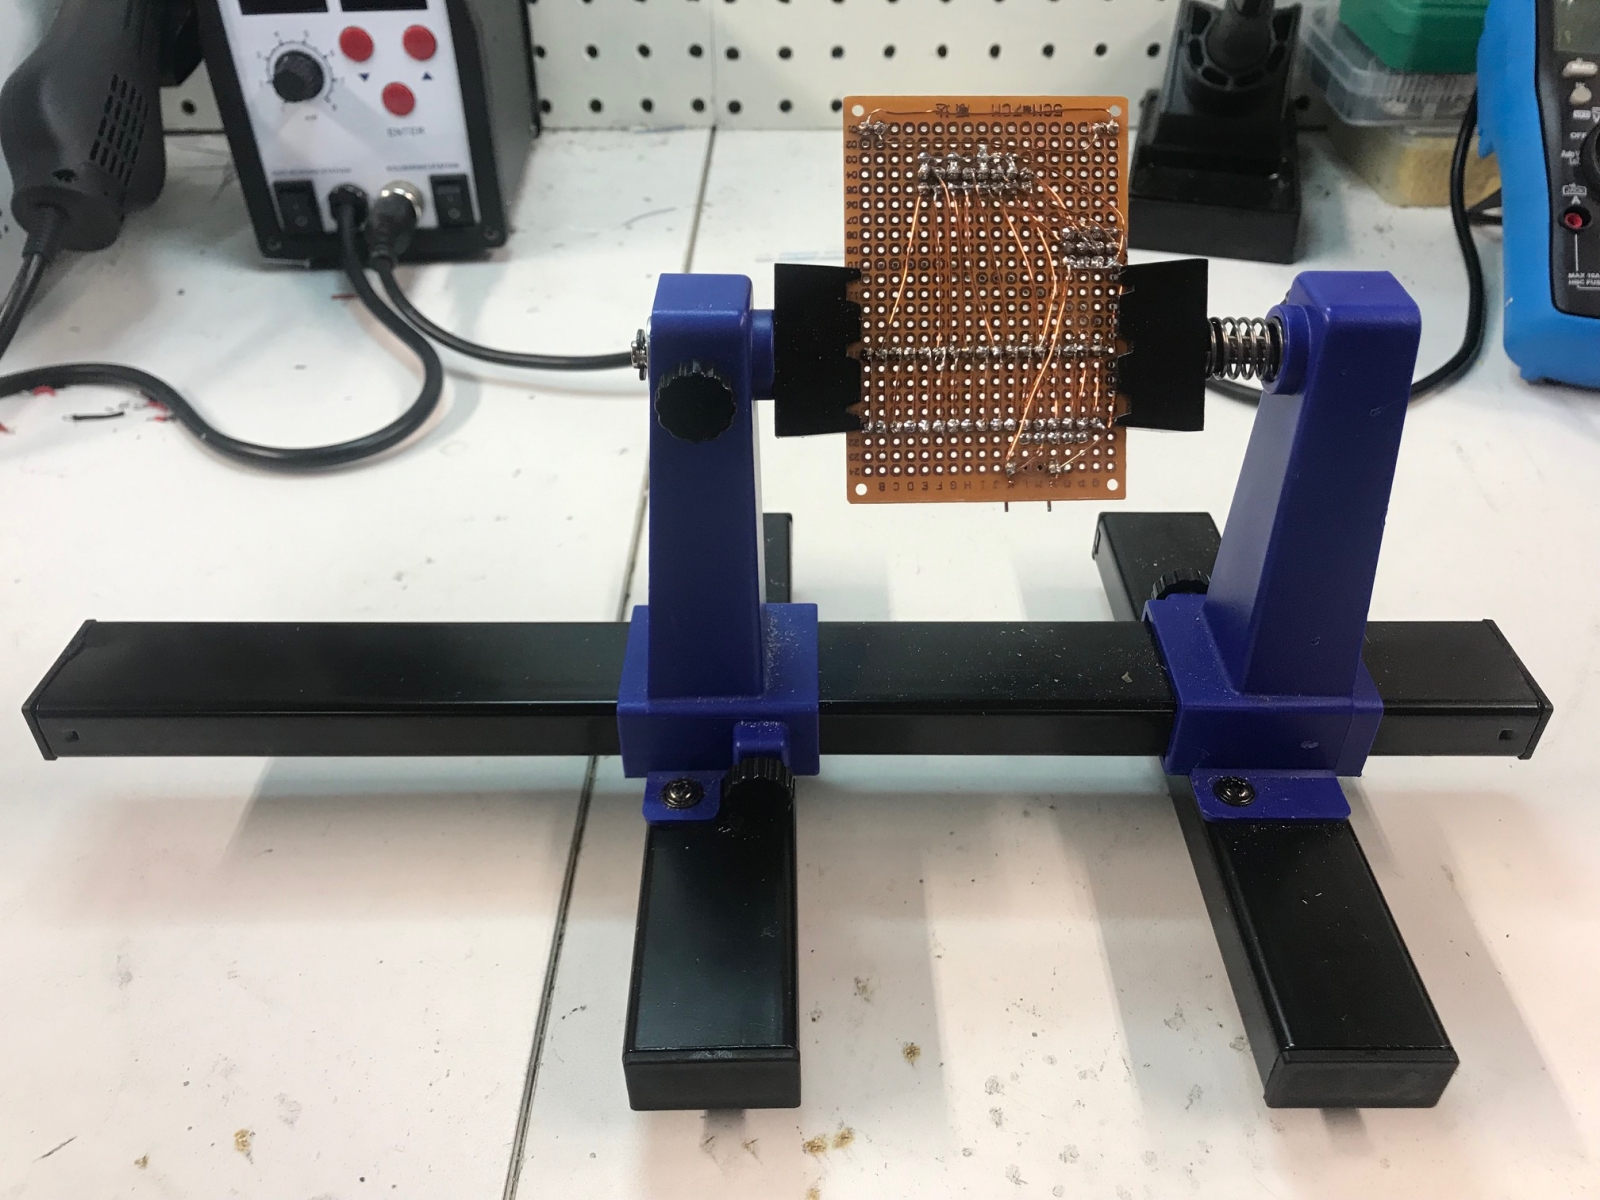
This has been a fairly recent acquisition, and I love, love love it.
The PCB squeezes between the clamps, and you can fasten it with different screws degrees. I usually still allow the PCB to rotate around the axle. This is not only great for soldering, but also when doing all kind of measurements.
-
Wire-type Soldering Iron Tip Cleaner: $9.50 on Amazon
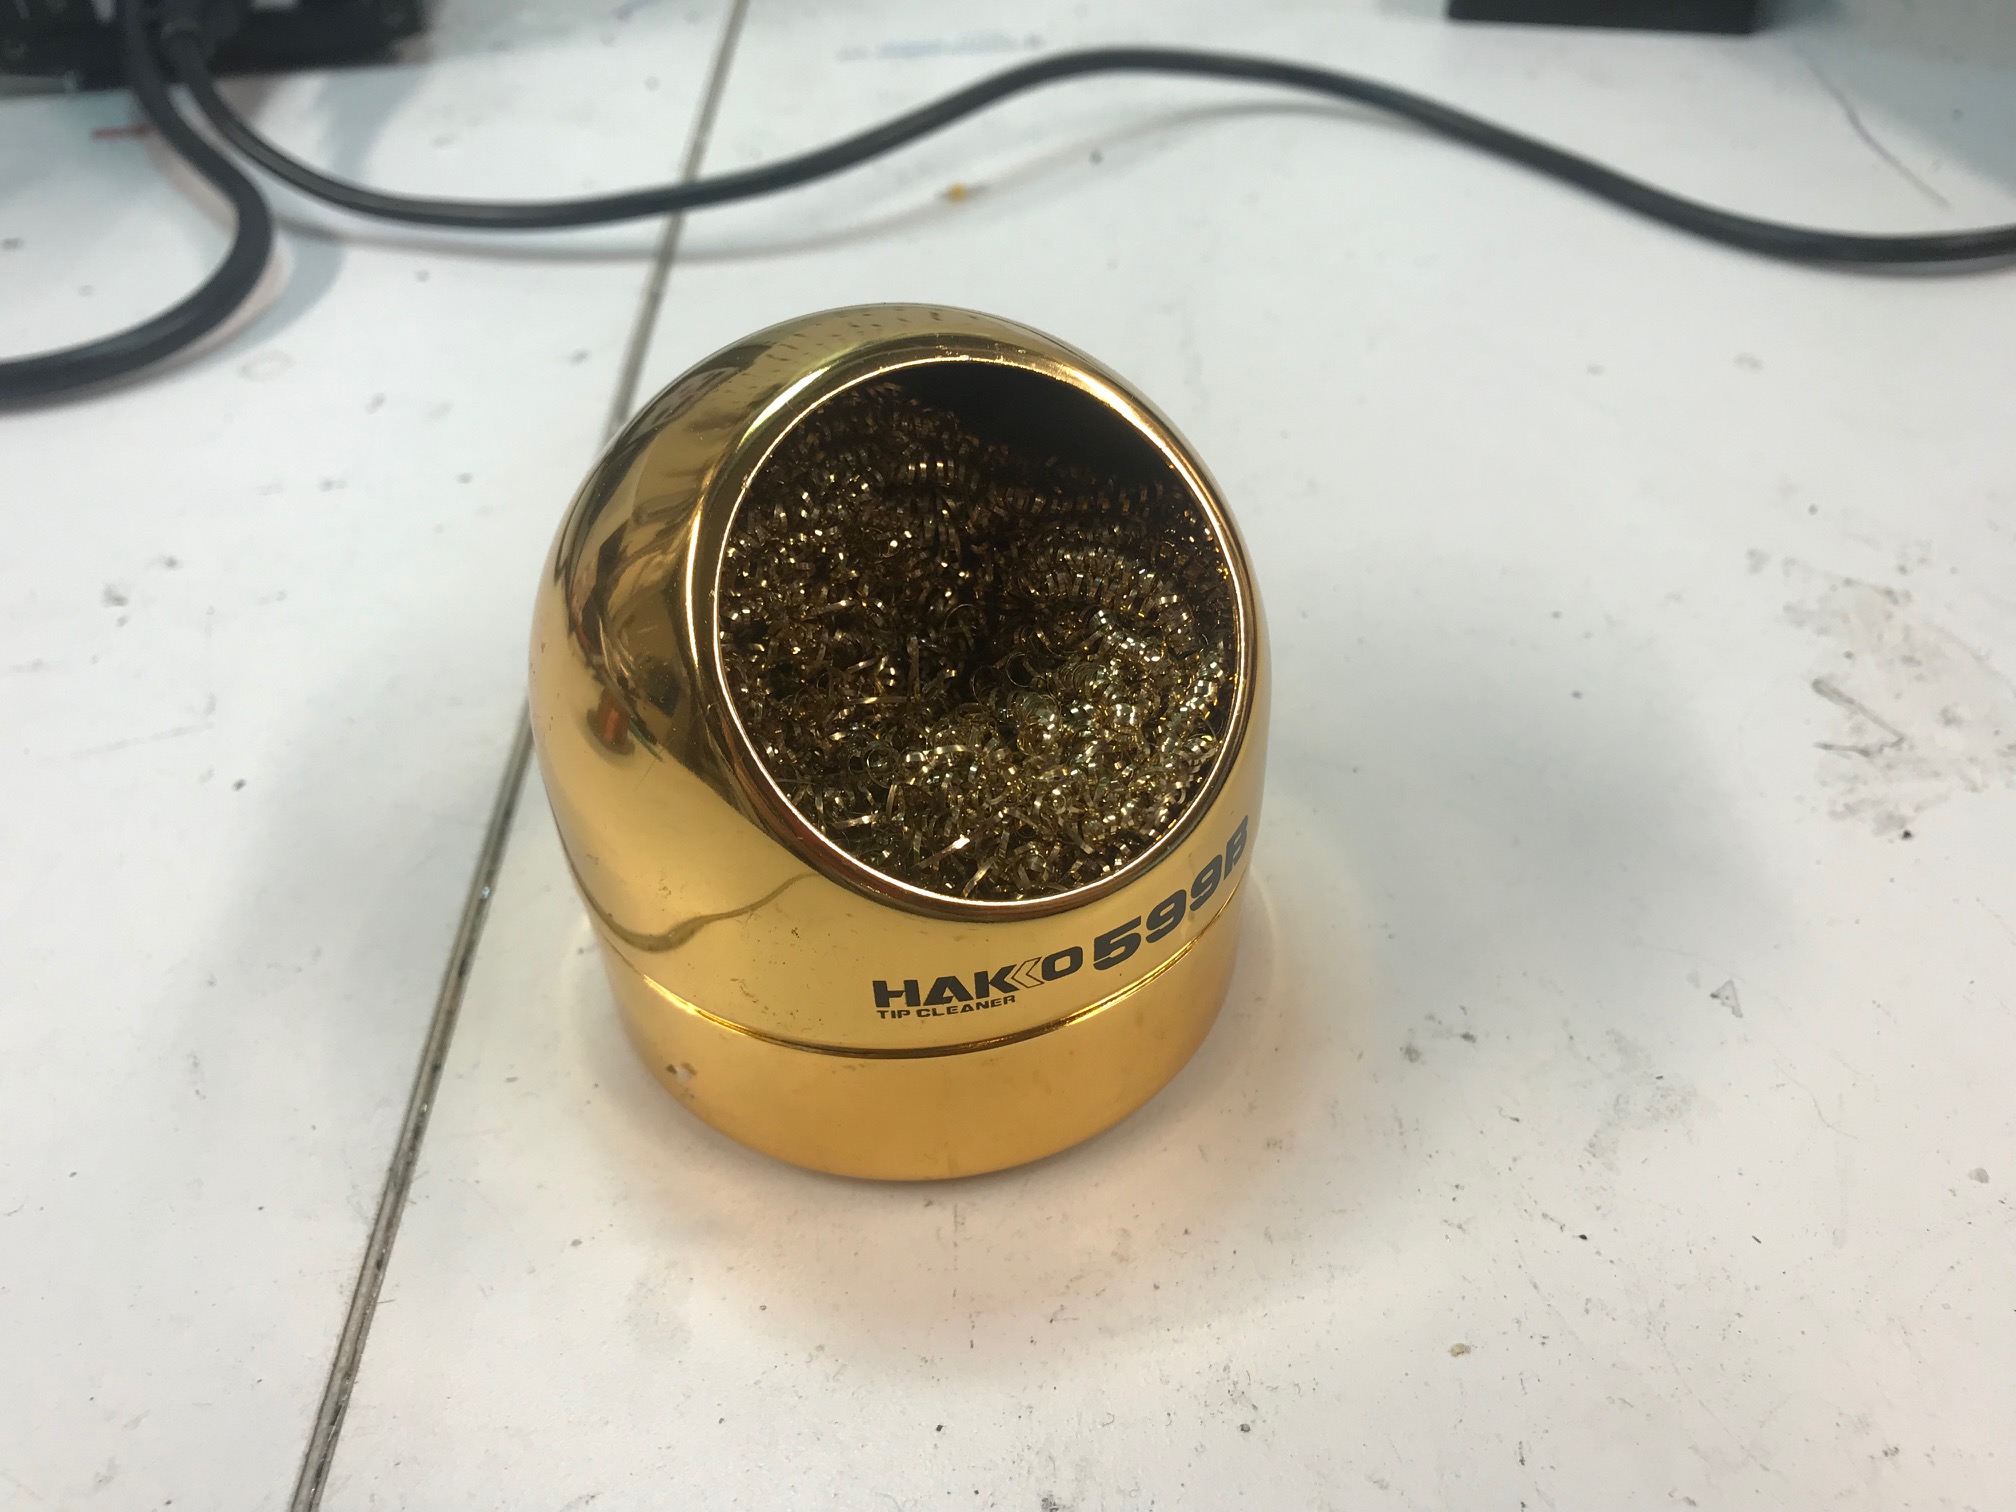
The soldering station comes with the traditional sponge, but a wire-based tip cleaner is so much better.
I clean the tip about 2 times for each wire that must be soldered, so this gets a lot of use.
I bought this before I got exposed to the wonders of AliExpress, and I went with a brand-name product, which explains the high price of $9.50. On AliEpxress, you should be able to get this for less than a dollar…
-
Magnifying Desk Lamp: $57 on Amazon
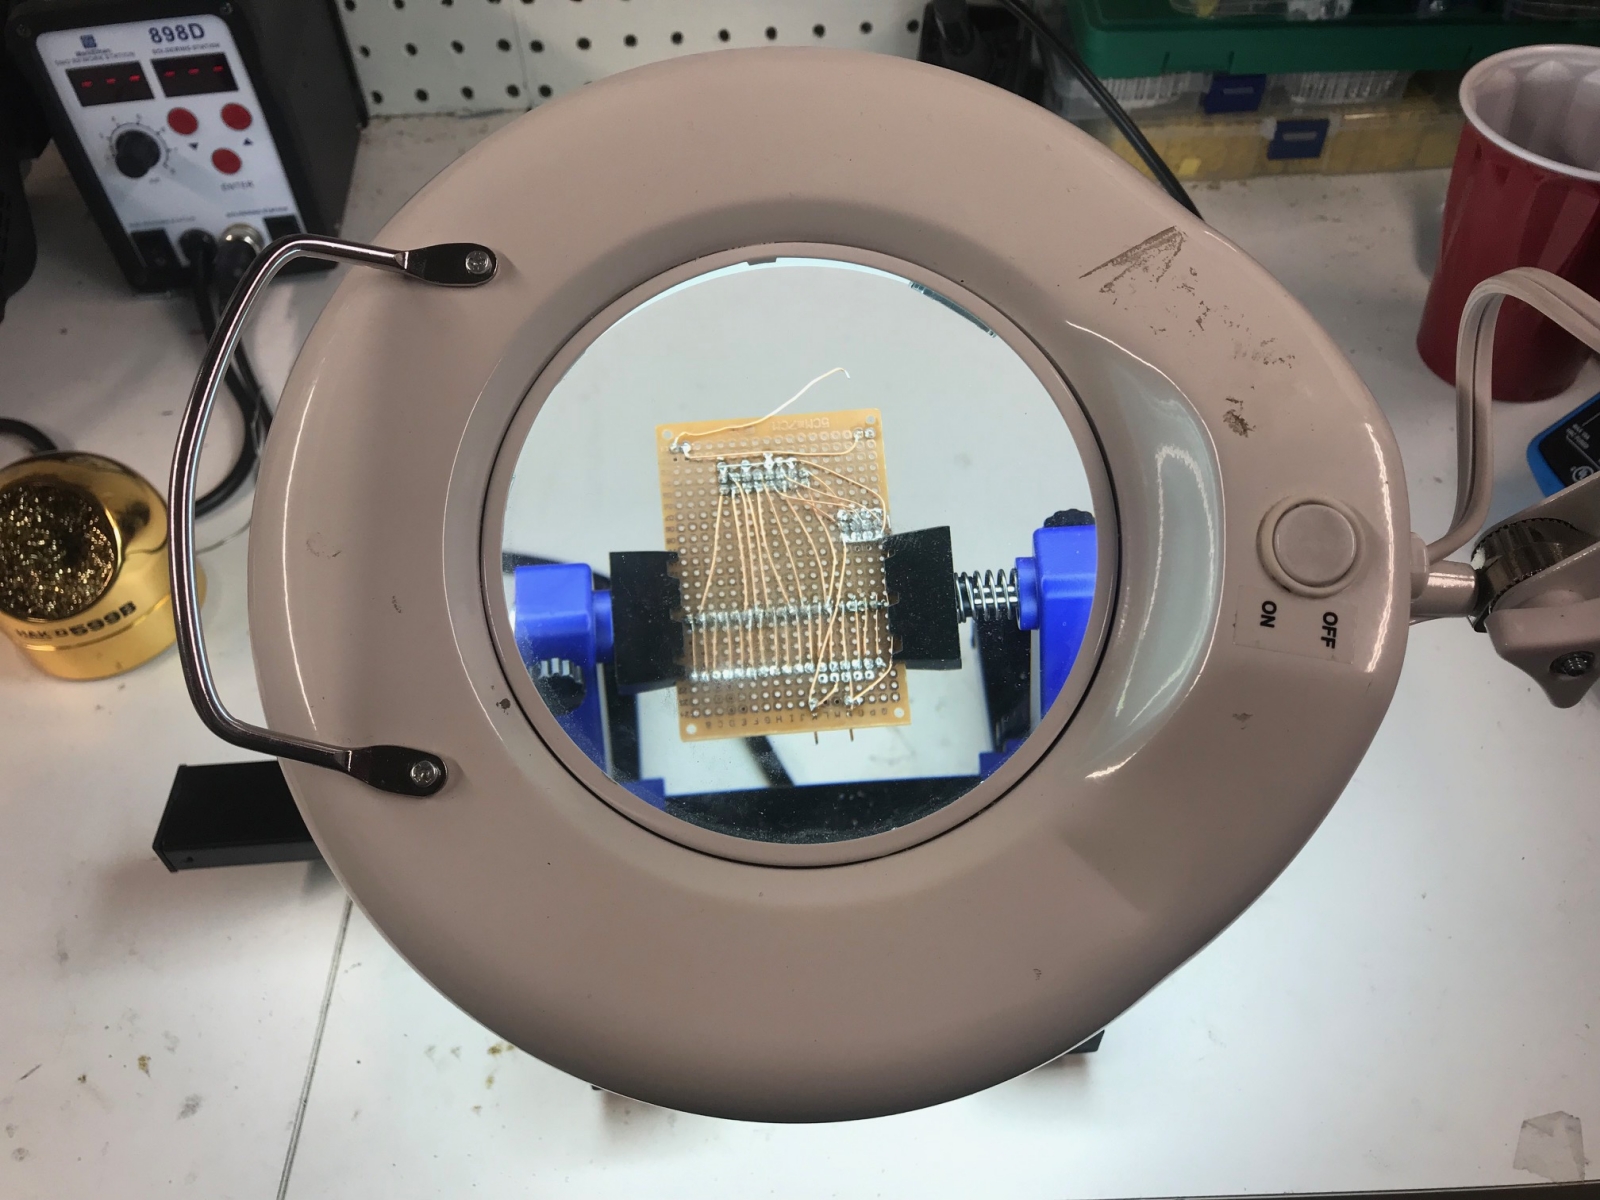
Another essential, especially when handling SMD components with regressing eyesight. This one is old and still uses a fluorescent lamp.
Mine gets moved around all the time. The clamp to secure it to the desk is usally too weak for that, but the solution was a simple as it was crude: I drilled a hole in the countertop of the desk. :-)
-
Helping Hands Soldering Aid: $7.20 on Amazon
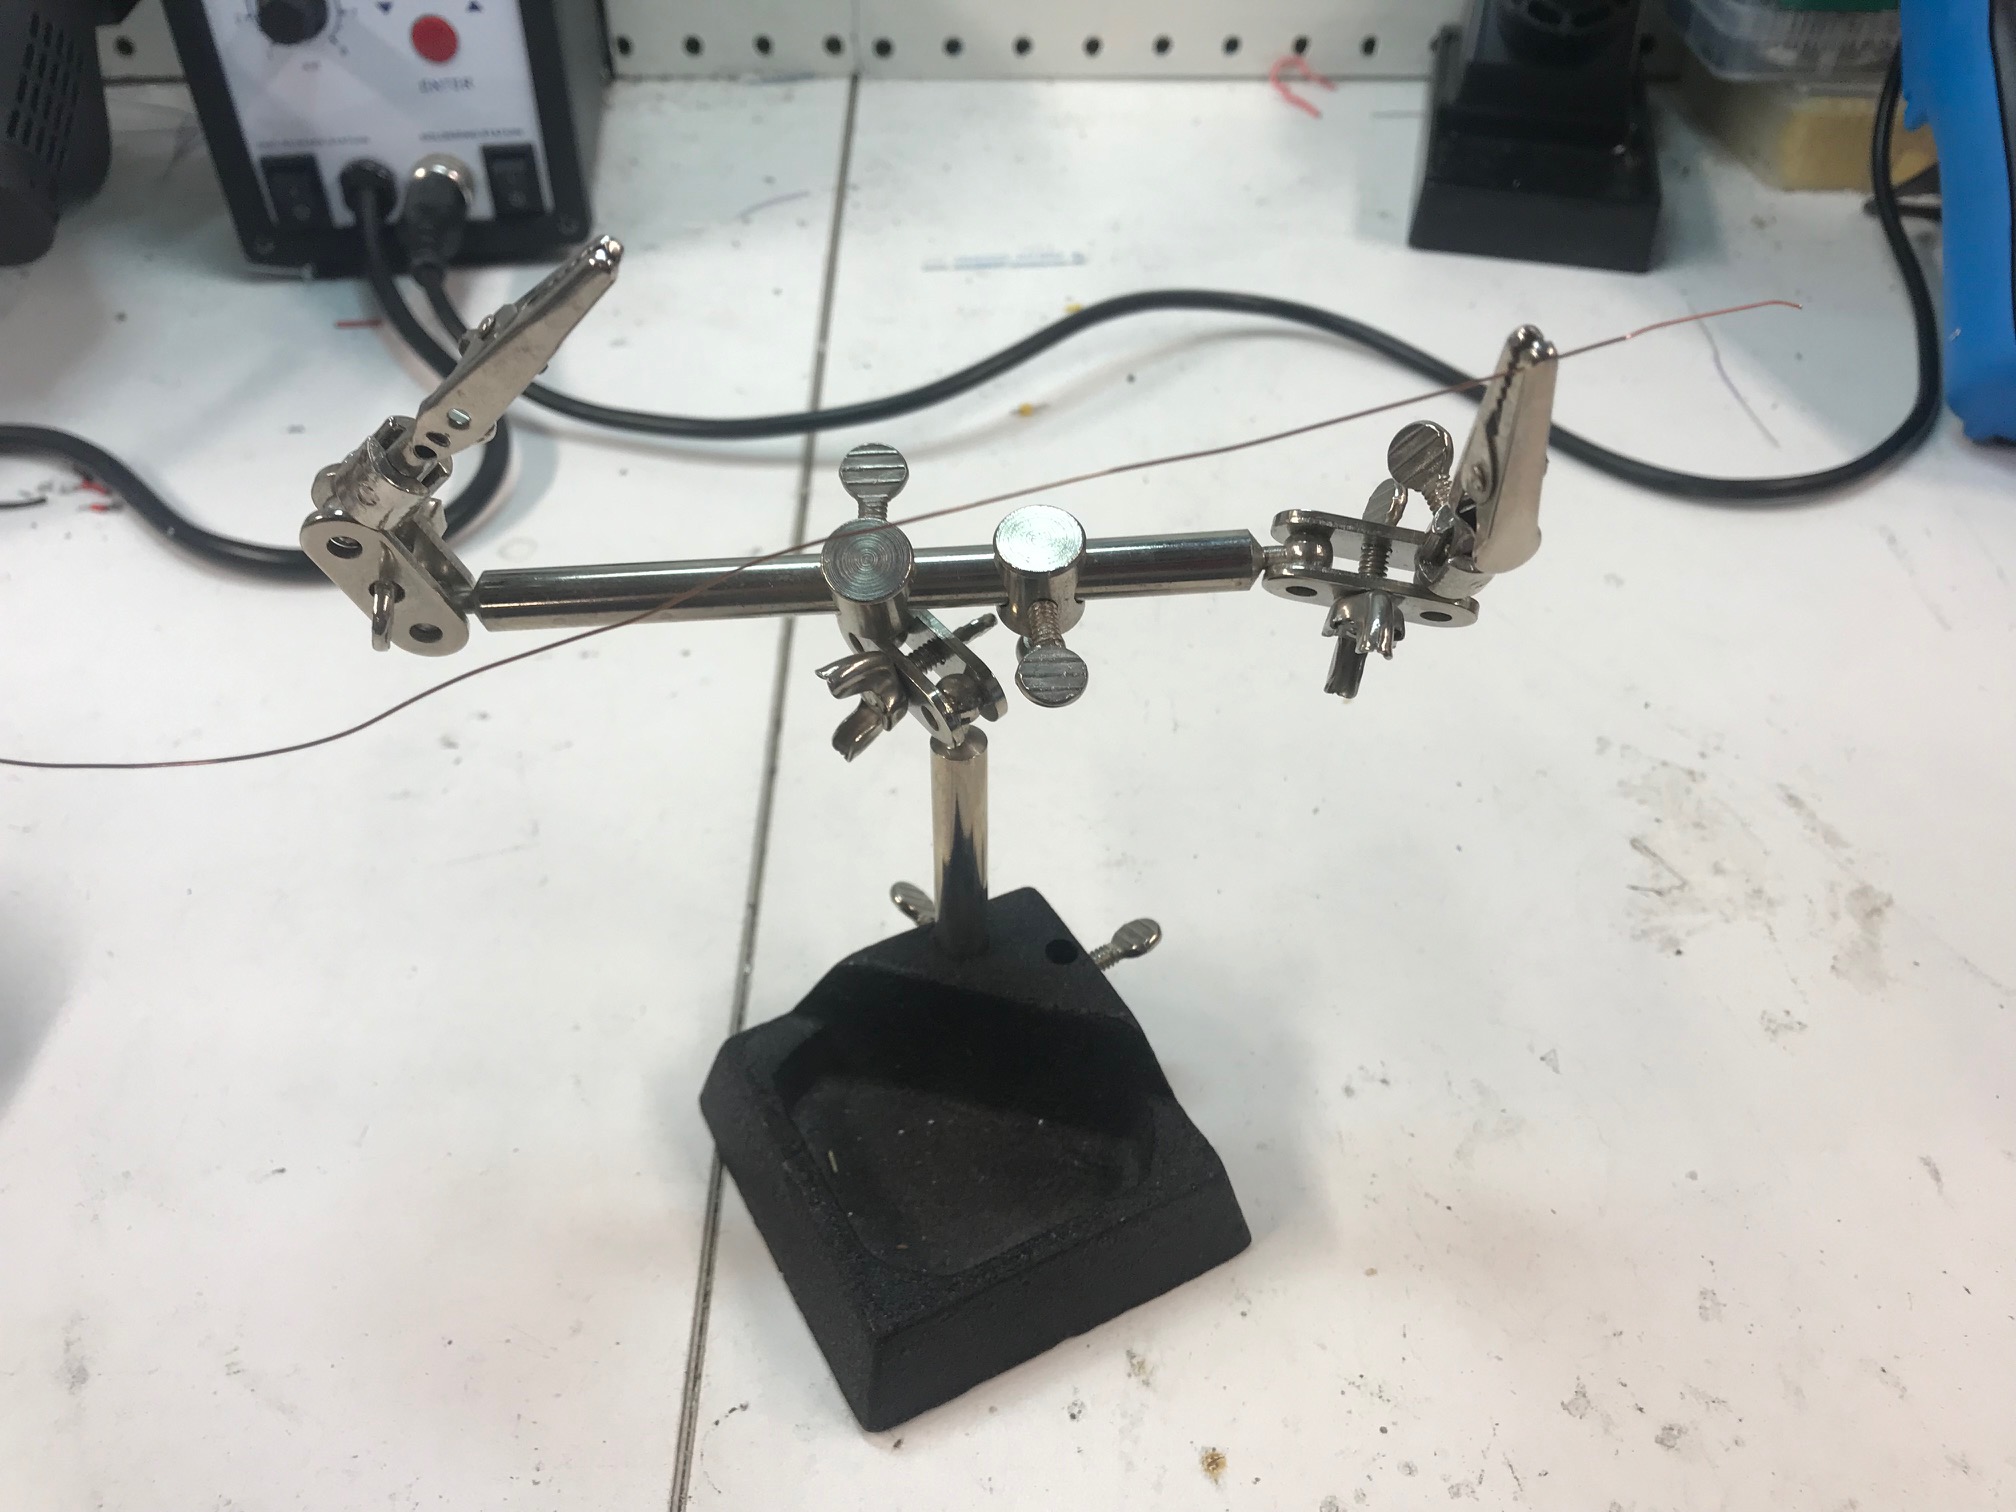
I’ve had these for years. They’re supposed to hold a PCB, but I’ve always found them to be a hassle to use. However, they are perfect to hold the magnet wire when I need to boil off the enamel!
Suprisingly, they are not much cheaper on AliExpress.
-
EEVblog Brymen BM235 Multimeter: $125 on Amazon
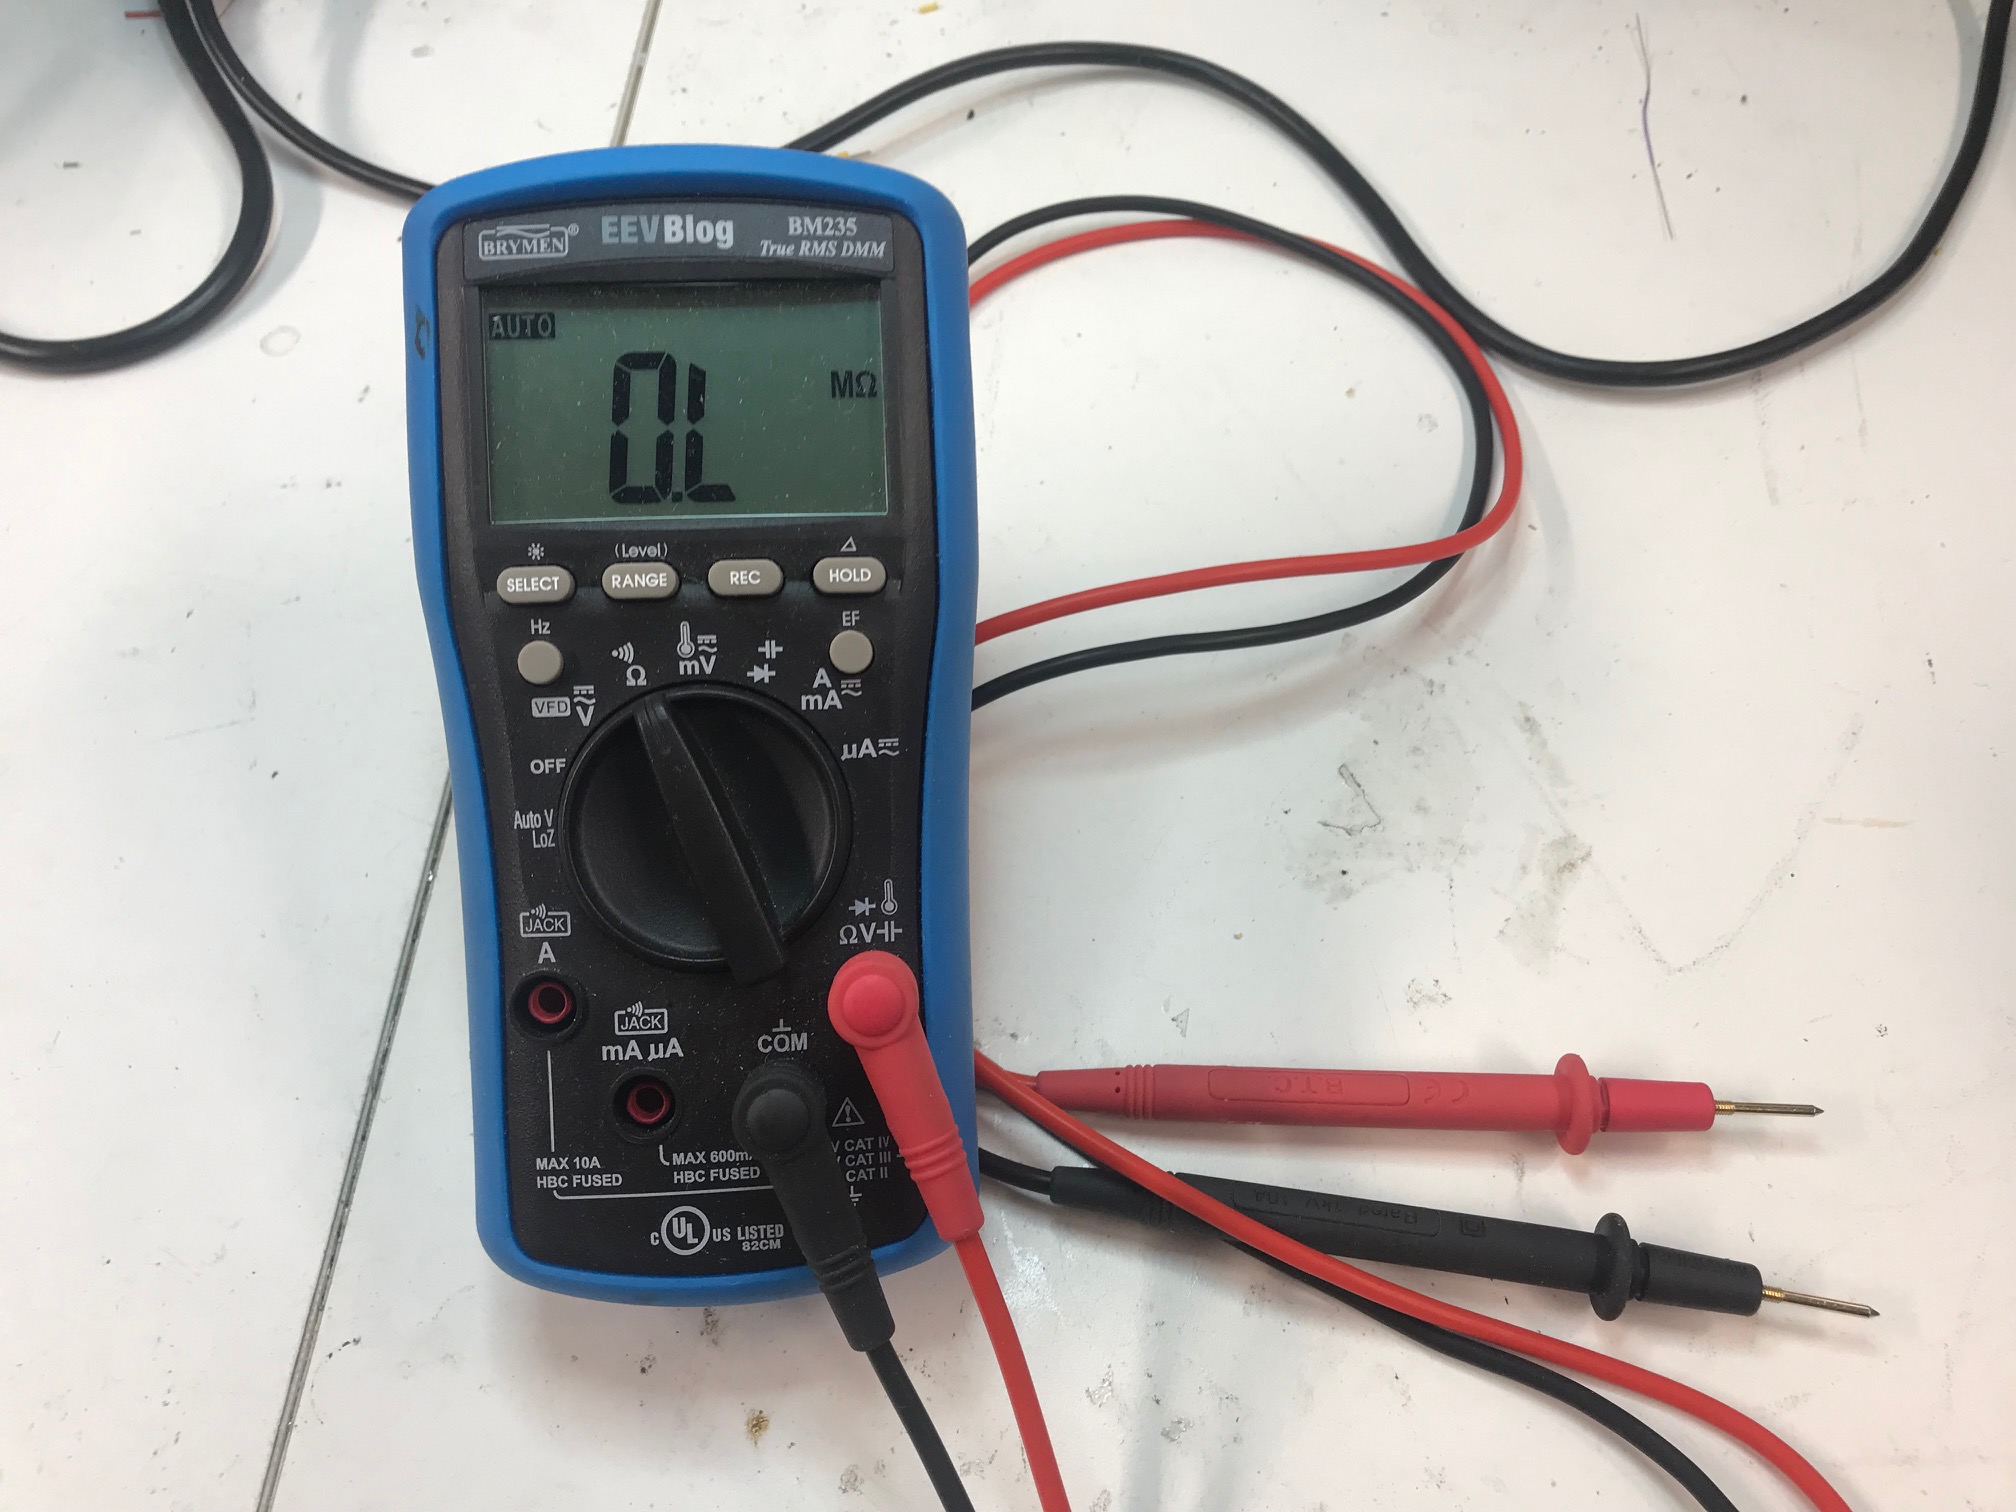
I’ve added a multimeter to the list of soldering equipment because I always double check my work to make sure I didn’t accidentally short nearby pins.
Multimeter range from dirt cheap to very expensive. $125 is on the expensive side, but I hope to use it for years. It got good reviews and it has served me well so far.
-
Miscellanous small stuff
-
Solder
I’m still on leaded solder until I run out.
-
Solder Wick: $7
For when you make the invitable mistake.
-
Small Cutting Pliers: $14 for 5
Why 5? Because they break when using them on things on which you’re not supposed to use them on. Cheaper AliExpress.
-
Tweezers
I find noze tweezers more useful than regular ones, but just get both…
-
Prototype PCB Board
I’ve been using single-sided prototype boards, but I’ll switch to double-sided once I run out.
-
That’s mostly it!
Not on the list is my stereo-microscope (which I review here). It can be a life saver for precision work (e.g. when soldering wires onto a 0.5mm TQFP pins), it’s not something I use when building prototypes.