Setting Up an ADSB-Exchange Feeder
When this blog post was written, ADS-B Exchange had an API that was free for non-commerical use. This is not the case anymore. All references in this blog post to their free API are now outdated. Check out this page on the ADS-B Exchanged website for details about using their API.
Introduction
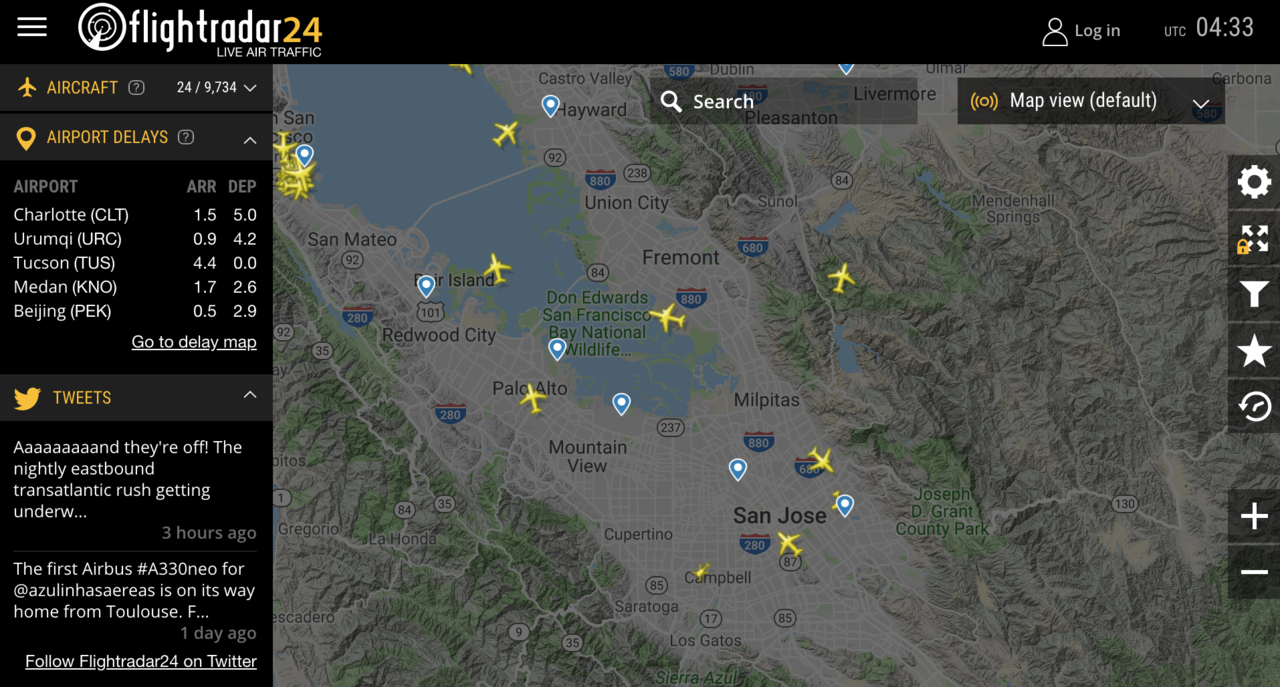
You’ve probably seen websites like flightradar24.com that display all the airplanes on a live map, provide information about flight delays etc.
Have you ever wondered where their data comes from?
Most of it comes from ADS-B and MLAT.
ADS-B is a system whereby airplanes broadcast information about their location, altitude, speed, call sign, airplane type and other pieces of information.
This broadcast is in the open, unencrypted, and the data can be received and decoded with a trivially simple and cheap SDR (Software Defined Radio) setup.
Per FAA mandate, aircraft that currently operate inside airspace that requires a transponder are expected to have an ADS-B transponder installed by Jan 1, 2020.
MLAT can be used to track planes that don’t have ADS-B yet but that have a Mode-S transponder that broadcasts identification and altitude data. This transponder information can be received by the same SDR setup, and tagged with a timestamp. When this data is received by multiple stations, the location of the plane can be determined through multilateration based on the time difference of arrival.
Aggregation of ADS-B data is a complex task due to the size and sheer number of messages produced each day: while airborne, an ADS-B equipped aircraft will typically transmit 2 messages per second!
Flightradar24 and others encourage enthusiasts to set up so-called ADS-B feeders: permanent SDR receiver stations that send the received ADS-B data to them, where the data gets sanitized and stored in a database, to be sold commercially to buyers in industries from manufacturing to finance, and even governments. It’s one large crowd-sourcing operation used to profit from aircraft spotting enthusiasts.
In addition to a basic map view, these for-profit flight aggregation operations provide APIs to query flight data, near real-time or historical, for a per-use fee. They also profit from enthusiast data in other ways: if an owner or operator of an aircraft does not want to be tracked on their site, they contact each site and pay a monthly fee to have their data removed completely or obscured. Aircraft owners can also request to be put on a block list by the FAA. Once an owner is on the block list, FR24 etc are required to remove that aircraft from view. Commercial operations such as FLTPlan have similar obfuscation programs.
There is one non-commercial alternative: ADS-B Exchange.
ADS-B Exchange provides an API with free access for non-commercial purposes and does not filter or remove any aircraft, such as military, private, and corporate aircraft.
Just like the commerical operators, ADS-B Exchange relies on volunteers all over the world to continuously feed them with the latest data.
The ADS-B Exchange website is a volunteer operation that runs 100+ servers to receive a continuous stream of data points from all over the world, process it, store into a database, display data on a map, and drive the API. It is a very complex and costly affair.
Tracking Local Airplanes
So what’s a possible use of this data?
For the past 2 years, I’ve been keeping track of airplane traffic over my neighborhood. This kind of data makes it possible to analyze trends (number of flights per day, shifting traffic patterns etc.) or for neighbors to identify noisy airplane and file complaints.
The main screen is just a list of airplanes for a particular day:
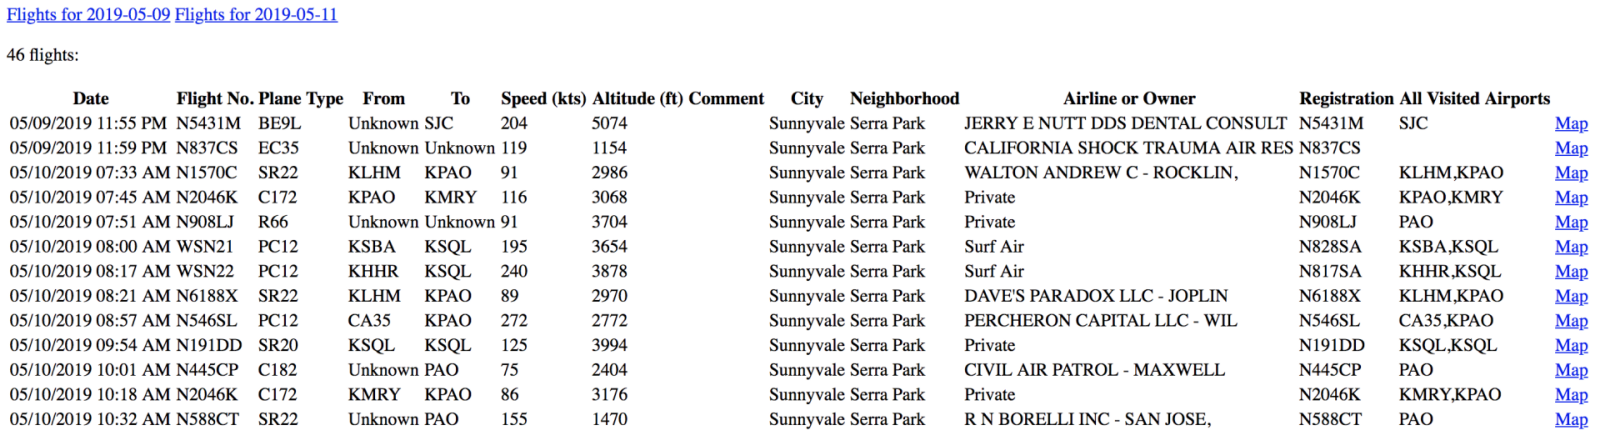 (Click on the image to enlarge)
For each airplane, you can see its trajectory overlaid on a map. Here’s a plane that arrives at SFO:
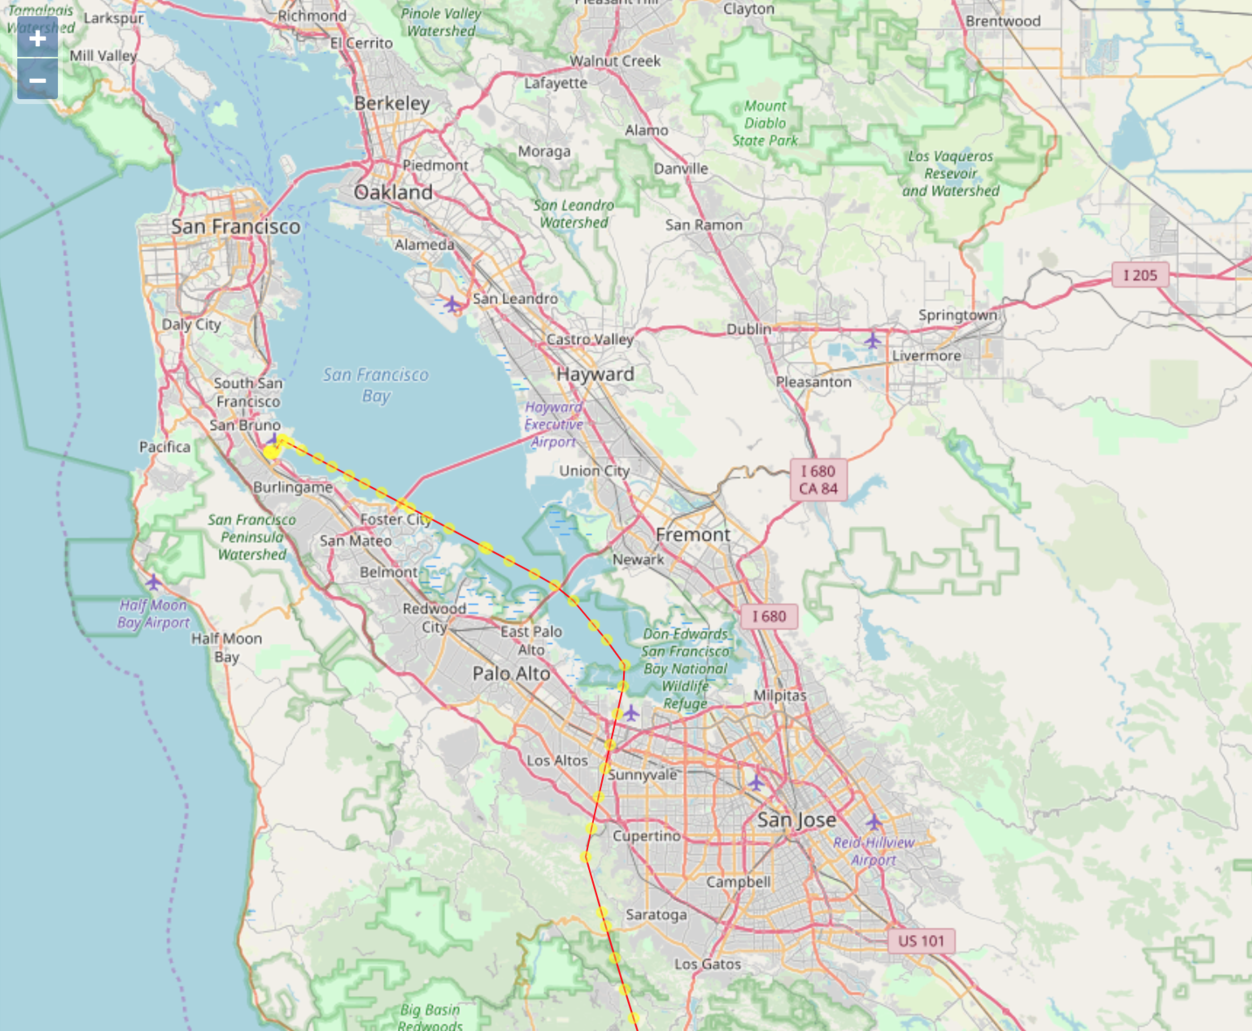 (Click on the image to enlarge)
You can also plot all the airplanes of a particular day on the map. Here’s a busy day of planes arriving at SJC:
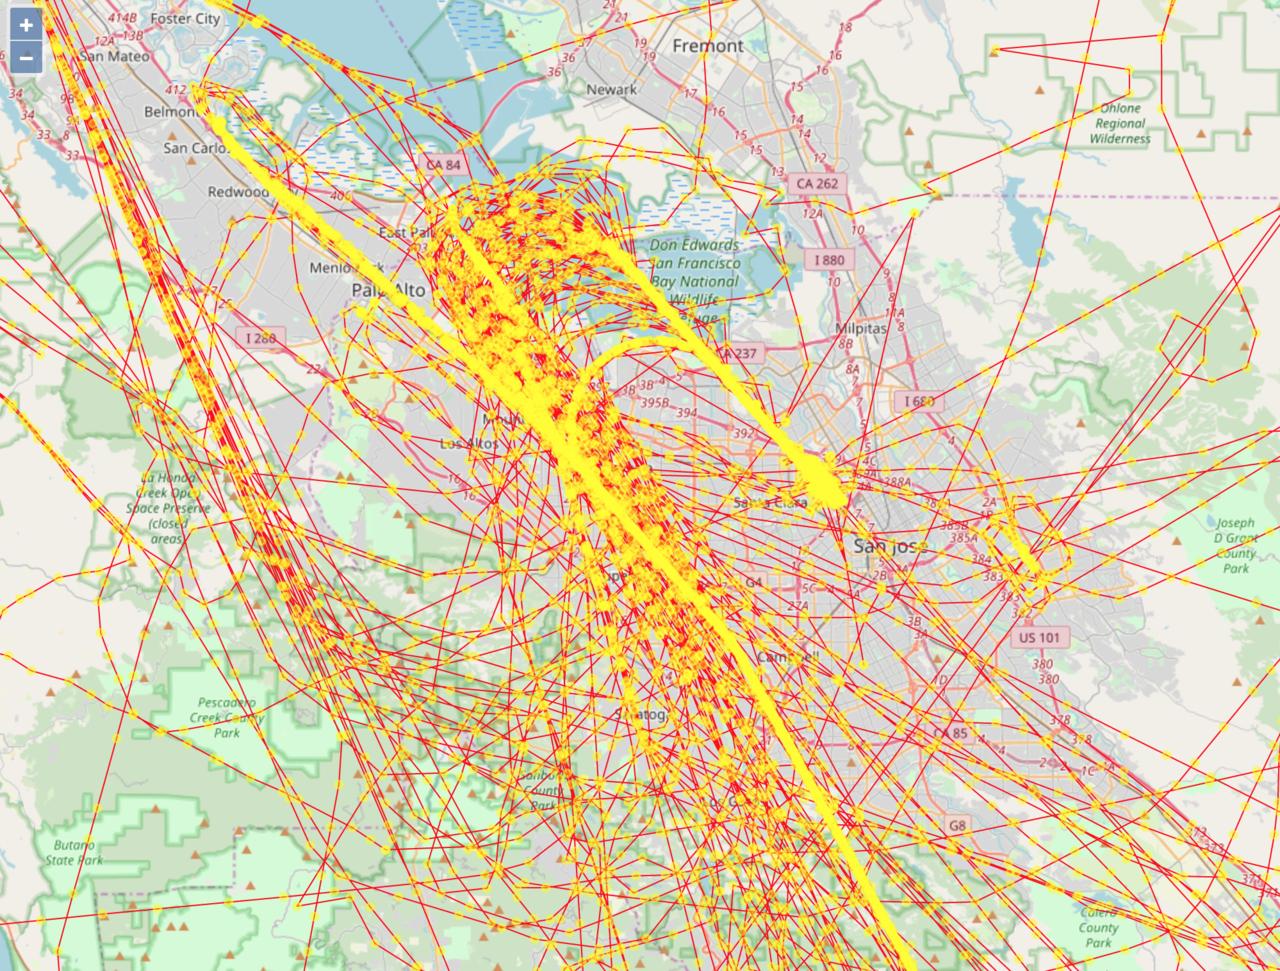 (Click on the image to enlarge)
The website runs on a cheap Linode VPS using PostgreSQL with the PostGIS spatial database extension.
While developing this application, there were 2 ways to get the airplane data for this application:
- Stick an antenna on the roof and record the ADS-B data straight from all the planes in the neighborhood: a good antenna with unobstructed views can get a range of more than 200 nautical miles!
- Use the ADS-B Exchange API
The antenna solution is definitely possible but it requires sanitation of the incoming data and an Internet uplink to the Linode server. Meanwhile, the API route is easier, since all the sanitation has already been done, and it doesn’t require a permanent link from your local ADS-B receiver to the Linode server. So I chose the API method.
I’m using the API at a steady rate, so I set up an automated monthly donation to cover a very tiny fraction of their total hosting costs.
However, since crowd sourcing the data is such an important aspect of the whole operation, all API users are asked to set up a feeder.
In the remainder of this blog post, I’ll go through the steps that I had to go through to make this happen.
The Hardware
Let’s start with the hardware! It’s perfectly possible to run everything on a regular PC, but the hardware will be running 24/7 and mounted on an outside wall of the house, so a cheap, low power, dedicated system is a much smarter choice. A Raspberry Pi is perfect for this!
-
Raspberry Pi 3B(+) - $36
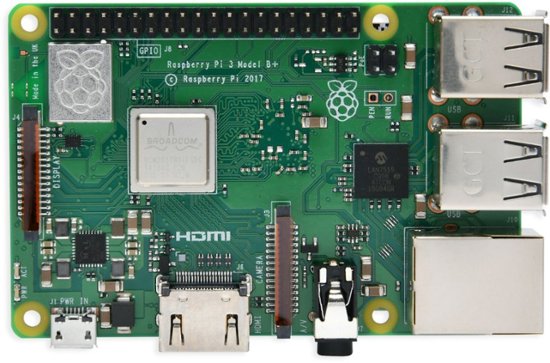
Most new installations are using a Raspberry Pi 3B or 3B+. An earlier version works too, but this one has built-in WiFi. If you mount it somewhere outside, the WiFi makes it easy to connect to your home network. 2.4GHz WiFi has greater range than 5GHz, so 2.4GHz is recommended.
-
Micro SD Card (8GB+) - $4
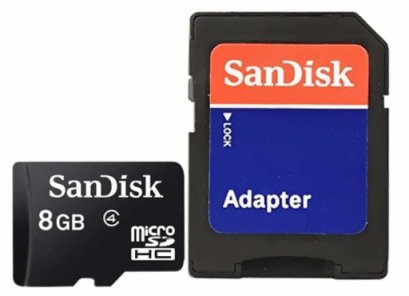
Your Raspberry Pi will need to run Linux. A full-featured Raspbian Linux installation will take close to 6GB of storage so 8GB will be the minimum capacity of the micro SD card.
-
SDR USB Device - FlightAware Pro Stick Plus - $20
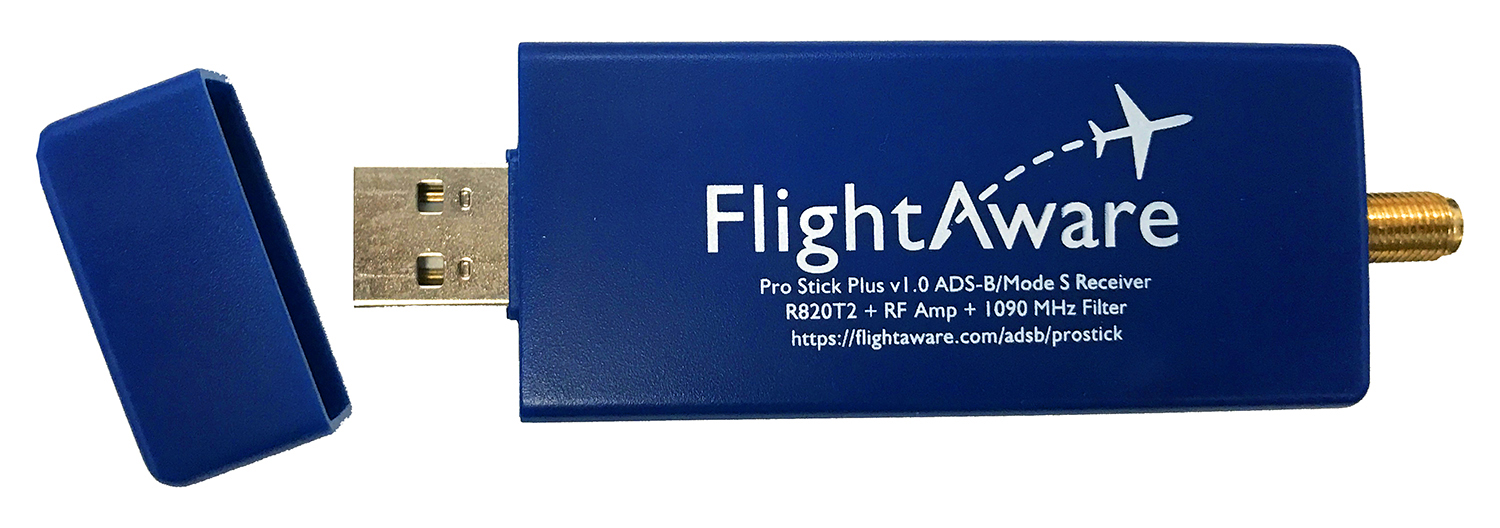
An SDR device makes it possible acquire RF signals, sample a particular band to the digital domain, and then hand it over to your CPU to decode the acquired raw data into something meaningful. You can use it to process tons of different signals: FM radio, GPS, ADS-B, and many more.
Cheap all-round SDR devices (~$20) cover a pretty large frequency range, from 500 kHz to 1.7 GHz. If you want to experiment with SDR, they are perfect to start with. One disadvantage of this wide range is that an uninteresting signal on one frequency band may impact the quality of reception on another.
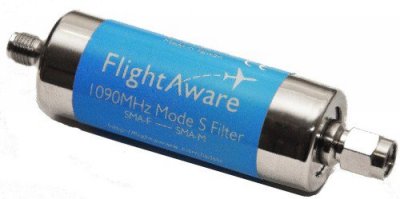
If you have an application which has a signal on a specific frequency, it’s therefore useful to have an analog band pass filter between the antenna and the SDR receiver that only passes signals in the frequency band of interest. There are discrete analog filters that do exactly that for ADS-B.
However, if you know up front that you’re only interested in ADS-B, you can buy the FlightAware Pro Stick Plus USB dongle: it has the same price as any other cheap unfiltered RTL dongle, but it has the analog filter and amplifier built in!
-
Antenna - $40
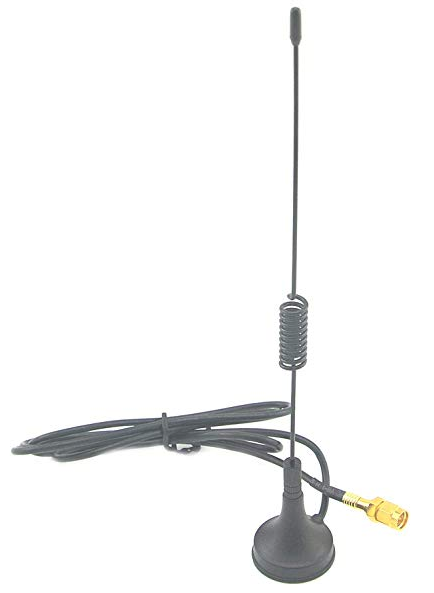
You can find tiny antennas, often with a magnet in the base, that are perfectly fine for receiving nearby airplanes. These antennas can also be used for other SDR experiments.
If you want to your feeder to have a larger range, a bigger antenna is required.
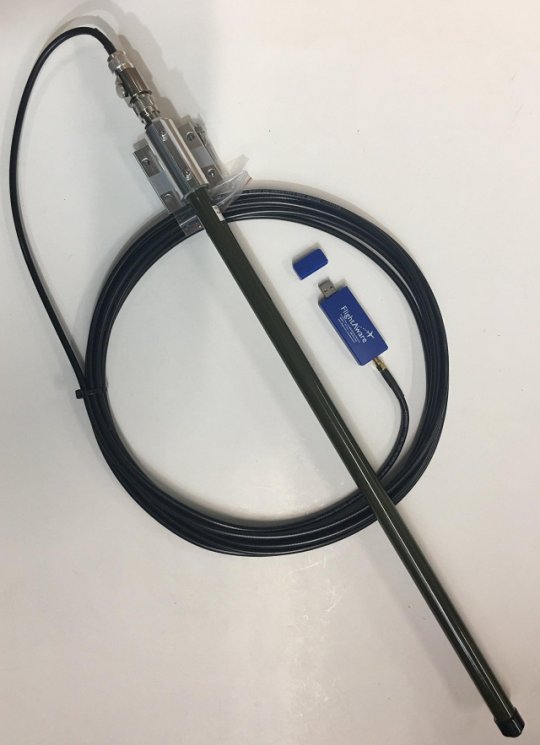
My goal was to have a permanent high-quality setup. You can find plenty of websites that tell you how to make a decent antenna yourself, but for esthetic reasons and plain laziness, I choose 66cm/26” antenna by FlightAware. It’s designed for the 1090 MHz band, pretty cheap and gets excellent reviews.

I later learned about a combo antenna sold by ADSB Exchange themselves! It supports both the 1090 MHz and the 978 MHz band. In the US, general aviation airplanes that don’t go higher than 18000ft often use the 978 MHz band (called 978 UAT) to transmit ADS-B. With this antenna and 2 SDR dongles, one for each frequency, your feeder can decode both. With shipping included, this antenna is $5 more expensive than the one from FlightAware, if you have free Amazon Prime shipping. Still, the dual band feature is interesting, and I’d have chosen this one if I had known about it up front.
Both antennas have a female N-type connector.
-
Cable - $16
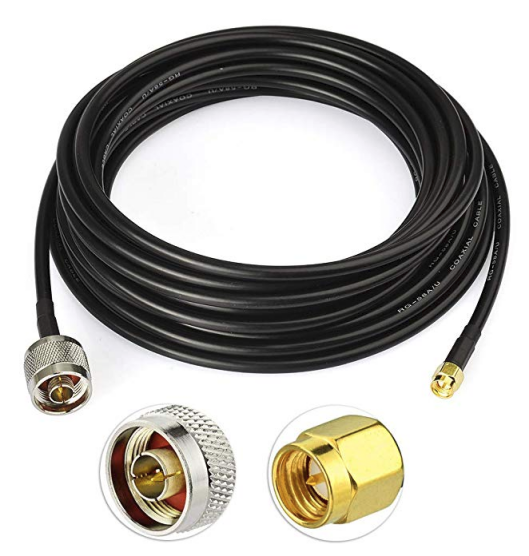
You need to connect the antenna to your SDR dongle!
Different antennas and SDR dongles have different connectors, so be careful.
The FlightAware SDR dongle has a SMA F connector. The antenna has a female N-type connector. So I needed an N Male to SMA Male cable.
Everything together, the full setup cost around $116. You can easily reduce by $50 by switching to the tiny antenna.
Software Installation
The ADS-B Exchange website has a page dedicated to setting up a feeder but it’s written with the assumption that the reader already knows what he or she is doing.
So I go into a little more detail.
-
Install Raspbian
Raspbian is a Raspberry Pi specific distribution of Linux. Using a PC or Mac with a SD card interface, Raspbian must be flashed onto the micro SD card.
- Download Raspbian from the Raspberry Pi website.
- I selected the zip file of Raspbian Stretch with desktop and recommended software (1.9GB).
- At the time, version 2019-04-08 was the most recent one.
- Unzip after download. You will now have a .img file of ~5.4GB.
- Download and install Etcher, a tool to flash an SD card with a new disk image. There are versions for Windows, OSX, and Linux.
- Use Etcher to flash the .img file to an SD card.
- This will erase all the existing content on the SD card!
- Download Raspbian from the Raspberry Pi website.
-
Configure the Raspberry Pi
The Raspbian that you just flashed contains a full featured windowed desktop. The easiest way to proceed is to configure everything through this desktop, so that’s what I did. However, it requires an HDMI monitor, mouse, and keyboard.
- Insert the flashed SD card into the Pi.
- Connect USB keyboard and mouse.
- Connect monitor with HDMI cable.
- Power up.
- You should see a desktop after about 1 minute.
- Follow the installation instructions on the screen to set up password, keyboard, WiFi, time zone etc.
- When asked to update to latest software, say yes. Go get some coffee, it will take a good 10 minutes to update.
- Eventually, your Raspberry Pi will ask to reboot. Do so.
-
Enable SSH
Right now, your Raspberry Pi is a little desktop computer, but when it’s installed somewhere in your attic or on the side of your house, you’ll have to access it through SSH. By default, SSH is not enabled.
To enable: Click Raspberry Icon -> Preferences -> Raspberry Pi Configuration -> Interfaces -> SSH: Enable
-
Install the PiAware flight tracking software
PiAware is a package by FlightAware that takes care of everything to connect to the SDR dongle, decode ADS-B and MLAT information, and make the data available in a format to send it to ADS-B data aggregators (including FlightAware, of course.)
After the installation of PiAware and rebooting, your Raspberry Pi will be transmitting ADS-B data to the FlightAware servers, but not yet to ADS-B Exchange.
- Open a terminal
- Follow the installation steps:
wget http://flightaware.com/adsb/piaware/files/packages/pool/piaware/p/piaware-support/piaware-repository_3.7.1_all.deb
sudo dpkg -i piaware-repository_3.7.1_all.deb
sudo apt-get update
sudo apt-get install piaware
sudo apt-get install dump1090-fa
sudo reboot
-
Install the ADS-B Scripts
Execute the commands for the final step of the installation: it will like the PiAware setup with the ADS-B Exchange server.
When running the
setup.shscript, you will be asked the GPS coordinates of your ADS-B receiver. It is important that those coordinates are filled in accurately because they will be used during MLAT triangulation! You can find the exact GPS coordinates of your house through Google Maps: right click on the desired location, and select What’s here.
sudo apt update
sudo apt install git socat
git clone https://github.com/adsbxchange/adsb-exchange.git
cd adsb-exchange
chmod +x setup.sh
sudo ./setup.sh
-
Check Status of NTP (Network Time Protocol)
It is very important for MLAT accuracy that your Pi has the right time. NTP syncs your Pi to a reference clock that is accessible through the Internet. Changes are that NTP is already enabled by default, but it doesn’t hurt to check.
- Run
timedatectl. The output should look like the printout below, with “NTP synchronized: yes” and “Network time on: yes”.
- Run
      Local time: Fri 2019-05-17 05:43:41 UTC
  Universal time: Fri 2019-05-17 05:43:41 UTC
        RTC time: n/a
       Time zone: Etc/UTC (UTC, +0000)
 Network time on: yes
NTP synchronized: yes
 RTC in local TZ: no
-
Enable NTP
If NTP was not enabled, enable it by executing the commands below:
sudo systemctl enable systemd-timesyncd
sudo systemctl start systemd-timesyncd
sudo timedatectl set-ntp 1
-
Check that data is being sent to ADS-B Exchange
Go to
http://www.adsbexchange.com/myip.If all went well, you should see something like this:
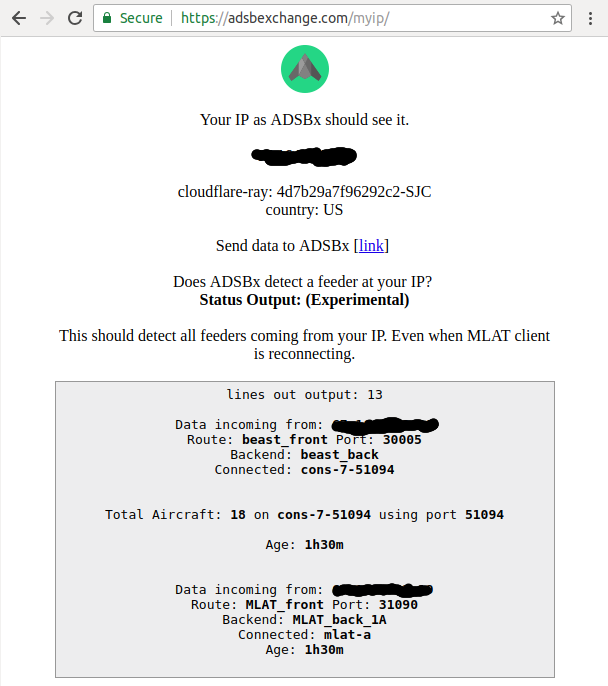
Data from 18 airplanes was picked up at the time of taking the screenshot.
ADS-B data is being sent to port 30005 of the ADS-B Exchange servers, and MLAT data is sent to power 31090.
-
Claim Your PiAware Feeder Station (Optional)
After completing this whole setup, no only are you sending ADS-B data to ADS-B Exchange, you are also doing so to FlightAware, the developers of the PiAware package.
FlightAware provides all kinds of additional data and services, some of them only for paying users.
When you operate an ADS-B feeder that sends data to FlightAware, you can register your feeder. In return, your account will be upgraded for free from Basic to Enterprise level (which normally costs $90/month.)
An particularly nice benefit of registering is the statistics page, which shows all kinds of information that are related to your feeder: from the number of planes you’ve reported per day to histograms of the distance of reported planes.
You can claim your receiver here: https://flightaware.com/adsb/piaware/claim.
Local Live View
The PiAware package automatically runs a web server on the Raspberry Pi that can be used to get a live action view of all the airspace activity that was captured by your feeder.
To use it, you need to know the local IP address of your Raspberry Pi. My Eero router makes this easy: it has an app
that lists all the connected devices and their IP address. Lacking that, you could log in to the Raspberry
Pi, run ifconfig and write down the IP address. However, there’s no guarantee this address will stay constant
after the next reboot. An in-depth treatise on this subject is outside the scope of this post, but a good start
is this article.
Once you know the IP address, you can ask the browser on your regular PC or laptop to point to the PiAware Skyview
page: http://<IP ADDRESS>:8080.
You will be greeted by a page that looks like this:
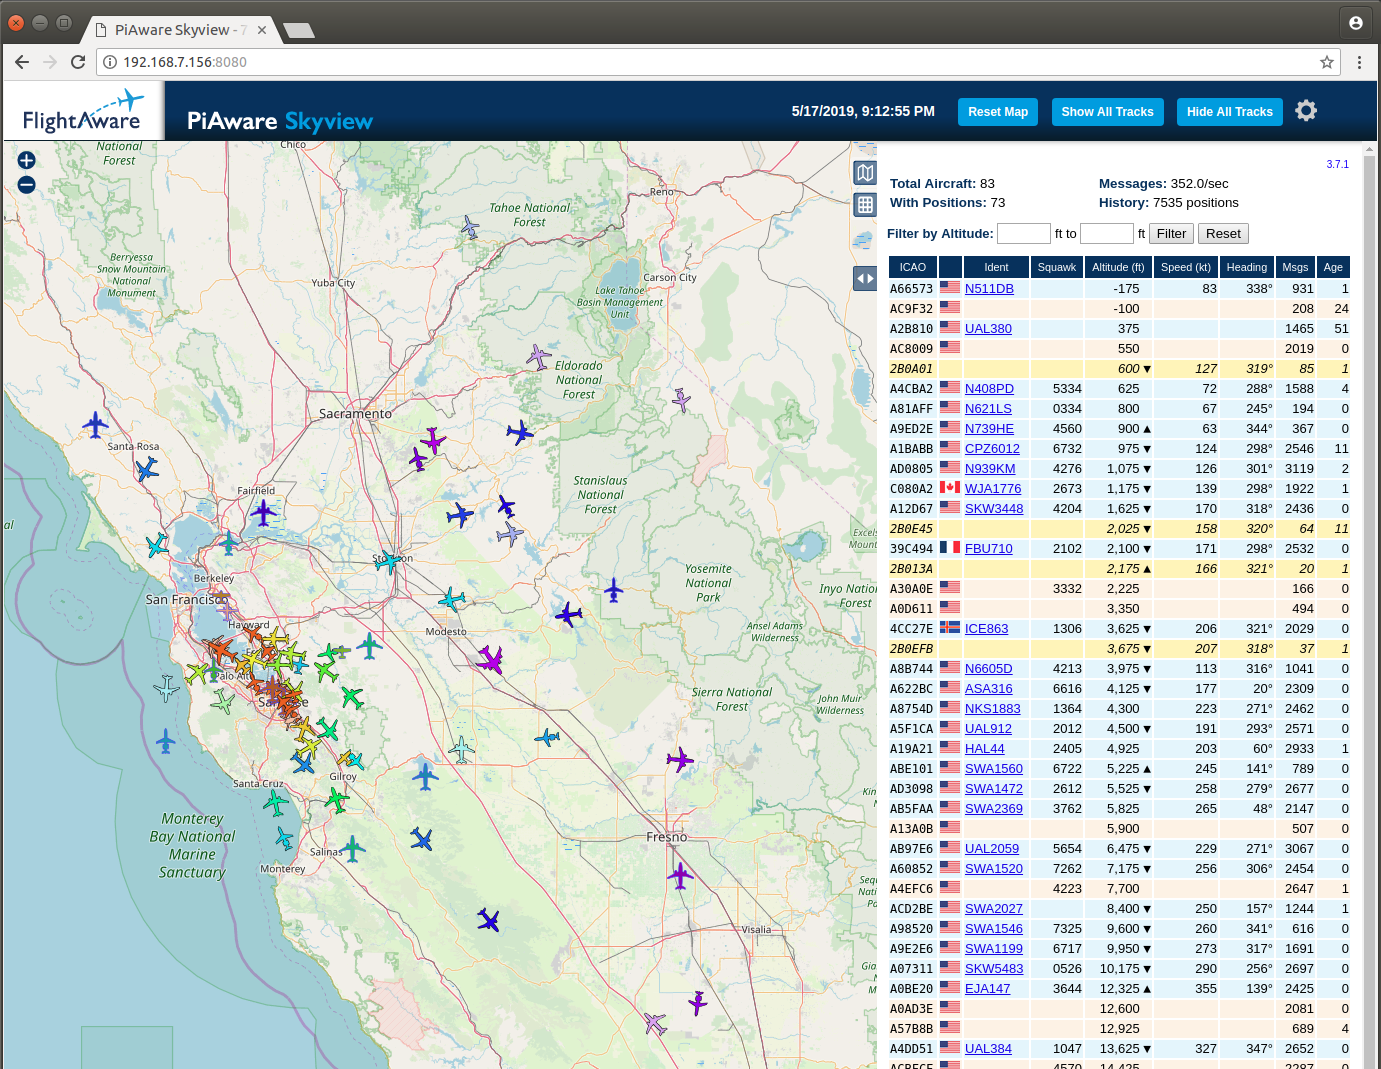 (Click on the image to enlarge)
On this quiet late Friday evening, my antenna, located in the South Bay, picked up 83 aircraft, some of them as far a Lake Tahoe and Visalia, each a good 150 miles away! Your, ahem, mileage may vary depending on antenna size and installation, obstruction from nearby trees or buildings, mountains etc.
By clicking on a plane, you’ll get to see all the recorded data points and detailed information.
Since this is live view without database backend, planes will disappear from the map when no new data has been received for one minute.
Conclusion
That’s it for now!
Setting up an ADS-B feeder is not hard. Once you have all the components, it took me less than an hour.
If you’re just having fun, and learning about SDR in general, I’d start with the cheapest kit with a universal SDR dongle (without bandpass filter) and tiny antenna. You can track plane, decode FM radio etc. There are tons of resources out there.
But if you want to contribute to a good cause of free data, setting up a feeder is an excellent idea.
James Stanford from ADSB Exchange helped me with proof reading and corrected things that I got wrong. Thanks!