ThinMachine - a $25 Thin Client MacOS Time Machine Appliance
The instructions below set up Time Machine using the Apple File Protocol (AFP). After publishing this blog post, I’ve been told that this is now deprecated and that Samba should be used instead. I’ll update this blog post in the near future.
- Introduction
- The HP t520 Thin Client
- Backup Storage: Internal or External?
- Install Bodhi Linux
- Update Bohdi Linux and Install a Few Tools
- Create a Dedicated timemachine Account with Access to the Backup Partition
- Set up the Time Machine server daemon
- Changing the BIOS ‘After Power Loss’ Option to On
- Connect your Mac to ThinMachine
- Accelerating Time Machine Backups
- Conclusion
- Footnotes
Introduction
October 2007, that’s the time I decided to buy my first Mac. It was the moment Apple announced Time Machine, their on-the-fly backup feature. I had been considering a PC to Mac switch for a while, but this gave the final push. I bought a Mac Mini and an Iomega MiniMax backup drive along with it.

A year later, Apple released Time Capsule, an AirPort Extreme base station with built-in backup hard drive. By then I had also bought my first MacBook, so seamless wireless backups were highly appreciated.
The first Time Capsule was stolen during a home burglary, but the second worked great for more than 10 years until it didn’t, 448 days ago, as my current MacBook likes to remind me of every few days1.
Apple discontinued Time Capsule years ago, but it’s easy to create one yourself by setting up a Linux server.
For this kind of single-use always-on application, I want something small and low power that fits in a cramped internet closet. A Raspberry Pi works, but they’re still hard to get these days. And at $80 and more, they’re kind of expensive for what you get, and that’s without an enclosure or power supply.
There’s a better option: a thin client PC. They’re available by the thousands on eBay, and they’re very, very cheap.
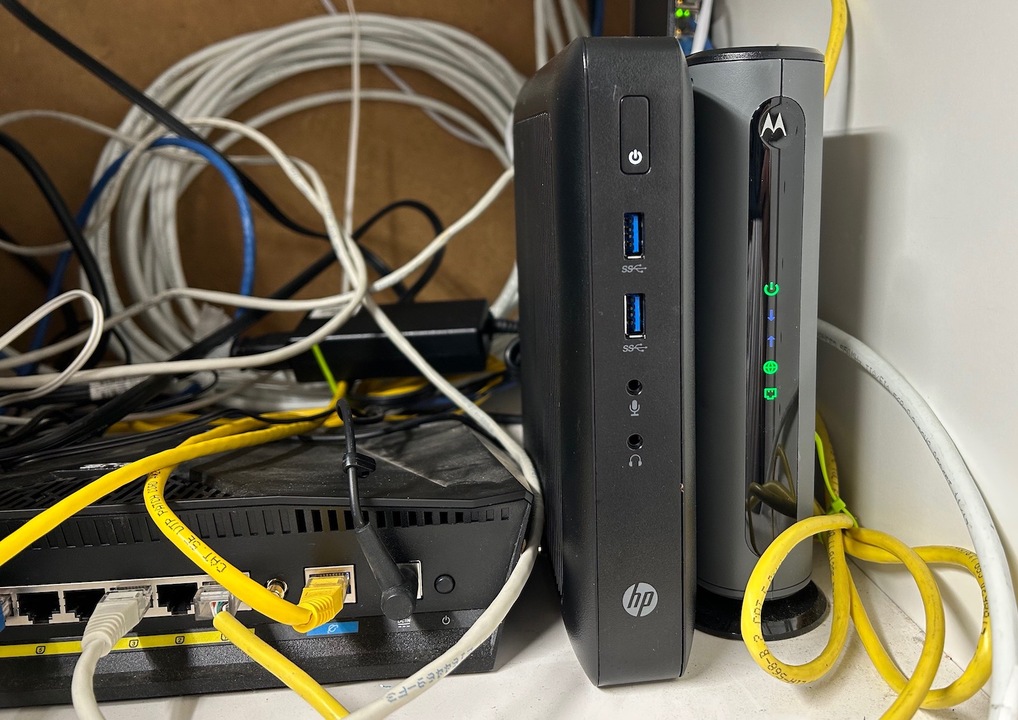
I bought an HP t520 for $25, shipping included.
In this blog post, I write down the steps on how to convert the t520 into ThinMachine, a MacOS Time Machine backup appliance.
The HP t520 Thin Client
My pre-purchase thin client research consisted of going on eBay, typing ‘thin client’ and selecting the cheapest option that was ready to go, with at least 4GB of RAM, a flash drive and a power supply. I ended up with this:
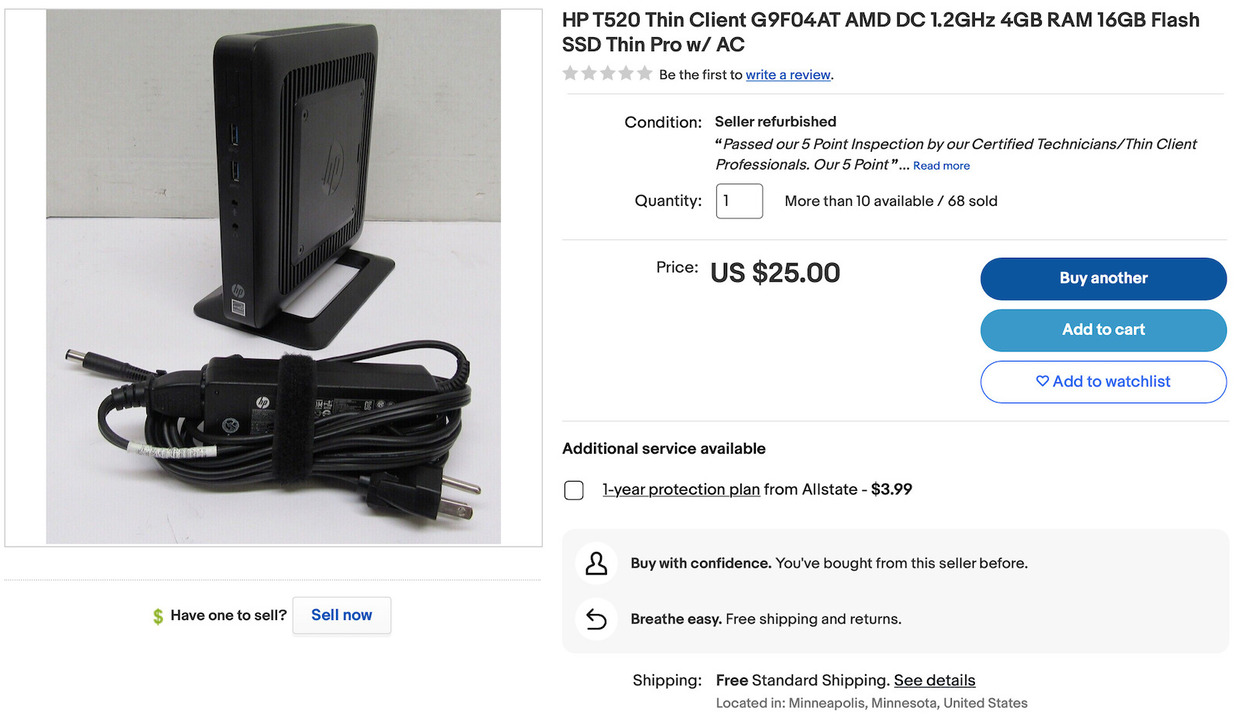
$25 will get you an HP t520 with the following features:
- AMD G-Series GX-212JC with dual-core 1.2GHz CPU and Radeon R2E.
- 4GB of DDR3-1600
- 16GB M.2 SATA SSD
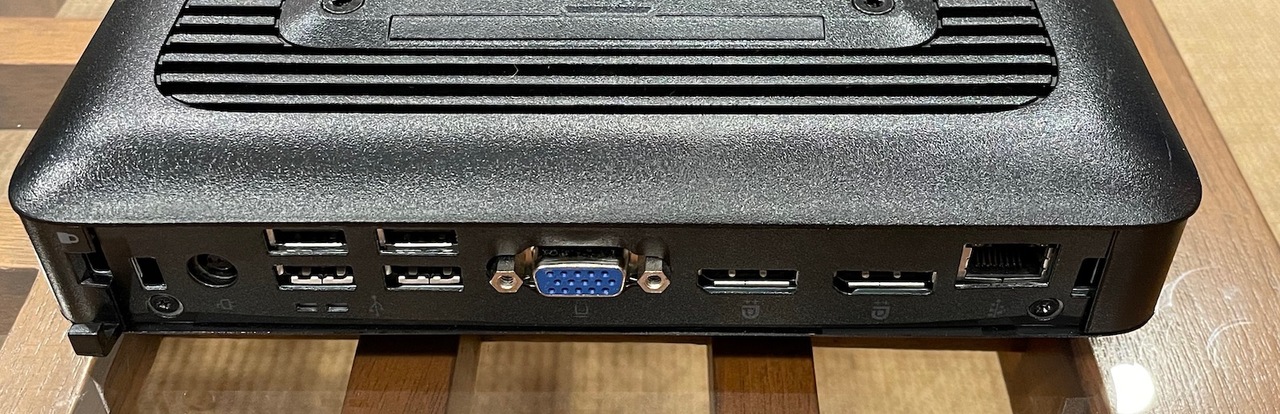
- 1 Gbps Ethernet port
- 2 USB 3.0 ports
- 4 USB 2.0 ports
- 2 DisplayPort outputs
- 1 VGA output
- vertical support stand
- 18.5V power brick + power cable
It doesn’t have wifi, but it will be living in my Internet closet, right next to a router. These is an empty mini PCIe slot that can be used to add wifi if needed.2
Head over to parkytowers.me.uk for more details. It has information for over a hundred thin clients.
Power consumption is something to pay attention to for a device that will always be on. The t520 consumes 6W at idle and 10W otherwise. My electricity rates are $0.56/kWh during peak hours and $0.25/kWh otherwise, for an average of $0.35/kWh. At 6W, this will cost around $19 per year. Other thin clients, like the HP t610, have older chipsets with an idle power of 10W and more. A Raspberry Pi 4 clocks in at around 4W, higher than I expected.
My unit arrived a few days later. It was very well packaged, but despite the seller’s advertised 5 point inspection by their certified technicians, it looked like this:
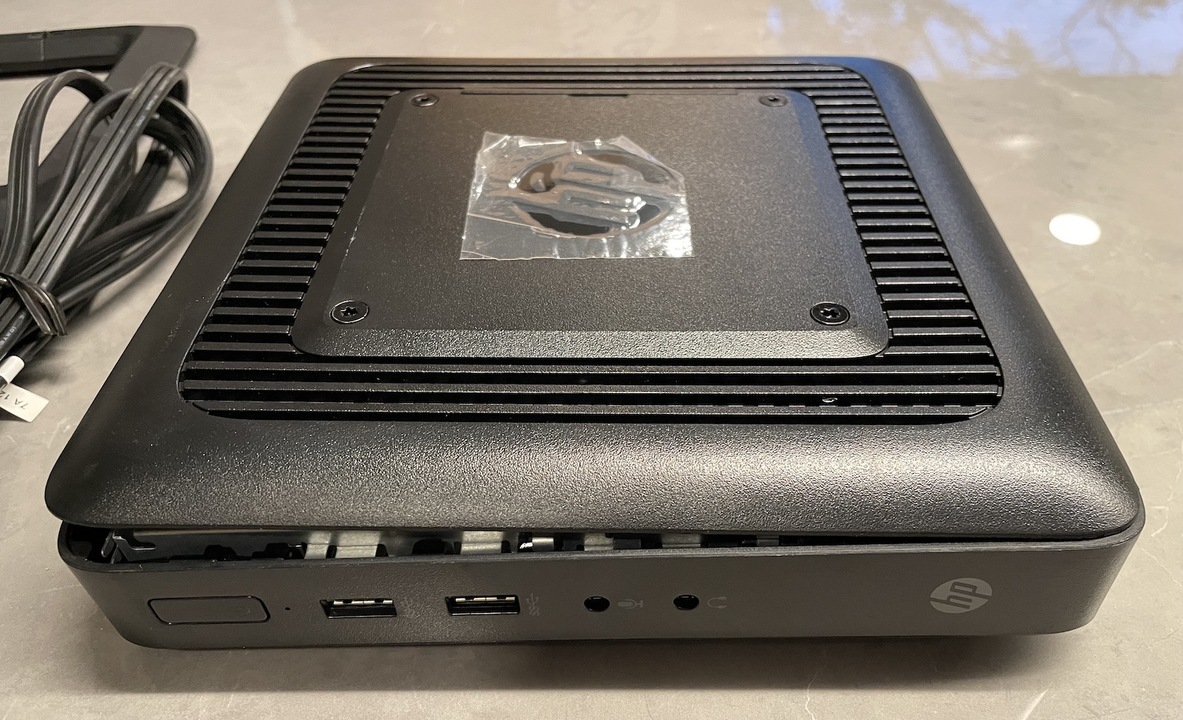
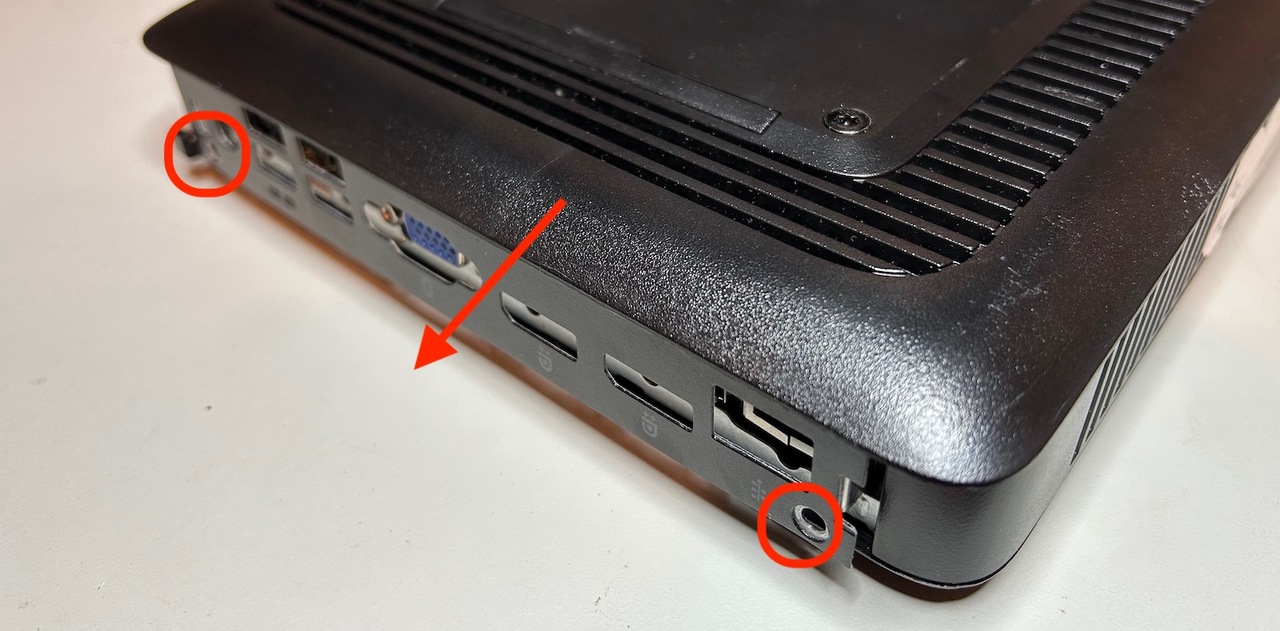
Luckily, fixing this was a matter of sliding off the cover after removing 2 screws, and putting it back together. The thin client booted up fine too.
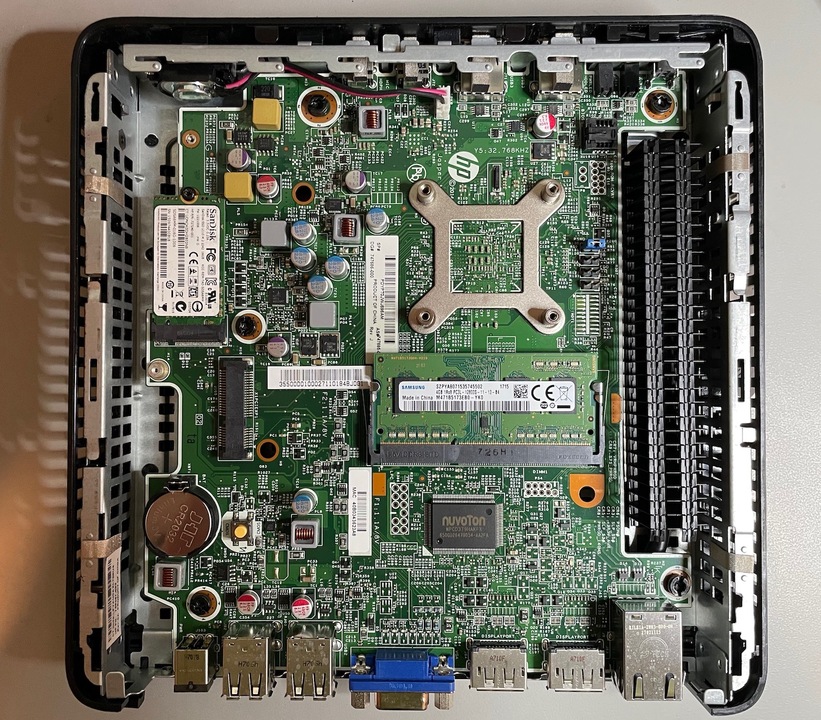
Inside, we can see one PCB with all the components. The DRAM SO-DIMM sits in the center, the M.2 SSD is on the left top. It has a 2242 form factor (22mm wide, 42mm long) but there is retaining screw hole for a 2260 form factor SSD too. 2280 sized SSD sticks don’t fit by default, but you can make it happen if you remove the speaker. We’ll get to that…
By default, the t520 comes with the HP Thin Pro OS, though the seller offers Win7E as well on request.
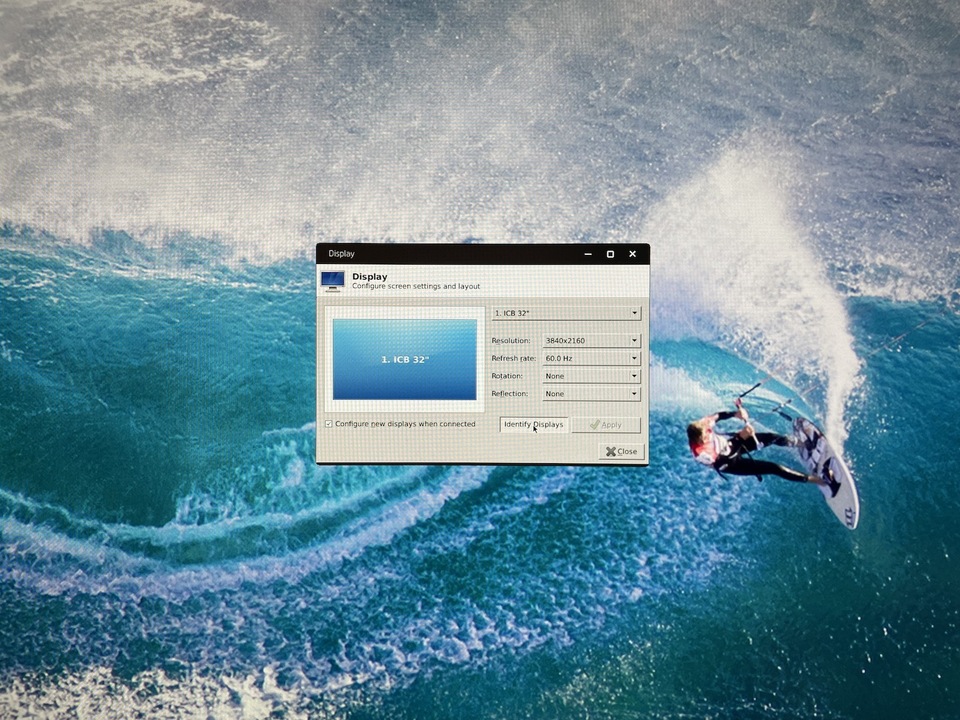
According to ParkyTowers, the t520 supports a maximum resolution of 2560x1600 but it booted up to a 4K 60Hz desktop right from the start:
HP Thin Pro is a customized version of Tiny Core Linux, a Linux distribution that offers a working desktop with just a few hundred MB disk space. HP added Citrix and VMWare clients since that’s what most of their customers will be using it for.
I installed an original version of Tiny Core Linux and tried that as basis for my ThinMachine project, but it was too limited in the number of packages that were offered.
Backup Storage: Internal or External?
Internal storage
Officially, the t520 internal SSD slot supports a maximum capacity of 64GB. That’s obviously way too little for backups, but the t520 specs were written at a time when no M.2 SSD sticks larger than 64GB existed.

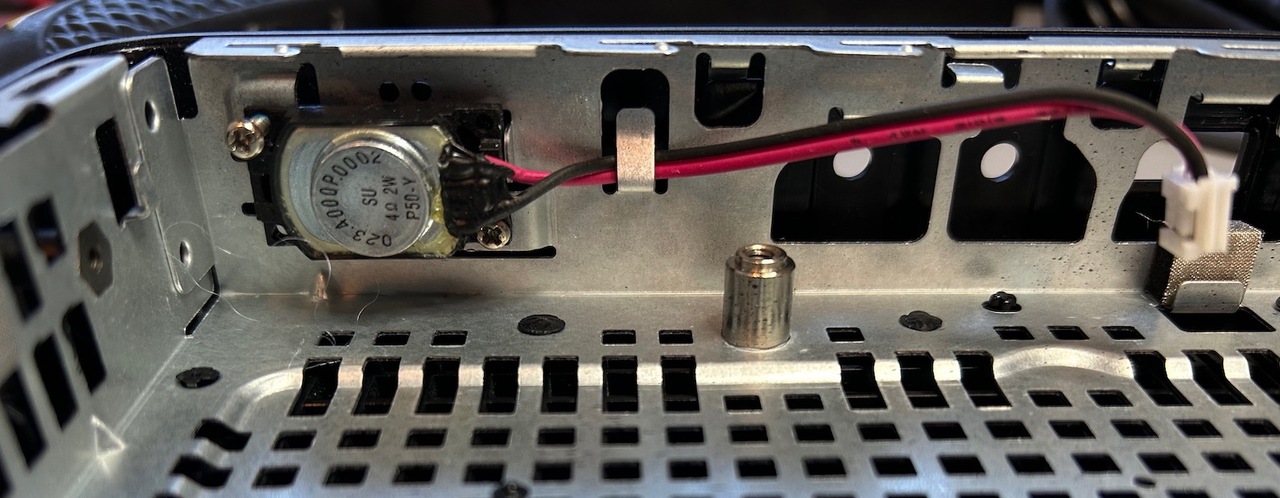
Another limitation is the maximum supported stick size: 2242 and 2260 are supported, 2280 is not: the loudspeaker is in the way, but it is easy to remove: first remove 5 screws to lift the motherboard out of the main enclosure to get access to the 2 small screw that hold the speaker in place.
After removing the speaker, first add tape around the back of the SSD stick to cover some exposed copper pads and traces, then insert the stick into the SSD slot, and then insert the motherboard back to where it needs to be.
Without a retaining screw, it’s possible for the SSD stick to get out of the socket, but I’m not too worried about it.
Finally, the t520 only supports M.2 SSD sticks with a SATA interface. Most large capacity SSD sticks of the NVMe type, which uses the PCIe protocol. Given the right connector on the motherboard, it should not be possible to insert an NVMe stick into a SATA-only slot, but HP chose the wrong connector.
If you insert an NVMe stick into the M.2 SSD slot, chances are that you’ll destroy the SSD, or the motherboard, or both!!!
I wanted at least 2TB of backup storage. I could find only 1 2TB 2260 M.2 SATA SSD on Amazon, for $149. Meanwhile, there are plenty of 2280 variants that start at $69. There are 4TB 2280 SATA versions too, but the price jumps to $260. NVMe version go for as low as $154.
Conclusion: for an internal storage solution, the sweet spot is a 2TB 2280 M.2 SATA SSD stick. I bought the $69 one, installed it, and it works fine.
That brings the total cost of my 2TB ThinMachine to $94.
External storage
Instead of upgrading the internal SSD, one can use an external USB3 drive. This has two major of benefits:
- there are 4TB 2.5” SSDs for as low as $150. Larger capacities are available too.
- you can easily disconnect a drive and put it into secure storage, or attach it to a different PC.
- no need to open up the t520. Everything you need is already there.
The two main disadvantages:
- you need a USB3 enclosure for that 2.5” SSD. Or you pay more an off-the-shelve external SSD. Enclosures go for as low as $10.
- it doesn’t look very tidy.
If you decide on this solution, a 16GB internal SSD is sufficient for a smallish Linux installation, even 8GB should be ok.
It tried this option too. It worked fine just the same.
Install Bodhi Linux
My Linux PC and laptop use Ubuntu. I considered installing just that on the t520, it should totally work, and I even started downloading the latest version from the Ubuntu website, but the 4GB download was just too slow.
In parallel, I looked for Linux distributions that focus on a smaller installation size but that are also still based on Ubuntu. Without too much deliberation, I kind of randomly settled on Bohdi Linux, the Enlightened Linux Distribution. They have a standard and an HWE version. The latter supports more recent hardware in addition to the ones supported by the standard version. The difference between them is only 5MB, 832MB vs 837MB, so I really didn’t see the point in choosing the standard version. The actual download speed was much faster than the Ubuntu website, the ISO image downloaded in a handful of seconds.
Installation should be familiar for most for you:
- find a USB stick that’s at least 1GB
- copy the ISO image to the USB stick with Balena Etcher
- insert the USB stick in the thin client
- power on the thin client and watch it boot an installer from the USB stick
-
follow the instructions and install the Bohdi Linux on t520 SSD
One of the first steps will be to select and optionally partition the drive where everything needs to be installed.
For the internal SSD, I used the following configuration:
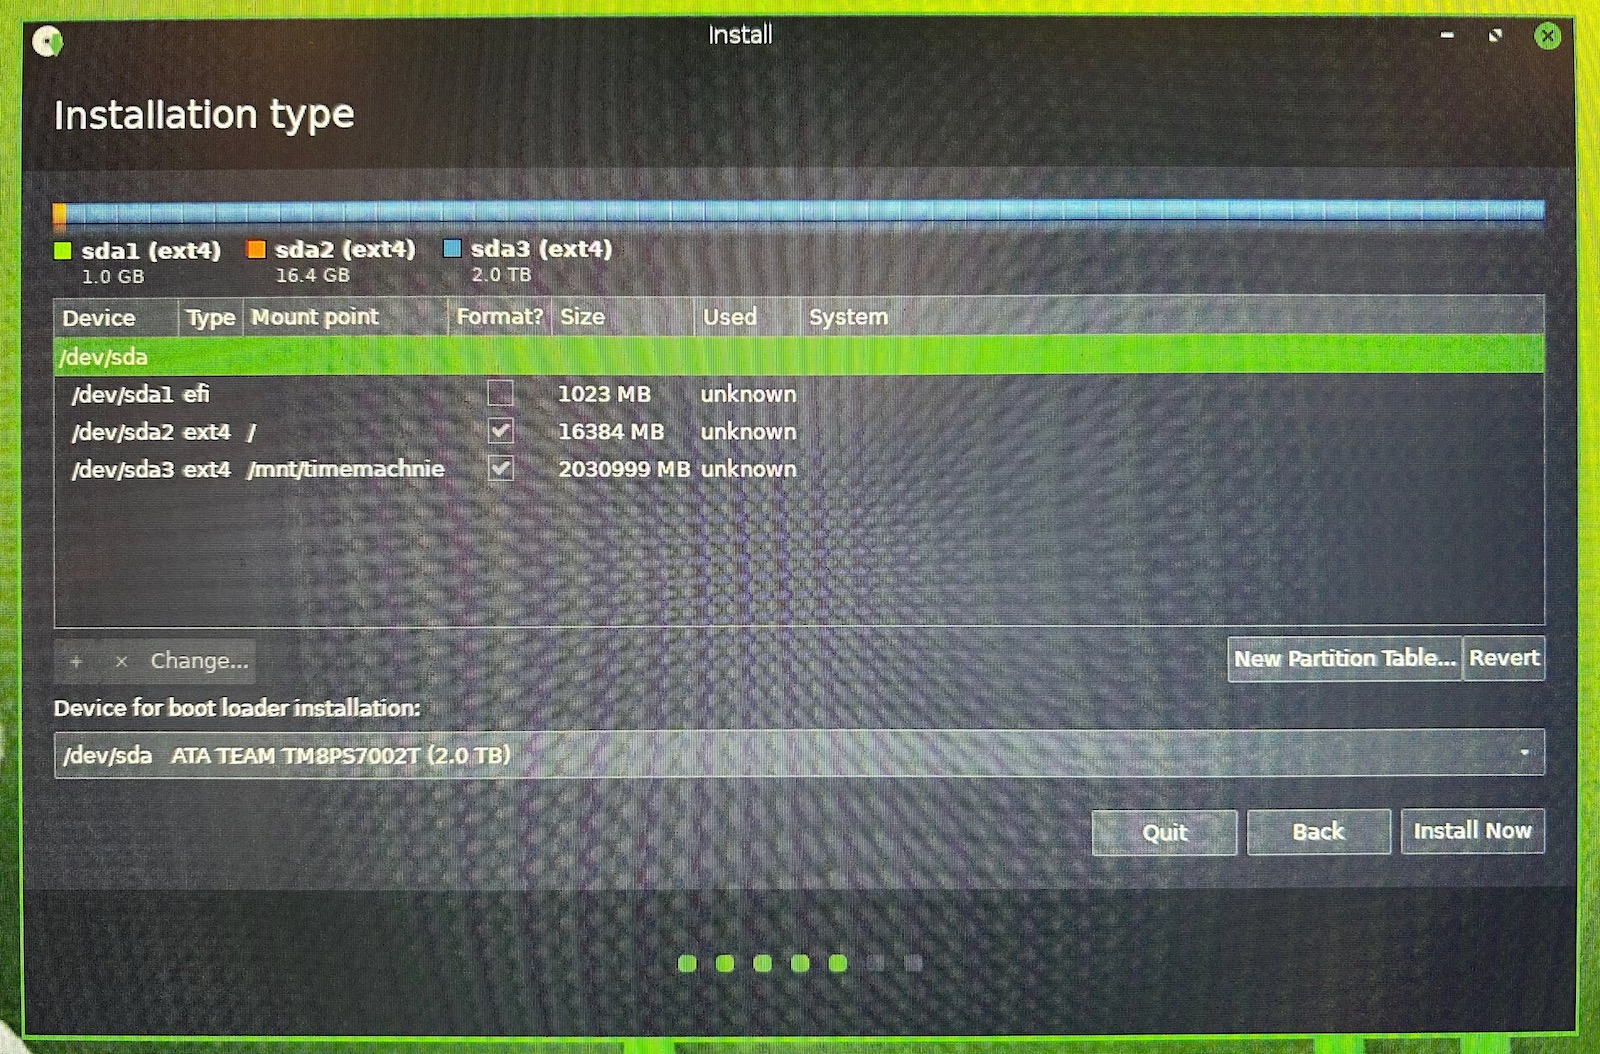 (Click to enlarge)
- /dev/sda1: efi - 1GB - the boot partition. Make sure that this is the first partition.
- /dev/sda2: ext4 - 16GB - This is where Bohdi Linux will be installed.
- /dev/sda3: ext4 - all the rest - This is the backup data partition
/dev/sda2 is mounted to the root
/directory. /dev/sda3 is mounted to the/mnt/timemachinedirectory.The installer will ask for a user name and a computer name. I choose ‘thinmachine’ as computer name so that it will be trivial figure out the machine’s purpose on my home network.
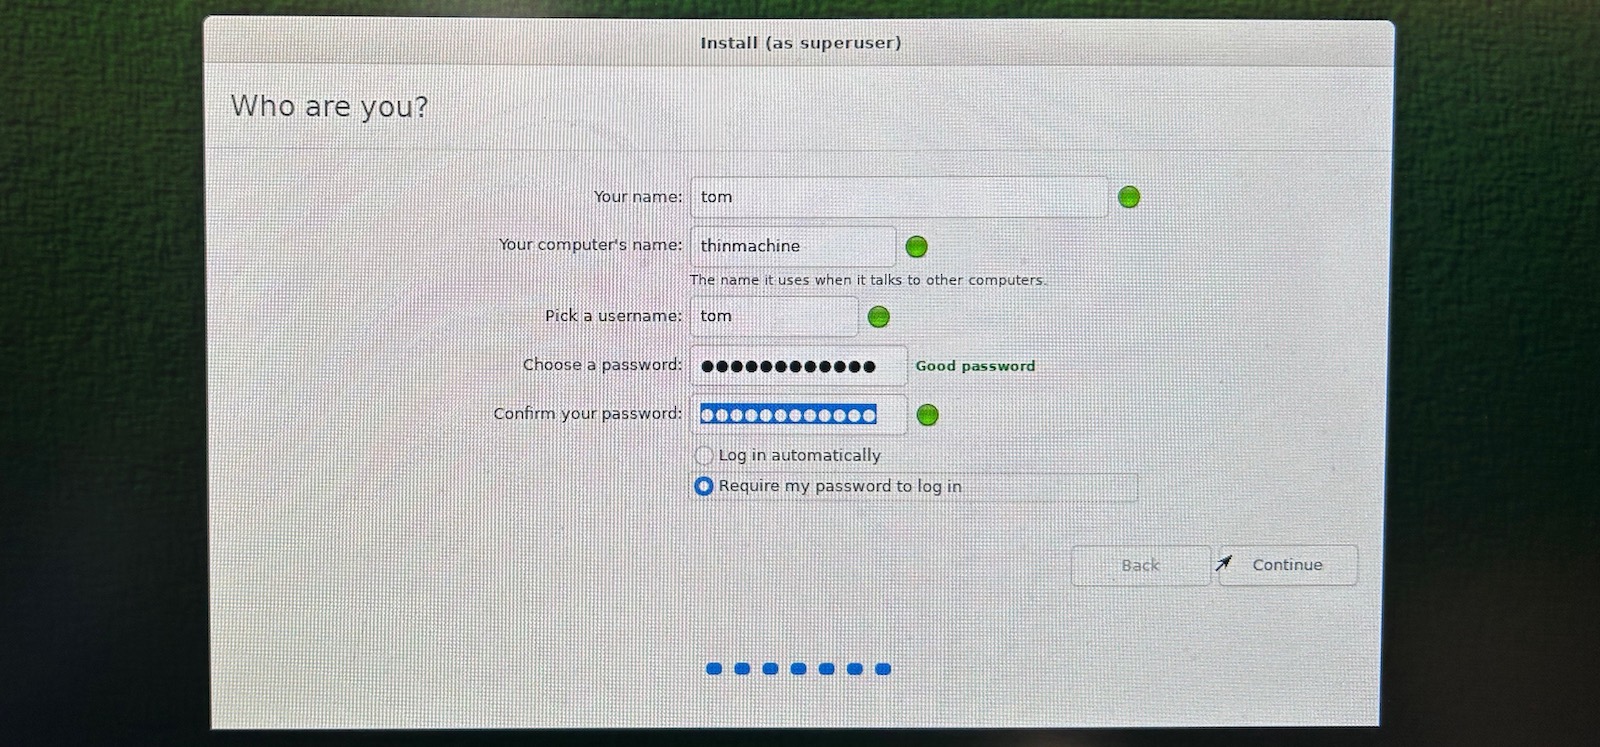 (Click to enlarge)
 - reboot
- watch the thin client boot from the SSD
After installation, Bohdi Linux will take up a bit more than 5GB on the SSD. With 16GB reserved, there’s plenty left for additional tool if you need them.
Update Bohdi Linux and Install a Few Tools
After booting up, log in to the machine with the account that you’ve created and open a terminal window. The default terminal app is called Terminology, it’s available at the bottom left of the screen.
-
Update all packages to the latest version
sudo apt update && sudo apt dist-upgradeThis will take a while.
Unfortunately, you’ll need to babysit the process because you’ll be asked a few questions. I answered the default ‘N’ for all of them.
-
Install packages that are necessary for Time Machine operation
sudo apt install procinfo netatalk avahi-daemonAvahi is the open source version of Apple’s zero-configuration Bonjour networking feature. It’s what will allow your Mac to see the thinmachine server on the network.
Netatalk is an open source implementation of the Apple Filing Protocol. Among other things, it has support for Apple Time Machine.
Create a Dedicated timemachine Account with Access to the Backup Partition
I like to have a dedicated timemachine account. This account does not
have root or sudo priviledges nor does it have its own /home directory.
The user name and associated password that will be created here will be used later when connecting your Mac to this server. The password is not the password that will be used to encrypt your backup data.
-
Create the account
sudo useradd --no-create-home timemachine -
Set a password
sudo passwd timemachineNew password: Retype new password: passwd: password updated successfully -
Give the timemachine account access to the backup partition
sudo chown timemachine:timemachine /mnt/timemachine/
Set up the Time Machine server daemon
I followed the Timemachine backup to a Linux server instructions for this.
-
Edit
/etc/netatalk/afp.confYou can use
vol size limitfield to restrict the amount of disk space that can be used for Time Machine backups. The number is in megabytes, so 1024 is 1GB. In my case, the drive is 100% dedicated to Time Machine use, so I don’t specify a number.A full list of options for the apf.conf file can be found here.
Note that the
hostnamefield in the configuration file below does not have to be the Unix host name that you specified when installing Bohdi. The Unix host name is what you’ll use if you want to log in to the machine over the network, such as when you dossh tom@<hostname>. Thehostnamein theafp.conffile is the name to use to reach the machine over Apple Bonjour network. It will show up as<hostname>.localin the Apple networking tools.I don’t see a good reason to use different name, so
thinmachineit is for both.
;
; Netatalk 3.x configuration file
;

[Global]
hostname = thinmachine

[ThinMachine]
path = /mnt/timemachine
time machine = yes
valid users = timemachine
;vol size limit = 500000
- Start the necessary daemons
sudo systemctl enable avahi-daemon
sudo systemctl start avahi-daemon
sudo systemctl enable netatalk
sudo systemctl start netatalk
- Open the necessary TCP/IP ports on the firewall
sudo ufw allow 548
sudo ufw allow 427
sudo ufw allow 4700
sudo systemctl restart netatalk
Your t520 should now be ready to work as a Time Machine backup server.
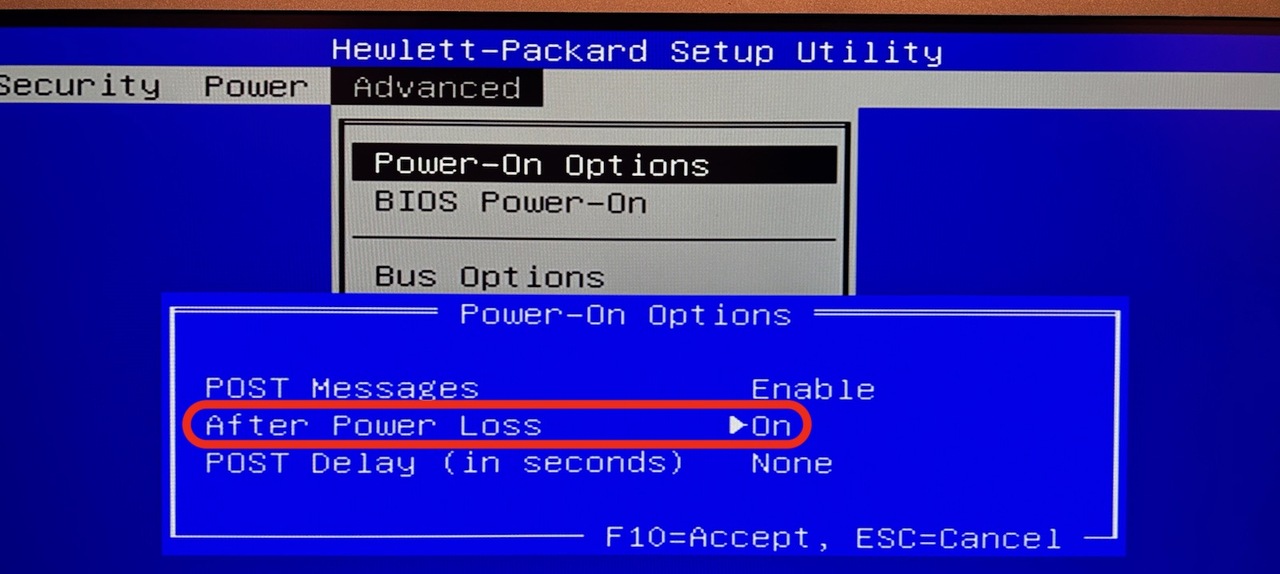
Changing the BIOS ‘After Power Loss’ Option to On
If power goes off, you want to make sure that your backup appliance automatically boots up again when power is restored. There’s an option for that in the t520 BIOS.
- Hit the F10 key a million times during initial boot to enter the BIOS setup utility.
- Go to Advanced -> Power-On Options.
- Set After Power Loss to On.
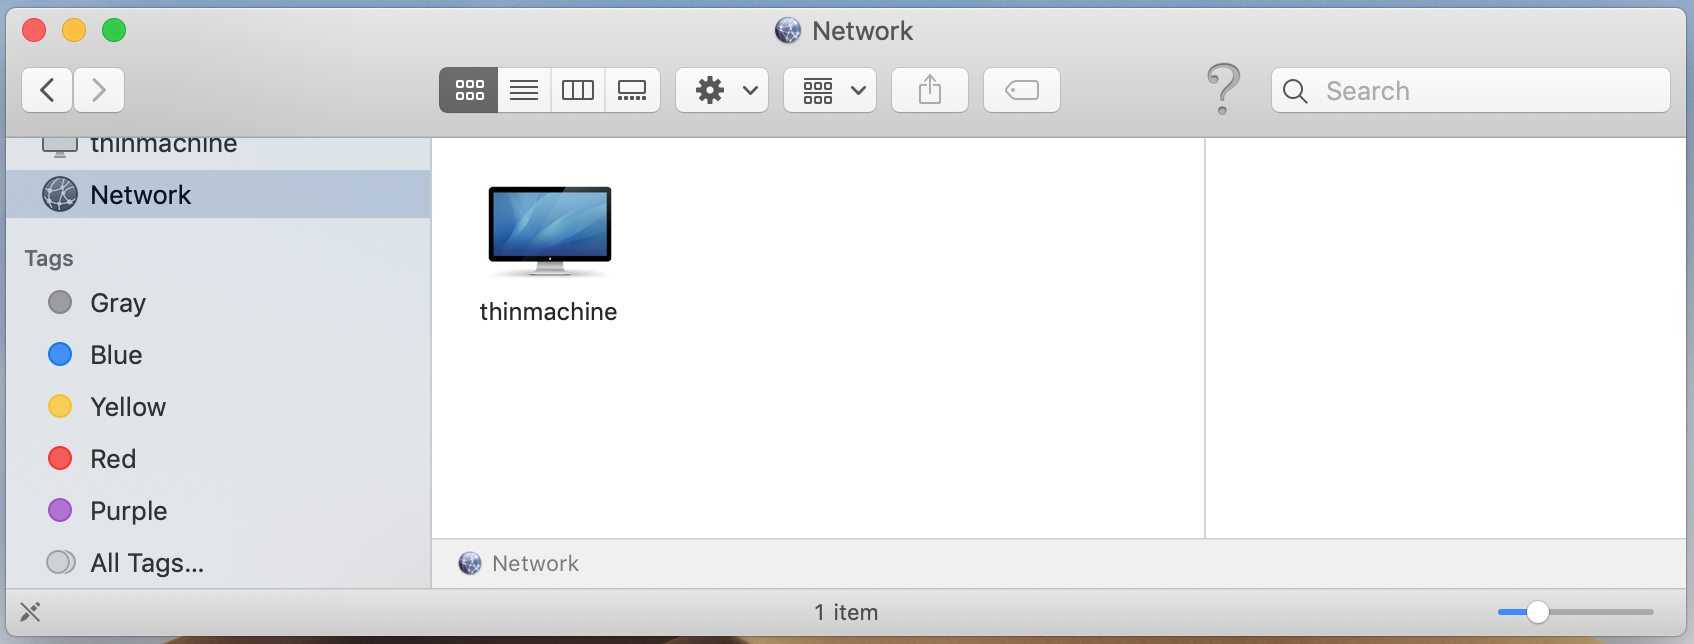
Connect your Mac to ThinMachine
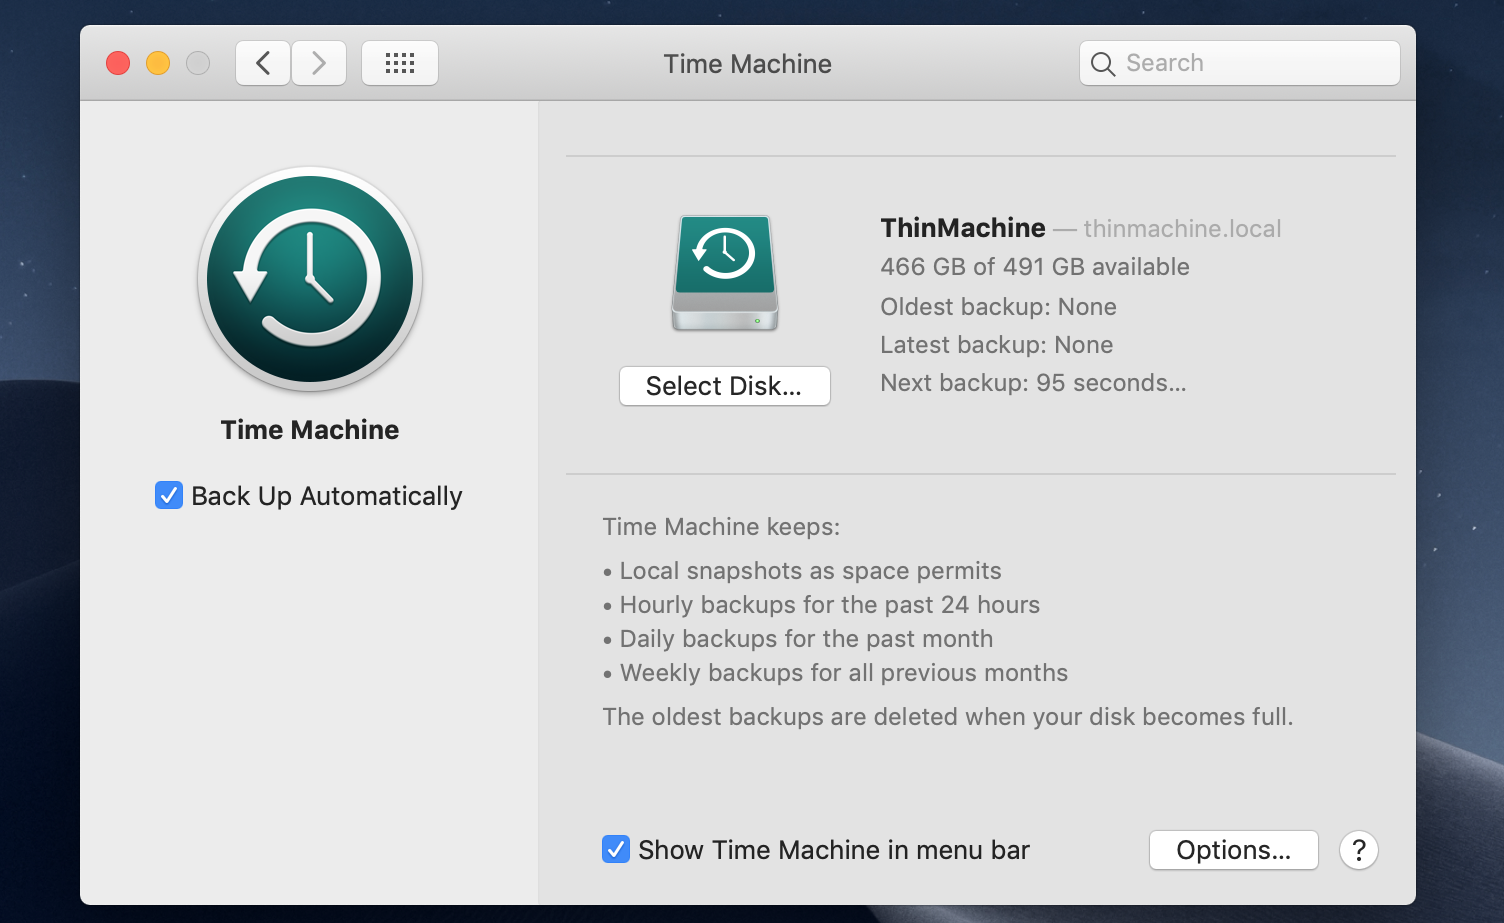
If you did everything right, your thin client should now be ready to do its Time Machine magic.
Select Time Machine in your Mac System Preferences, if it’s not already part of your menu bar, press Select Disk, and watch ThinMachine being available as an option:
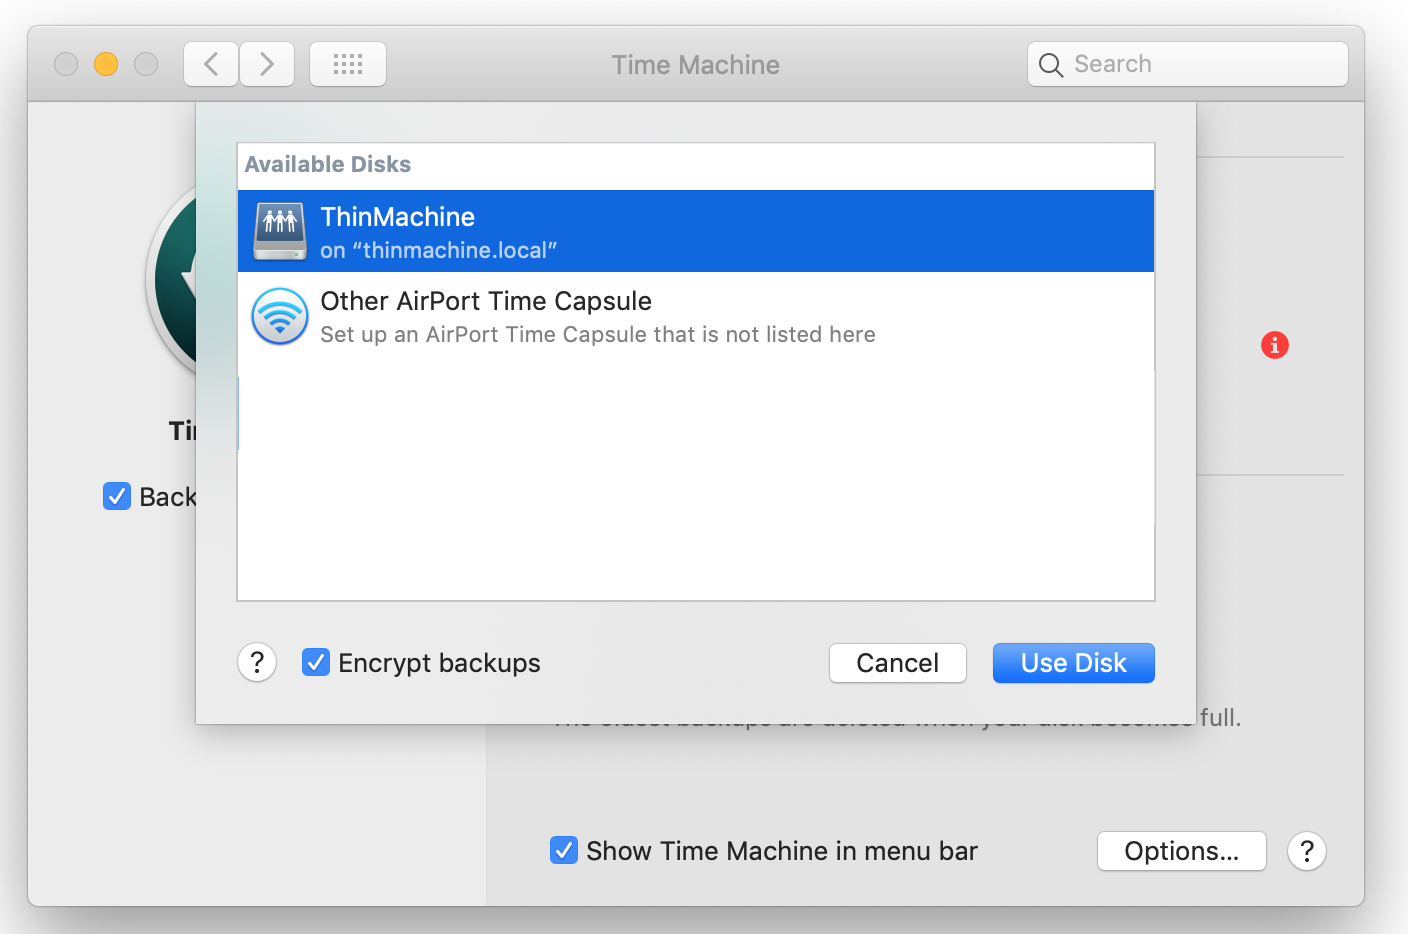
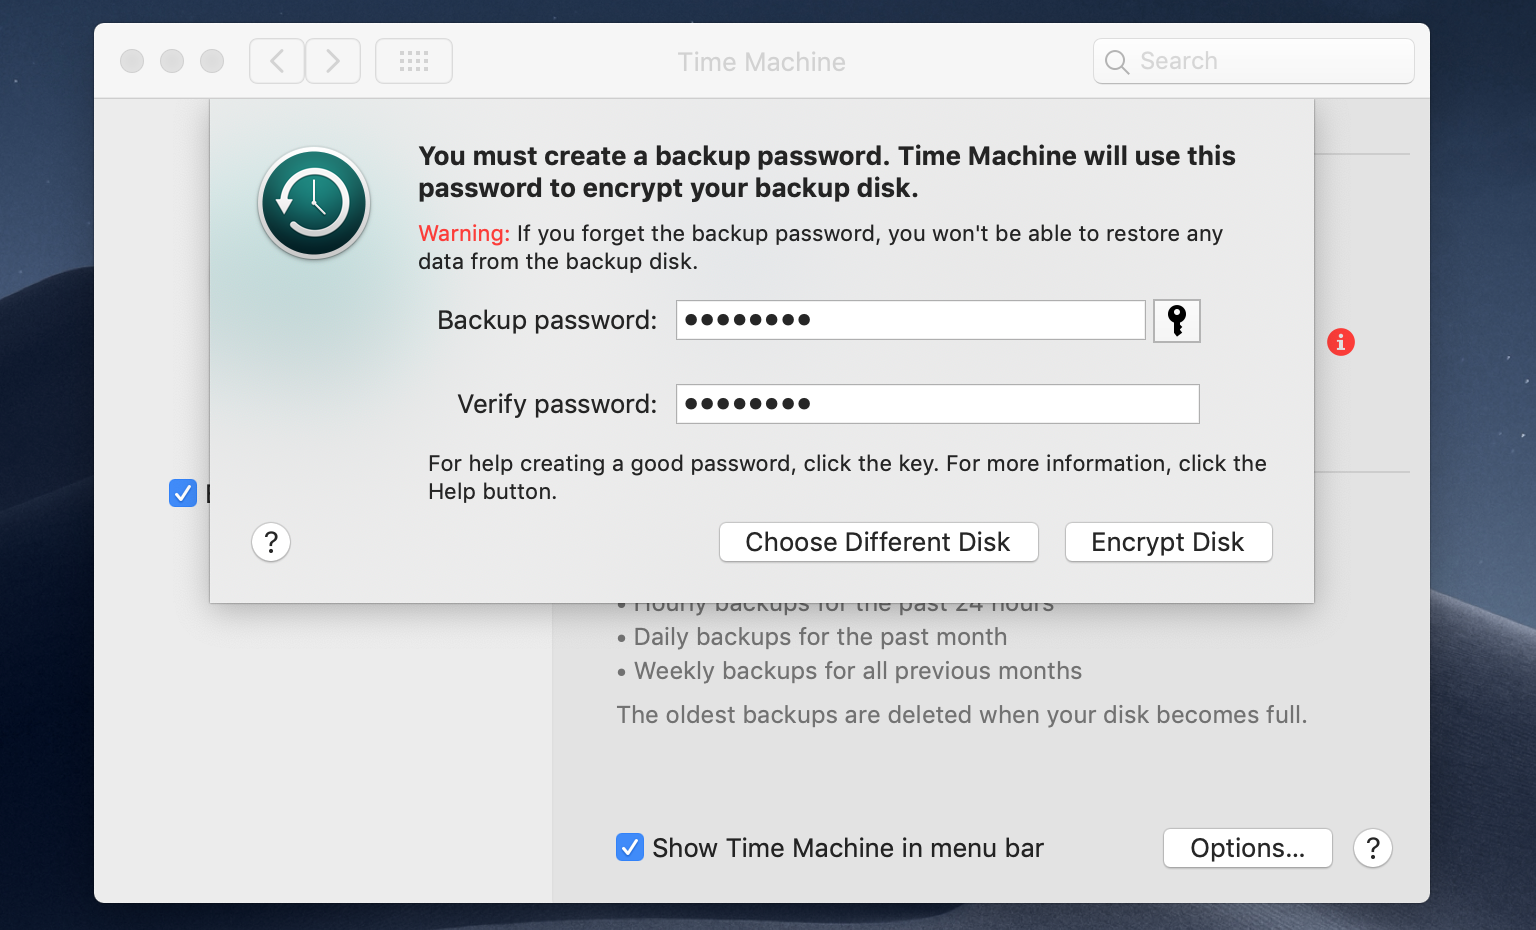
Since my TimeCapsule has been stolen in the past, I want my backup data to be encrypted. It’s the safe thing to do. The actual encryption and decryption happens on your Mac, the thin client is not involved in that part of the backup process. Just make sure you don’t lose the password, because there’s no way to recover your data without it.
And then it’s time to start the first backup session. It will be long, long wait…
Accelerating Time Machine Backups
My MacBook has 460GB of data. Time Machine backups are atomic: a backup either completes or it doesn’t. And when it doesn’t, the backup needs to start all over again.
Initially, backups were ridiculously slow: around 2 Mbits/s, meaning it would take around 21 days to back up the full drive. During that time, you can’t power cycle the server or take your laptop out of your wifi network or you need to start all over again.
I did three things to make the process less painful:
-
Enable the Power Nap features while running the laptop on battery power.
With Power Nap enabled, Time Machine backups continue even when the laptop is closed or running on battery power. With power nap disabled, the backup gets aborted and will restart from scratch when you open it.
You can enable Power Nap for battery in the Energy Saver screen of the System Preferences.
-
Increase the priority of background processes during the first backup.
By default, background processes like Time Machine are throttled. This is good because it saves battery power and it’s fine to do small incremental backups at a leisurely pace. But it doesn’t make sense for the very first backup of the full drive.
You can disable this throttling with the following command:
sudo sysctl debug.lowpri_throttle_enabled=0In my case, it accelerated the backup speed from a 2Mbit/s to 20Mbit/s.
Don’t forget to change the setting back after the initial backup!
sudo sysctl debug.lowpri_throttle_enabled=1 -
Move the laptop closer to an access point.
This should have been obvious in hindsight. Our house has an Eero wifi mesh network, but most of my laptop usage doesn’t require very fast internet. When not in use, the laptop sits on my nightstand, which is not close to one of the access point.
After moving the laptop next to the Eero, the backup speed jumped from 20 to 120Mbit/s.
Changing the priority and moving the laptop reduced the 460GB backup time from 21 days to 8 hours.
Conclusion
A few days in, there isn’t much to say about using this setup: my MacBook has stopped nagging about backups that are too old, and everything is working in the background just like it is supposed to be.
There are some improvements possible: I could add additional drives to use the t520 as a NAS, but that’s not something I have felt a need for ever. It’s also possible to add a second, external, drive to make full copies of the internal drive every so often, in case the internal one fails. But with Backblaze as my off-site backup service, I feel like I already have sufficient redundancy.
I have a long standing desire to clean up the wiring in my internet closet. Maybe one day…